Showing posts with label Roasted. Show all posts

Wednesday, April 6, 2011

Lemon and Garlic Roasted Sardines with Potatoes


After a salmon treat, here's a no less delicious recipe using a much looked down upon fish--the cheap sardine. Yes, sardines! Those cheap little oily fishes are rich in the same omega3 fats that we celebrate the salmon for. And have I mentioned how cheap they are?

A lot of people find them overpowering, but a bit of garlic lemon and fresh herbs will definitely get rid of any "smell", although I find it not so much a problem with fresh fish. I decided to roast the sardines whole, on a bed of potatoes because I like how pretty and impressive they look. I know many people cannot stand the idea of having the fish still staring at you on your dinner plate, but I'm absolutely fine with it. Maybe it's because I grew up in a household where my Chinese mum would often steam a whole fresh fish for dinner. Or maybe I'm just weird.

Lemon and Garlic Roasted Sardines with Potatoes
Ingredients
serves 1-2
2 sardines, whole
1 large baking potato, chopped into large chunks
3 cloves of garlic, smashed but skin on
1 lemon (1/2 cut into wedges, 1/2 reserved)
couple of sprigs of thyme
sea salt, black pepper (to taste, but be generous)
extra virgin olive oil

Method
1. Pre-heat oven to 180 degrees celsius.
2. Parboil the potatoes in salted water for about 5 min, then drain well and give them a good shake to bash them up so you get crispy skins later. Arrange the potatoes in an even layer on a greased oven proof dish, season and drizzle with evoo, and place into the oven to roast for 45 minutes.
3. Meanwhile, remove the gills and insides from the sardines by cutting from just beneath the head down the belly. Wash under running water and rub the sardines all over to remove the blood and scales. Pat dry and season with salt and pepper.
4. 10 min before your potatoes are ready, remove, turn up the heat to 200 degrees celsius.
5. Place the sardines over and scatter the garlic thyme and the lemon wedges around. Squeeze the juice of half a lemon over. Return to oven and roast for 10 more min till the sardines are just cooked. You can also change to broil setting for the last few minutes to get a lightly charred, crispier skin!

sardines before roasting (they look so cute, all wide-eyed and innocent)

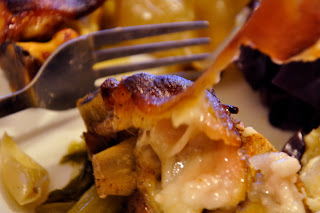
sardines after roasting (I'm sorry, but yum)

The garlic and thyme really give the roasted sardines a mouthwatering aroma, and the lemons help to cut the richness of the sardines, so I can safely assure you there is no more horrible fishy smell. Option: You can also grill sardines whole if you have a barbeque, a fantastic option as the weather starts getting warmer (yay).

By the way, sardines are full of little bones that you can eat and that are actually good for you because they're full of calcium. Usually I have no problems eating the little bones in canned fish, but I find them quite irritating in sardines :( I'll find a way to get all these bones out for my next sardine adventure.

I'm off to Romania for 5 days! My favourite bit about planning for this trip (as with all trips) is the food research hee hee. Romania's supposedly a place that's not yet overflowing with processed food, instead being full of traditional meaty stews and vegetables! approve. anyway, will be back to blogging next week! (:


Saturday, March 12, 2011

Five-spice Roast Poussin with Mandarin Orange and Carrots


So, for my first fusion dish since that very important post, I decided to post a classic british roast chicken, but with lots of chinese flavour influence.

A poussin (pronounced poo-sun, sounds awfully french and posh doesn't it) is a teenage chicken (baby would be a chick wouldn't it??). It costs a bit more than chicken because the meat is much more tender, but my butcher was having a sale due to an oversupply of poussins, 1 pound each. That's cheaper than a chicken leg!

see how small it is!

I never really tried roasting a whole bird before, because it just doesn't make sense for one/two people. I usually roast chicken legs or sometimes chicken breasts, but this time, with a small poussin, I can finally try things like stuffing an entire lemon into the cavity. I want to try the technique of spatchcocking the next time I manage to get my hands on a whole bird!

I did this sometime in January, when mandarins and clementines were everywhere, so I decided to change it to a sweet citrus instead, and being mandarin oranges, I felt compelled to use some chinese spices. To prop up the bird, I roasted it on a bed of carrots, just because I felt very orange ;)

Five-spice Roast Poussin with Mandarin Orange and Carrots
serves 2
Ingredients
1 poussin
2 mandarin oranges/clementines
4-5 small carrots (or 3 large, halved lengthwise)
2 tbsp soy sauce
1 tbsp five-spice powder
1 tbsp Chinese rice wine (hua diao/shaoxing)
few sprigs of thyme
1 tbsp melted butter + a few more dabs
1 tsp sesame oil

Method
1. Preheat oven to 200 degrees celsius.
2. Parboil the carrots for about 5 min, not till it gets soft! At the same time, drop in the mandarin oranges, whole, to make it easier for the juices to release later.
3. Meanwhile, wash the poussin, pat dry and season the inside and outside of the poussin with the soy sauce, five spice powder. Rub the sesame oil and butter over the skin.
4. Poke one of the mandarin orange all over then stuff it with a sprig of thyme into the cavity of the poussin.
5. Arrange the carrots in a single layer on a roasting tray , throw the remaining thyme around, and then place the poussin on top (try to prop the legs up by being strategic with the carrots hehe).
6. Cut the other mandarin orange in half and then squeeze the juices all over the bird and carrots. Sprinkle the tbsp of Chinese rice wine around.


7. Into the oven for about 45 min, till the juices run clear!


8. Let the poussin rest, tented with foil for at least 15 min before cutting into it. I served it halved with the roasting juices spooned over.


Yes, on mashed potato,very un-Chinese I know, but it just felt right against the roast poussin and sweet carrots. I think it would also work out very well if you drop the carrots and then section the chicken, serving it over a bed of noodles and steamed vegetables, with the gravy poured over, kind of like roast duck noodles.


This is the first time I've tasted poussin. You know how if you poke baby skin you get that feeling of slight amazement at the tenderness and smoothness? It's the same with poussin! Poussin has less developed flavour than chicken though, so the five-spice and soy sauce really helps to add a punch. The mandarin orange adds sweetness without the need for sugar or honey, giving the crispy skin a deeper golden hue and the carrots, a yummy sticky glaze. I love seeing so much yellow, orange and brown on a plate, I think they're a few of the most appetising colours to the eye(:

This is part of Weekend Herb Blogging #274 hosted by Winnie from Healthy Green Kitchen.

Sunday, February 27, 2011

Crispy Honey Roast Pork Belly with Onions (Marco Pierre White-adapted)


I'm a nerd when it comes to what I love. I google and research and spend all my free (yes I lie. fine, I confess. even when I'm supposed to be studying.) time on it. It being food. And I have my cooking idols too, and like any fan girl I watch all the cooking shows they do. Everyone knows the usual famous British chefs, and I love them all too, but I recently discovered Marco Pierre White. He's the original British celebrity chef, the youngest chef at his time to be awarded 3 Michelin stars, and our favourite Gordon Ramsay was trained under him. He hwas actually quite hot, albeit 20 years ago. He still has that bad boy charisma and humour to send me gushing to disinterested friends (and sisters) hee hee hee.

Watch him talk about pigs and fat women and then watch the pleasure he takes in cooking, then come tell me I'm being a fangirl. Anyway, that second video practically made me salivate and I knew I had to go roast a pork belly.

There are many different tips out there on getting the perfect roast pork belly with crispy crackling. I'm going to try them all out, not all at a go duh, but definitely a to-do thing, along with testing out the different velveting methods for perfect Chinese stir-fry meat, so keep checking back ;)

For now, I followed Marco Pierre White's recipe, but had to make changes to the roasting times and temperatures, and the glaze because people have commented it's too sweet and really quite unnecessary. i.e. What I really got out of his recipe are his tips for really crispy crackling for a roast pork, like rubbing oil over the scored skin first. A little disappointed in my new favourite chef ):

Crispy Honey Roast Pork Belly with Onions
300g pork belly, skin-on (originally 1 kg, but, I'm not feeding a whole family here.)
generous sprinkling of sea salt, black pepper
clarified butter (or you could use oil. don't use sunflower like he said.)
2 small brown onions, halved, skin-on
2 bay leaves
sage leaves (which I didn't have)
cold water

For the glaze
1 tsp coriander seeds
(2 star anise, which I didn't have)
1 tbsp honey (his recommended amount is really too much)
80 ml of water

Method
1. Pre-heat oven to 160 degrees celsius.
2. Score pork belly skin (my butcher did it for me!). Rub the clarified butter or oil over the pork belly skin.
3. Pour some cold water into a roasting tray, then place the pork belly on a roasting rack over the water. Roast for 2hours at the bottom rack of the oven.
(My crackling didn't become crispy, so I turned the heat up real high to 220 degrees celsius for an extra 20-30 min.)
4. Meanwhile, bring the ingredients for the glaze to a boil and let it simmer and reduce till you get a syrupy consistency.
5. When the pork belly is done, leave it aside to rest in a warm place (It's important to let all roasts rest. It makes all the difference really. This allows the juices to return to the meat. Some chefs even recommend letting it rest for the same amount of time the meat cooks! hmmm.)

6. Over medium high heat, melt some butter and fry the halved onions, cut side down. A few minutes later, add the bay leaves, just to brown slightly, before transferring to an oven for about 25 min.
7. Boil to reduce the tray of water (plus collected porky juices/fat) by about a third, till you get a nice gravy sauce.
7. To serve, glaze the crispy skin with the honey reduction. Cut the pork belly into thick generous slices, arrange the roasted onions around it, and drizzle the meat juice gravy over.

Such a rich roast would go really well this a sharp and sweet Braised Red Cabbage with Apples, and if you don't want to do the honey glaze plus gravy, I think a Celeriac and Mustard Sauce would be brilliant too.


Crispy skin, juicy meat, with the flavour and richness of the fat running through the pork, and then that caramel sweetness of the onions and honey! Come share my joy and salivate together!

Crack

Cut

Crunch

Wednesday, February 16, 2011

Curried Roast Chicken Leg with Spicy Sweet Potato Chips


I love curry, I cook curry a lot, I eat curry a lot, I hope my sister marries an Indian one day. I don't know why I've not been posting more curries. This is still not a curry, but those wonderful aromatic spices and flavours help to add the much-needed kick to a standard roast chicken (leg) recipe. Together with sweet salty spicy sweet potato chips it's a really easy roast dinner. (When I came to the UK, I learnt that chips aren't the thin wafers in a can of Pringles. Those are crisps. A chip is a fatter fry/ skinnier wedge. Well, at least according to the British).

Curried Roast Chicken Leg with Spicy Sweet Potato Chips
Serves 1
Ingredients
1 chicken leg, skin-on, bone-on
1 medium sweet potato, scrubbed clean and cut into fat sticks
1 large banana shallot, halved, not peeled (you can use a normal shallot. or even a small onion.)
2 cloves garlic, smashed, not peeled
1/ 2 tsp coriander
1/4 tsp cumin
1/4 tsp turmeric
1/4 tsp cinnamon
sea salt, chilli powder (to taste, about 1/2 tsp)
1 tbsp melted coconut oil + 1 tsp butter (you can replace the oil with evoo, or unrefined palm oil)

Method
1. Pre-heat oven to 200 degrees celsius.
2. Make the spice paste/marinade/rub.
For the chicken: cumin, turmeric, and half of the coriander, chilli powder, salt and coconut oil.
For the sweet potato: cinnamon, half the coriander, salt and chilli powder, salt and coconut oil.
Rub the spice paste all over the chicken and sweet potato, lifting up the chicken skin a bit to rub some onto the flesh too.
3. In the middle of a roasting tray, place the halved shallot cut side down, and the chicken leg on top of it. Scatter the sweet potato and garlic around the chicken, be careful not to overlap!
4. Put into the oven and roast for about 45 min, or until the chicken skin is brown and crisp, and the chips are tender on the inside and crispy on the outside.

Cucumber and Mint Raita (optional, but just do it.)
serves 4 (save the extra or quarter the recipe)
Ingredients
250 ml plain whole yogurt
1/2 cucumber, peeled and chopped very finely
handful of mint leaves, chopped very finely
pinch of cumin powder
pinch of salt

Method
1. Sprinkle salt over the cucumber and then leave to sit and drain and squeeze out all the water from the cucumber.
2. Mix all ingredients together.

Finally, garnish the dish with fresh coriander, and serve with a dollop of cucumber and mint raita.


This chicken is just oozing with juicy spicy savouriness, and the shallots and sweet potatoes are bursting with sweetness, all balanced by the refreshing yogurt and cucumber. Yay now go wiggle your head bollywood-style.

This is part of Seasonal Sunday.

Monday, February 14, 2011

Whole Mackerel on Balsamic and Thyme-Roasted Beetroot, with Sauteed Beet Leaves


Here's my last beetroot recipe for the Valentine's day line-up, this time a main course, not just a starter or side. This is a true celebration of the whole beet! Did you know it's not only the beetroot you can eat? You can eat the beet leaves too, it's actually related to the chard, which I love. Also, I want to take this opportunity to show you how you can work with more than just salmon fillets, but the whole fish. Mackerel is a wonderful oily fish that's rich in the same omega 3 fatty acids as salmon, and tastes amazing, but for a fraction of the price of salmon.

Whole Mackerel on Balsamic and Thyme Roasted Beetroot
serves 2
Ingredients
2 small/medium-sized mackerels, gutted but leave the heads and tails intact. (Nothing's wrong with your eyes, I only used 1 mackerel, because it was just for me)
2 small beetroots, peeled and chopped into large chunks (actually on second thought, if you slice it into nice circles, you can do a more classy presentation!)
1 tbsp balsamic vinegar
4-5 sprigs of fresh thyme
2 tbsp extra virgin olive oil
sea salt, black pepper

Method
1. Pre-heat oven to 200 degrees celsius.
2. Toss the chopped beetroot with the balsamic vinegar, 1 tbsp of evoo and 1 tbsp of thyme leaves. Roast for 20-25 minutes, till beetroot caramelises on the surface, but the inside is not totally soft.

3. Season the mackerels well with sea salt and pepper (esp the cavity), and tuck 1 sprig of thyme into the cavity of each mackerel.
4. Place the mackerel on top of the beetroot, and return to the oven for another 20 minutes, till the flesh is opaque, and the skin gets crispy. (You can turn the heat up, and change to "broil" for the last 5 min to get that charred effect if you want!)

5. Pour a tiny bit hot water just to deglaze the roasting dish and get the caramalised balsamic-beetroot juices off.

Simple Beet Leaves Saute
This is done in the same way as my Two-Kale Stir-fry, which is the no-fuss method I use on most greens when I just want a simple side.
Ingredients
Bunch of beet leaves from the 2 beets
2 cloves garlic
1/2 small onion
2 tsp of extra virgin olive oil
1 tsp butter
a little balsamic vinegar (instead of lemon, so the whole dish is more harmonious)
sea salt, pepper (to taste)

Method
1. Remove the stalks from the beet leaves. These are harder and take longer to cook.
2. Melt butter with the 11/2 tsp of evoo over medium-high heat, in a large frying pan.
3. Fry the garlic and onion till golden/translucent, not browned.
4. Add the beet stalks first, turn up the heat, then add a splash of water (which quickly turns to steam) and the salt and pepper. 2-3 min later, add the beet leaves.
5. After the beet leaves have wilted and all the liquid is absorbed, remove from heat, add the extra tsp of evoo, and balsamic vinegar. Mix well and serve!


Serve the sauteed beet leaves with the roast mackerel and beetroot, drizzling the beet/balsamic roasting juices over, and sprinkling a few fresh thyme (leaves only) over. A fish cooked whole has has a more moist, flaky flesh, and it looks so impressive on the plate, don't you think? Or maybe it's just me. If you're worried about the head scaring your date off, you could always behead the fish I guess.

This entry is part of Tuesday Twister and Real Food Wednesday.

Wednesday, February 2, 2011

Roasted Leek and Potato Soup


Like I said earlier, it's time to eat lots of leeks! This is not a Chinese recipe of course, (but still auspicious!), and very yummy, perfect this season. Leek and potato soup is a classic combination, but to give it a lot more oomph, I roasted the leeks first to get all those caramelised leekiness. Along with 2 secret ingredients, it's not just a leek and potato soup.It's an extra baking tray to wash, but so worth it I promise you!

Roasted Leek and Potato Soup
serves 3-4
Ingredients
1 large leek, white and light green parts only, cleaned and chopped into about 5cm large pieces
1 med floury potato, peeled and chopped
1 med onion, chopped finely
4 cloves garlic, peeled
2 cups homemade vegetable or chicken stock
1/2 cup milk
1 tbsp+1tsp extra virgin olive oil
1 tsp butter
1 heaped tsp dijon mustard
sea salt, black pepper (to taste. I used around 1 tsp of salt)

To serve
extra drizzle of extra virgin olive oil
snipped chives

Method
1. Pre-heat the oven to 180 degrees celsius.
2. Prepare the leeks by trimming the ends and root, slice lengthwise then run water through to wash off the soil in between the leaves. Then chop into about 5cm large pieces.
3. Arrange chopped leeks and garlic on a baking tray, tossing all with 1 tbsp of olive oil. Roast for 30-45 min till the leeks turn slightly brown.
4. Meanwhile, sweat the onions in 1tsp each of olive oil and butter, till translucent and slightly golden.
5. Add the potatoes and the stock, bring to the boil and simmer for 20 min.
6. Remove the roasted leeks and garlic and add to the pot, scraping all the caramelised yumminess in too (you can use some hot water or liquid from the pot to help deglaze the tray). Simmer for another 10 min.


7. Add the milk and remove from heat. Using a blender, puree the soup, adding more hot water or stock if necessary, till you get a smooth creamy consistency.


A creamy silky soup just bursting with the flavour of caramelised leeks, with just that hint of roasted garlic and dijon mustard<-- my secret ingredients.

Sunday, January 23, 2011

Garlic Roasted Brussel Sprouts


Of all vegetables, this has got to be the one with the worst rep. People turn up their noses whenever they hear its name, but I'm nuts, I absolutely love brussel sprouts. I like cabbage (ok that just totally confirms my position as a nut) and brussel sprouts are like mini-cabbages that I can pop into my mouth like grapes.

The important thing is not to overcook them, and they're actually really sweet and not pungent at all. I enjoy them very simply steamed with melted butter over. But for those who are not that easily won over, here's a recipe for roasted brussel sprouts that may convert you:

Garlic Roasted Brussel Sprouts
serves 2-3, or 1 veggie lovers
Ingredients
1/2 bag (250g) brussel sprouts
2 cloves of garlic
1 tbsp extra virgin olive oil
sea salt, black pepper (to taste, but be generous)

Method
1. Pre-heat oven to 200 degrees celsius.
2. Wash and trim brussel sprouts and cut into halves (leave the tiny ones whole). Smash the garlic, with their skins on. Toss all with the salt, pepper and olive oil. I like to rub the garlic into the sprouts a bit also.

3. Spread on a baking tray (cut side up, don't overlap) and roast for 35 to 45 min, shaking every 10 min or so ensure they brown evenly and don't burn. When done, they're brown and crispy outside and tender and savoury inside!

Yum yum yum.

Tuesday, January 4, 2011

German-inspired Roasted Pork Trotters


About 2 weeks ago, my friend and I went to Berlin for the authentic German Christmas market experience. It was a crazy idea seriously, considering we were already freezing in London (we traveled smack in the middle of the cold spell). My toes turned black from the cold on the first day, not kidding, and by the last day, I was wearing all the clothes I brought so my carry-on was conveniently light. But it was great fun! One sip of a mug of hot Bailey's and one (ok much more than one) bite of sizzling bratwurst are all we needed to make us forget about the cold. And then that massive German pork knuckle at Augustiner. We ate so much pork there I was convinced I had enough pork to last me the rest of the year.

But it's 2011! (yes I knew that when I said "rest of the year") So I started to think about the pork knuckle again. It's that power combination of crispy outside and soft and gelatinous inside, the fat/collagen (I don't know which I was eating after a while) and tender meat underneath that crack!-ling. So I googled recipes and decided to try this very basic Shweinshaxe recipe out.

Then at the butcher's, I stupidly got pork trotters instead. Ahhh :( Knuckles are above the trotters, which are the actual feet?hooves? of the pig, so there's a lot more meat. Trotter= Knuckle - meat= Skin+gelatin+fat. BUT who says I must give up all hope? I went for it anyway, not knowing how it'll turn out! I slow-cooked the pieces of trotter with soup vegetables first, then once I got them soft and tender, I chucked them into the oven at a very very high temperature for 40 minutes to crisp up the skin.

UPDATE: Doesn't turn out crackling this way... ):

German-inspired Roasted Pork Trotters
Ingredients
1 pork knuckle, chopped into large chunks
1 large onion
1 carrot
1 celery stick
1 leek
salt, black peppercorns
pinch of cumin
beer/stock/water
1 tbsp of oil, preferably lard
1 tbsp of butter
pinch of cumin (or if you have caraway seeds, a tsp of that would be better!)
pinch of sugar

Method
1. Boil the pork knuckle in rapidly boiling water for 10 min or so first to clean it. You'll see alot of disgusting scum floating to the top of the water. Drain and discard the water.

Pork trotter, after the boiling/cleaning process. Piece the puzzle? ;)
2. Chop vegetables and combine with pork totters, salt and black peppercorns in a large pot filled with just enough beer/water (I used water/stock, but I wished I had beer)to cover. Bring to boil and simmer gently for 3h or so until tender.
3. Preheat oven to 220 degrees celsius. (HOT.)
4. Oil the base of a roasting tray, then arrange the pork trotter pieces on the tray, skin side up. Try to make sure there's no overlapping so all the skin will get exposed to the heat! Arrange the vegetables around the trotter pieces. Moisten everything with a ladle or so of the cooking liquid. I dotted the trotters and vegetable with a bit of butter, and sprinkled a pinch of salt, black pepper, cumin and sugar (just in case;) too.
5. Bake for 30-40 min, moistening frequently with more cooking liquid.
6. Traditionally served with sauerkraut, red cabbage, potato dumplings and a huge dollop of mustard. I served mine with Mustard-mashed Potatoes, and Braised Red Cabbage with Apples.

Verdict: You know when you eat a pork knuckle and you get bits (ok chunks) where you have to abandon your knife and just bite and puuulllll to rip the skin? That's what you get all the time while eating it! It made it a lot of fun to eat. I ended up eating twice the amount in the photo, but eh, it's mostly bones ;) and since it's an uncommon and unpopular cut, it was so cheap too! But it's NOT crackling. I've learnt that crackling has to be made with skin that's very dry, hence you don't slow cook a pork belly then chuck into the oven. This was more like pork-gnawing not pork-crackling, mouth-action/sound effect wise.

Here's some food porn:
I humbly admit it doesn't match up to that impressive pork knuckle we had in Berlin. I still want my pork knuckle! I promise I will revisit this, stay tuned.

Saturday, December 25, 2010

Moroccan Quinoa Stuffed Chicken Breast wrapped in Bacon


'Tis the jolly season, but for me, it's when I start missing home and my family. We don't traditionally celebrate Christmas anyway (but wait till Chinese New Year. that's when we go all out with the festive goodies!), but my sister's born on the 25th December, lucky her, so we still have some kind of a family celebration in the form of food. What else is miserable about Christmas is I haven't got a whole party of people at your house, so I don't have an excuse to buy a whole turkey to stuff and roast. Then again, I'm a secret introvert, so I was perfectly contented stuffing a chicken breast instead.

Although I say Moroccan, I've got cured pork, roast bird, cinnamon, ginger, nuts and sweet dried fruit... Merry Christmas!

Moroccan Quinoa Stuffed Chicken Breast wrapped in Bacon
Ingredients
serves 2
2 chicken breasts, skinless
4 slices of bacon (or if you've got deeper pockets, try parma ham or pancetta)
pinch of salt, black pepper
extra virgin olive oil

For the stuffing
2/3 cup cooked quinoa
1 tbsp raisins
1 tbsp chopped dates
1 tbsp chopped toasted almonds
pinch each of cinnamon, cumin, turmeric, ginger
zest of 1/2 a lemon
1 egg yolk

For the dressing
Equal amounts of
extra virgin olive oil
balsamic vinegar
(a white sauce would be nice usually, but not with the Moroccan-style stuffing; balsamic vinegar adds a bit of sharpness to the dish. plus sweetness. plus it's easier haha)

Method
1. Preheat the oven to 180 degrees celsius.
2. Mix the stuffing ingredients together and set aside.
3. Lay the chicken breasts flat on the chopping board, and then cut a slit across the chicken breast through the centre, but don't cut through fully, so you can open it up (i.e. butterfly).
4. Place clingfilm over and pound so you get them flatter and.. wider. It looks like an open book now.
5. Flip over, so now the chicken breasts are on top of the clingfilm. Season both sides with salt and pepper.
6. Place half the stuffing on one side of the "book" for each chicken breast. Roll the other half of the "book" over so you kind of get a..swiss roll/ wrap?

7. (opt) Chill in the fridge for half hour or even longer to firm up.
8. Remove clingfilm, and wrap 2 slices of bacon around each chicken breast. The bacon helps to hold it in place also.

9. Put into the oven and bake for about 40 min, or till juices run clear.
10. Leave to rest for a while, before cutting up into pretty circles or you can also leave it as it is. Drizzle some evoo and balsamic vinegar over, and garnish with parsley.


The bacon is a must! It helps the lean chicken breast meat stay juicy, and flavour-wise, it adds all the right contrasts. Salty bacon v.s. sweet raisins and spiced quinoa. Crispy bacon and cunchy almonds v.s. tender chicken. Ho ho ho!


Wednesday, December 15, 2010

Spinach and Mushroom Stuffed Chicken Breast


I don't usually have chicken breasts, because they just cost so much! The legs and drums cost 1/3 the price of breasts, and honestly, they do pack more flavour. But since I recently cut up a whole chicken, I have chicken breasts to work with. The tricky bit about roasting chicken breast is it can end up very dry and bland because it's so lean. So you should try to keep the meat moist and the skin on, or another trick would be to wrap it in something fatty, like this Moroccan Couscous Stuffed Chicken Breast wrapped in Bacon.

Spinach and Mushroom Stuffed Chicken Breast
Ingredients
1 chicken breast, with skin
pinch of salt, black pepper
a bit of parmesan
olive oil, butter

For the stuffing,
2 tbsp grated parmesan
handful of spinach leaves, chopped roughly
2 button or chestnut mushrooms, chopped small
1 tsp garlic powder
pinch of nutmeg

Method
1. Preheat oven at 180 degrees celsius.
1. Saute spinach and mushrooms with a small knob of butter and a pinch of salt, pepper and nutmeg, for abut 1 min (they will get more cooking in the oven later). Drain, because you don't want all the liquid to make the stuffing too runny, but reserve the liquid (don't waste the flavourful butter/juices!).
2. Mix all the stuffing ingredients together.
3. Carefully lift up the skin of the chicken and push the stuffing in between the skin and the breast. The skin will stretch, so you can stuff more than you expect, but don't be too greedy!

4. Place stuffed chicken breast into a greased baking dish, skin side up. Pour the reserved cooking liquid over the breast
5. Season with salt and pepper, sprinkle the top with a bit of parmesan, and dot with some butter/olive oil.
5. Put into oven for 45 min, or until the skin is golden and crispy.
6. After removing from oven, let it rest slightly before cutting into it and adding some parsley if you want!


Crispy skin and melty inside always works(: I like it when there's something special hidden in your food, like in stuffed pastas or dumplings.