Wednesday, August 25, 2010

My Kitchen Must-haves!

Everyone has things in their kitchen that they gravitate towards using. A certain bowl, a special spoon perhaps. For me, it is my Pampered Chef knives that I have purchased over the past several months through a friend of mine who sells it. I linked her personal business site so you can look at all the wonderful things Pampered Chef has to offer for kitchen gadgets.


Here they are. Since I like the color green, and that is the main color in my kitchen, these go right along with that! They are the sharpest knives I have ever used. After I purchased the first one, I sliced some potatoes with it and the knife went through like they were butter, amazing!! The bread knife is great for all those lovely crusty specialty breads that are tough to cut through sometimes!

The close number two item that I love, is the cutting board that they are sitting on. I received it as a wedding gift and I have used it almost constantly ever since then! I love the lower edges on it so that it catches all the run-off juices of fruit so that it doesn't spill all over the counter.

What is your favorite kitchen item or gadget in your kitchen? Sound off and happy healthy cooking!

Heather

CSN Store Giveaway @ Cress Life


Jessica, my cousin in-law's wife, is giving away a $40 gift certificate to CSN Store at her blog, Cress life. Be sure to head over to her blog, to read the entry rules and good luck!


Heather

I've changed my mind...


I've got a new color on my hair and today, I curled it... do you like it?

Kelas Tataboga - Belajar Membuat Masakan Amerika yang Bercitarasa Tinggi

Kegiatan memasak memang menjadi kegiatan yang cukup menyenangkan bagi hampir setiap orang. Namun, bila dibahas lebih lanjut memasak sebenarnya punya arti luas yang tak hanya sekedar bagian dari rutinitas namun juga menjadi kegiatan yang berhubungan dengan art atau seni dalam menghidangkan sebuah makanan. Karena alasan inilah TRISTAR Culinary Institute yang beralamatkan di Jl. Raya Jemursari 234 Surabaya ini membuka jurusan Tata Boga (Culinary) dengan program Diploma.

Tak kurang dari 12 orang mahasiswa yang saat ini belajar di kelas culinary. Bukan sekedar isapan jempol belaka bila para mahasiswa diajarkan cara menggunakan alat-alat /mesin industri makanan, pengetahuan bahan-bahan makanan, gizi dan nutrisi makanan, teknik pembuatan dan pengolahan berbagai jenis masakan dari seluruh dunia secara benar higienis hingga menjadi produk bercita rasa tinggi serta teknik penyajian yang menarik. Karena hal ini memang dibuktikan dalam perkuliahan dengan sistem praktik setiap hari, seperti pada perkuliahan pada hari Jumat (21/05) kali ini.

Perkuliahan yang dimulai pukul 8 pagi ini diawali dengan teori terlebih dahulu yang berjalan selama 1 jam. Kemudian dilanjutkan dengan materi praktik mulai pukul 9 pagi hingga 12 siang. Adapun materi yang diajarkan kali ini adalah Pengolahan makanan Amerikan dan sekitarnya yang terdiri dari 4 masakan antara lain Sweet And Sour Soup, Chicken Primavera, Home Style Round Steak dan Mascarpone on Mixed Green. Masih dengan Pak Yanuar selaku pengajar, materi demi materi dijelaskan secara detail.

Dalam materi praktik ini, mahasiswa dibagi dalam 4 kelompok yang masing-masing kelompok terdiri dari 3 orang mahasiswa. Masing-masing kelompok diberikan tugas untuk membuat 1 macam masakan. Namun sebelum acara masak dimulai, para mahasiswa hanya diijinkan untuk menyiapkan semua bahan terlebih dahulu. Setelah semua bahan siap, masing-masing kelompok akan langsung mempraktikkan masakannya satu per satu dengan diarahkan oleh pengajar. Kelompok yang belum mendapat giliran memasak,bisa menyimak terlebih dahulu materi yang dipraktikkan kelompok lain. Dengan sistem ini, diharapkan para mahasiswa mendapat semua pengetahuan yang diajarkan dan cepat terampil.
Setelah memasak selesai, para mahasiswa diwajibkan mendisplay hasil masakannya hingga tampil menarik sesuai dengan kreasi para mahasiswa sendiri. Selain untuk display, para mahasiswa juga dapat langsung mencicipi masakan yang sudah dipraktikkan.


When is jam not jam? When it's chutney, of course!

The light is different. The Greek island of Lesbos opposite is starting to emerge from its hazy summer shroud so we can see its beautiful silhouette once more. There is a change in the air, the nights are much cooler, Osman Bey next door is no longer sleeping on his roof, his snores gently punctuating my stargazing. The displays of fruit and vegetables in the Ayvacik market yesterday were not quite so lavish and there was generally a fin du saison feel about it. The truth is, summer is almost over.

The zuccaciye where I bought my first lot of jars for bottling the tomatoes, still hasn’t stocked up on that most convenient size so I had to buy the larger ones, for today we had a project! Having your own vegetable garden may be a rural idyll but with all the lovely hot sun we have been having, Elaine’s has been relentless. It has been producing copious amounts of all sorts of things including aubergines, green peppers, tomatoes and cucumbers all summer long. They cannot be ignored; they clamour for attention on an almost daily basis. Just eating a few now and then will not suffice.

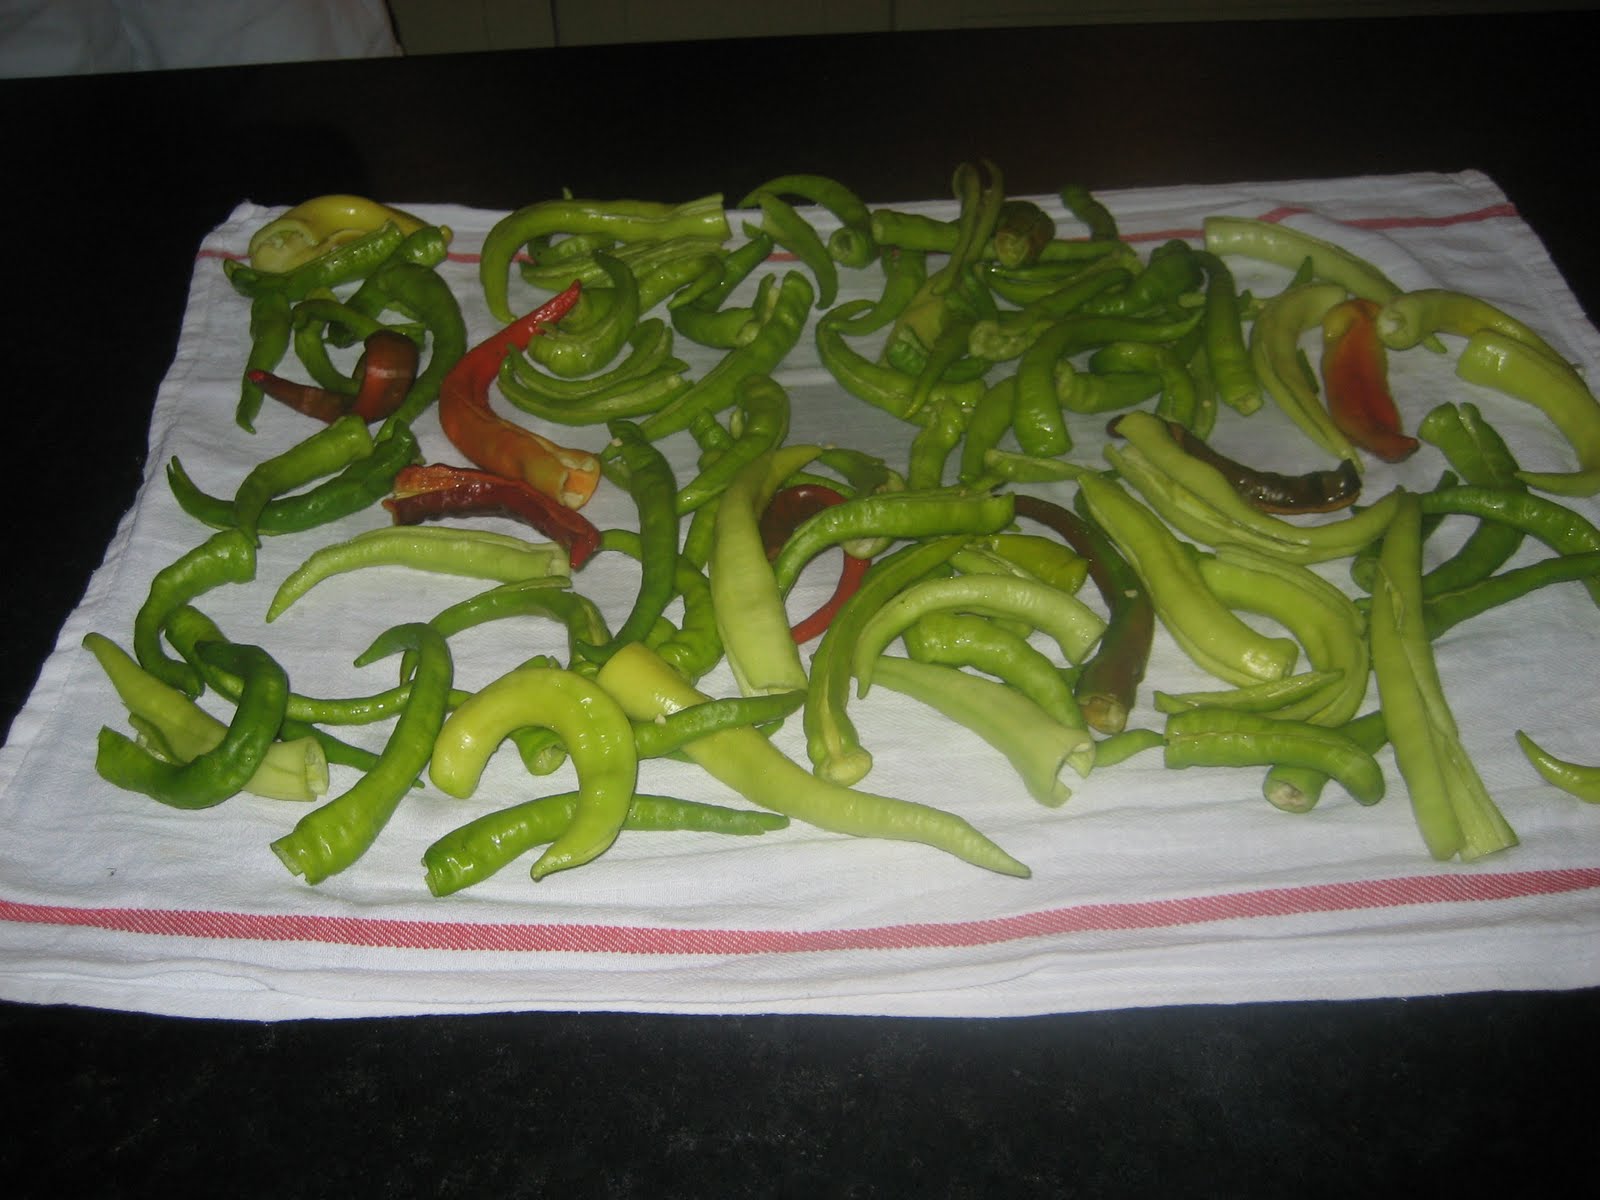
Here are our ingredients
Today’s recipe was actually for Chilli Jam using sweet red peppers with apples. Now, Elaine’s patch doesn’t do red peppers but what she did have was huge amounts of the green ones that had to be dealt with. With great panache, she adapted the original recipe so that it was no longer for jam but for chutney! It was a perfect exercise in using what you have and not worrying too much if you haven’t got quite the right ingredients.

Adaptation according to Elaine:

  • 1kg green peppers – there were a few little red ones in there too. By the way, these peppers are not hot, they just look it. However, we tested a few just to make sure!

  • ½ kg apples – ours were sweetish but the good news is that you can use any kind, sweet or sour

  • 150 gr granulated sugar

  • 110 ml. Vinegar: we had rice wine so you can see any will do! The locally available apple vinegar (elma sirkesi) would be fine

  • ½ tbsp salt

Makes 3 small jars or 1 ½ big ones.

Method

1. Wash and deseed the peppers.
Here are the peppers, all prepared and ready to go
 You can put them in a bowl of water as you go so that any remaining seeds fall to the bottom. You don’t want them. Lay the peppers in a single layer on an oven tray and put in a pre-heated 200 deg oven till slightly brown. The idea is to soften them up (about 10 – 15 mins).

2. Wash, core and cut the apples into quarters. We didn’t peel them.

<><><><><><><><>
<
<><><><><><><><>
Don't you think they look delicious?
3. Put apples and softened peppers into a large saucepan and add the other ingredients. Cover with cold water. Bring to the boil and let simmer for about an hour.After about 15 mins, scatter a few flakes of red chilli pepper (pul biber) just to add a little bite.

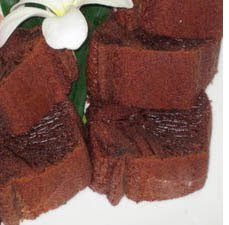
The chutney is ready when the water has almost all boiled away and the apples and peppers have merged into each other, the colour of warmed earth, sweet-smelling and soft.

Well, what do you think?
Using a stick blender, give the mixture little bursts to break it down further. Be careful: you don’t want to overdo it otherwise it becomes like baby mush. It is a chutney, after all.Spoon immediately into your prepared jars (see my first blog about bottling tomatoes for how to sterilize in the oven. Also Elaine’s method, below). Let cool slightly then screw the lid on.

We had a little taste and though we say so ourselves, found it quite delicious. The real test was Peter, that most English of Englishmen. We watched his face apprehensively as he popped a spoonful in his mouth: to our great delight, mmmmm was the verdict!

Conclusion: we may not have Military Pickles but we do have Elaine’s Pepper and Apple Chutney!

Tip

• Elaine has another way to prepare the jars: first, put them in the dishwasher. Then take them out and fill them with boiling water. Leave them like that for 1 hr. Done like this, filled, they should still be kept in the fridge till needed.

• Another friend of ours has a further tip: turn the jars upside-down after sealing. Leave that way to cool. This ensures that any pockets of air, which could cause mould, disappear.


And now we are off to the beach!

Rustic White Bench

Hi everyone, its that time again, White Wednesday. I have been drawn lately to rusty painted objects (I guess I want to have a sense of history). This bench was one I tried to sell at Scott's, secretly I was glad it didn't. I love this bench, I love the arms, and the curvy details. This will be a lot more comfortable to sit on than the last bench. This is real rusty crusty.....
Opps... she has a little boo boo, just makes her more lovable.
I will definitely love tea here.
Lots of attitude, but a good ole' girl......
For more Wondrous White pieces go see Kathleen at http://fadedcharmcottage.blogspot.com. Now I'm off to finish my Swedish Garden Room. I know, pics are coming.
See everyone next time.......

Fregula with Corn


Mario and Gwyneth hang out a lot.  By that I mean Mario Batali and Gwyneth Paltrow, and what guy wouldn't want to hang out with Gwyneth?  They're both busy celebrities, so I don't know that they actually hang out a lot, but they are friends and do projects together, so I at least project the influence Gwyneth is having on Mario.  They did their cookbook showcasing their mutual love of Spain and its food.  Now, Mario's newest cookbook highlights recipes from his casual Italian restaurant Otto Enoteca Pizzeria.  My favorite section is actually the vegetable antipasti.  How many times do we think to ourselves that we should or want to have a vegetable or grain side dish, but our usual stand-ins are just too boring?  In Molto Gusto, Mario provides us a host of new vegetable and grain side dishes that combine simple and wholesome ingredients in ways that refresh and inspire.  It is the Italian way, the Spanish way, the French way, even the Gwyneth way.  It is the way we should all cook and the way I feel like cooking here at the end of this summer.  His fregula with corn dish highlights that simplicity with summer ingredients.  The fregula (pearl or Israeli couscous to the rest of us) is paired with charred corn, for that summer vegetable and grilled taste.  The lemon vinaigrette keeps that summer brightness.  Here, I paired it with pan-seared cod, but this side would go with just about anything.  Enjoy it for yourself.  Serves 2.
  
Ingredients:
1/2 cup fregula or pearl couscous
2 ears of corn
1 tbsp olive oil
1 tbsp fresh lemon juice
2 scallions, sliced
salt/pepper
    
Directions:
Bring half of a medium pot of water, lightly salted, to boil and cook the fregula 12 minutes or until al dente.  Meanwhile, cut the corn kernels from the cobs.  In a medium saute pan over medium-high heat, heat 1 tbsp of oil and add the corn.  Stir occasionally to brown quickly the corn on sides.  You may need to cover to avoid popping corn.  After 3 minutes, remove the corn to a plate.  Whisk the lemon juice and remaining oil and season to taste.  When the fregula is done, drain and allow to cool if desired.  Mix in the corn, vinaigrette and scallions.  Season again to taste if desired.  Serve.
    

Indonesian Spice Cake (Spekkuk)

Indonesian Spice Cake (Spekkuk)

2 cups cake flour, sifted
1/2 teaspoon baking powder
1 teaspoon nutmeg, grated
1/2 teaspoon clove, ground
4 teaspoons cinnamon, ground
1 pinch salt
3/4 lb butter, unsalted (3 sticks)
1 2/3 cups sugar
4 eggs, large
3 egg yolks, large, lightly beaten
2 teaspoons vanilla extract
1 tablespoon confectioners' sugar (for garnish)

Preheat oven to 325 degrees Fahrenheit; grease and flour a bundt pan.

In a medium bowl, resift the sifted flour along with the baking powder, nutmeg, clove, cinnamon, and salt; resift one more time, then set aside.

In another bowl, beat the softened butter until it is soft and very pliant, about one minute, gradually add the sugar and beat on high speed until it is pale and fluffy, about 3 to 5 minutes.

Beat in the 4 whole eggs by hand, one at a time, until the butter and egg mixture is light and fluffy, about 2 minutes.

Add the flour mixture to the butter and egg mixture in 3 equal parts, beating on low speed (or stirring with a wooden spoon) until the batter is smooth and the flour is well combined with the butter and eggs; add the lightly beaten egg yolks and the vanilla, and continue to beat or stir until they are well mixed into the batter.

Pour the batter into the prepared pan, spreading it until the surface is even; then place the pan in the middle reack of the oven and bake about one hour, test with a wooden pick; this cake will nearly double in size as it cooks.

Remove the pan from the oven and set it on a wire rack to cool for about 10 minutes, when cool enough , invert the cake onto a wire rack to finish cooling; then transfer the cake to a serving platter and sprinkle the top with sifted confectioner's sugar.

Indonesian Spice Cake (Spekkuk)

Indonesian Spice Cake (Spekkuk)

2 cups cake flour, sifted
1/2 teaspoon baking powder
1 teaspoon nutmeg, grated
1/2 teaspoon clove, ground
4 teaspoons cinnamon, ground
1 pinch salt
3/4 lb butter, unsalted (3 sticks)
1 2/3 cups sugar
4 eggs, large
3 egg yolks, large, lightly beaten
2 teaspoons vanilla extract
1 tablespoon confectioners' sugar (for garnish)

Preheat oven to 325 degrees Fahrenheit; grease and flour a bundt pan.

In a medium bowl, resift the sifted flour along with the baking powder, nutmeg, clove, cinnamon, and salt; resift one more time, then set aside.

In another bowl, beat the softened butter until it is soft and very pliant, about one minute, gradually add the sugar and beat on high speed until it is pale and fluffy, about 3 to 5 minutes.

Beat in the 4 whole eggs by hand, one at a time, until the butter and egg mixture is light and fluffy, about 2 minutes.

Add the flour mixture to the butter and egg mixture in 3 equal parts, beating on low speed (or stirring with a wooden spoon) until the batter is smooth and the flour is well combined with the butter and eggs; add the lightly beaten egg yolks and the vanilla, and continue to beat or stir until they are well mixed into the batter.

Pour the batter into the prepared pan, spreading it until the surface is even; then place the pan in the middle reack of the oven and bake about one hour, test with a wooden pick; this cake will nearly double in size as it cooks.

Remove the pan from the oven and set it on a wire rack to cool for about 10 minutes, when cool enough , invert the cake onto a wire rack to finish cooling; then transfer the cake to a serving platter and sprinkle the top with sifted confectioner's sugar.