Monday, May 31, 2010

Making Dinner Fast

I know that a lot of you are concerned with getting dinner on the table as quickly as you can. I applaud your desire to prepare food for your family or your sweet self and to sit down to eat it. You’ve already had a full day of work, and now there is yet another task to be done. Dinner. Yikes. Years ago when I was working full-time (or more) at Duke University, I too felt the pressure to fix food fast. Getting home a little after 6:30, I learned to move quickly. I wanted to have dinner on the table within an hour. Being organized was the only way to do it.

Three things helped me out:
(1) On the weekend I would plan what we would eat for the week. I would choose three or four main dishes, doubling the recipes so there would be plenty for leftover dinners. I would prepare two of the dishes on the weekend—usually the two that took longer to prep or to cook. The other two dishes I chose were super speedy, like a stir-fry or sauté, easy to do within an hour. I would write down my plan on the store list and then shop so I would have everything I needed on hand.


(2) I had a couple of go-to recipes which could always be hauled out in emergencies. Most of them called for ingredients I usually had in my cupboard or fridge. Remember Cheese Soufflé (November 25, 2009) and Tuesday Pancakes (February 16, 2010)? Speed was uppermost in my mind; clearly cholesterol wasn’t.

(3) The boys learned to fix themselves something to eat after school so they weren’t “starving” by the time I got home. Popcorn, instant ramen, macaroni and cheese from a box, and the old stand-by, cereal. It wasn’t exactly health food. But the experience gave them some independence and confidence that they could fend for themselves in the kitchen.

All these strategies worked for me. But they required planning, shopping and cooking on the weekends. And it required a husband and kids who didn’t mind waiting to eat until 7:30 or so. That sort of a schedule doesn’t work for everyone. Because I value eating home-cooked meals as a family at a table, I was willing to do whatever it took. And going out to dinner every night wasn’t a viable financial option.

In the past few years a million cookbooks have come out with some combination of quick, fast, or simple in the title. Rachel Ray is making a fortune whipping up her 30-minute meals on the Food Channel and selling her books. I’ve tried more than 30 of these cookbooks and find them infuriating, disappointing and surprisingly helpful. Infuriating because they lead you to believe that you’ll have your dinner done in a blink but then the author says “Oh yes, the time assumes that you will have done all the prep ahead.” Like you have a sous chef chopping for you in your kitchen. And they always underestimate the amount of time it takes to prepare a dish for the first time. Disappointing because in 30 minutes you can’t make a stew or bake a meatloaf, or anything which requires long slow cooking which I love. Helpful because there are an astonishing number of really good recipes which can be put together pretty quickly.

Recently I have had good luck with these books:
The Illustrated Quick Cook by Heather Whinney. Check out Beef with Soy and Lime with Grapefruit and Ginger Salsa or Chicken with Cinnamon and Peppers. Over 700 recipes.
Nigella Express by Nigella Lawson. Check out the Red Shrimp and Mango Curry. She is a pleasure to have in your kitchen.
Great Food Fast by Martha Stewart Living. Check out Thai-Style Steak Salad. A really pretty cookbook.
And thank God for canned diced tomatoes, frozen spinach, fish, shrimp, steak, red or brown lentils, canned black beans or chickpeas—all of which help you cook really quickly. I’m not much of a fan of the pre-chopped veggies available in the supermarket. But they can help in a pinch.


If you are looking for speedy dishes on this blog, check out the following:
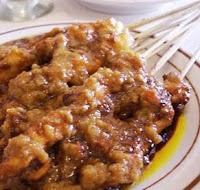
Picadillo (Mexican Meat Hash) (September 26, 2009), pictured
Thai Chicken Coconut Soup (February 2, 2010), pictured
Spicy Soba with Tofu (March 7, 2010)
Bistro-Style Steak with Sauce Marchand (March 13, 2010)
Catfish with Cherry Tomatoes and Lemon Sauce (March 21, 2010)
Grilled Cheese (November 11, 2009)
as well as the delicious recipes given below.

Menu 17: Fast Pasta Dinner

Linguine with Lemon Sauce


4 tablespoons butter, at room temperature
1½ cups heavy cream
Grated zest from 3 lemons
Lemon juice from 3 lemons
1 pound fresh linguine
OR
9 ounces dried thin spaghetti
3 tablespoons salt for the pasta water
1 teaspoon salt for the sauce or to taste
3 tablespoons fresh flat leaf parsley, coarsely chopped
Parmigiano-Reggiano cheese or other hard cheese, freshly grated at the table

1. Put 6 quarts of water in a large pot and bring it to a boil.
2. While the water is coming to a boil, combine the butter, cream, and lemon juice over low heat in a skillet large enough to hold the pasta later on. As soon as the butter is melted, remove the skillet from the heat, cover, and set aside.
3. When the water is boiling, add 3 tablespoons salt and the pasta, stirring to prevent the pasta from sticking. Cook until tender (fresh pasta won’t take long). Drain, leaving a few drops of water clinging to the pasta so that the sauce will adhere.

4. Transfer the pasta to the skillet, off the heat, and toss to blend. Add the salt, lemon zest, and toss once more. Cover and let rest for 1 to 2 minutes to allow the pasta to absorb the sauce. Transfer to warmed shallow bowls, sprinkle with parsley, and serve immediately. Pass the hunk of cheese with a microplane or a cheese grater for you and your guests to grate as desired.

3-4 servings as a main dish
Adapted from Patricia Wells’ Trattoria


Simple Sautéed Fresh Spinach or Swiss Chard


Spinach for as many as you are serving, about ¼ pound per person, depending on the serving size
OR
Swiss chard, about 1 bunch for 2 servings, stems removed, washed well, cut into ½-inch strips
Olive oil, about 1 tablespoon per serving

1. Place your spinach or chard in a non-aluminum pot big enough to hold your quantity of greens. Add 2 tablespoons of water and up to 3 tablespoons of olive oil.
2. Cover the pan and cook on low heat. The spinach will begin to wilt and give up its water. The chard will have the washing water still clinging to it; it will also begin to wilt but more slowly than the spinach. Stir to turn the uncooked spinach or chard toward the bottom surface of the pan. Keep stirring and cooking until all the spinach is cooked. With the chard, turn the heat to low, cover the pan and simmer for about 10 minutes until tender.
3. Serve immediately. You can also hold it for a short while after cooking. Rewarm gently before serving.
I never find it necessary to add salt because of the high oxalic acid in the spinach.
To add garlic, mince or press several garlic cloves into the spinach or chard at the same time as you add the water and oil.

Makes as much as you desire or your pot will hold
My own devising

Family Treasures


I meant to get a few more recipes posted over the weekend.  Really.  I mean, how are you going to live without my recipes for ruggelach, mocha chip cookies, pecan bars and biscotti?  However, when your very fabulous niece comes to visit for the holiday weekend, you drop everything so you can hang out with her.  And shop.  And eat.  And hang out with friends.  And shop.

As I write this, the Flight Track app on my iPhone just informed me that her plane has landed in Chicago.  I'm glad she got back safely, but I'm sorry she is no longer in Atlanta.  We had a great time together!


Since her grandmother is my mother-in-law (the one who was wearing that "Beam Me Up Scotty, There's No Intelligent Life on Earth" t-shirt the first time we met), I thought it only appropriate to post that ruggelach recipe I told you about.  Here's to you, Grandma Ruth and your awesome granddaughter!

GRANDMA RUTH'S RUGGELACH

For the dough:
8 oz. unsalted butter, softened
8 oz. cream cheese, softened
4 cups unbleached, all-purpose flour
Pinch of salt

Using electric mixer fitted with the paddle attachment, beat butter and cream cheese until smooth.  Add flour, reduce speed to low and mix until just blended and mixture forms a ball.  Remove from mixer, place on a sheet of plastic wrap and flatten into a disk.  Wrap well in plastic and refrigerate overnight.

For the filling:
1 1/2 cups granulated sugar
2 teaspoons ground cinnamon
1/2 cup finely chopped pecans
Pinch of salt
1/2 cup sultanas (white raisins)
1/2 cup chocolate chips

In a medium bowl, mix sugar, cinnamon, pecans and salt.  Measure out sultanas and chocolate chips in separate bowls.


Procedure:
Divide dough into 12 pieces.  Roll out on piece on a flour surface into an approximate 7-inch circle.  Cut into 8 wedges (as if serving a pie).  Sprinkle each one evenly with a small amount of the sugar/cinnamon/pecan mixture.  (You won't need a lot - if you add too much, you won't be able to roll it up).  Add a few sultanas or chocolate chips (one or the other but not many, as above).  Starting from the outer wide edges, roll dough to the inner point.  Pinch edges together and bring forward slightly to form a small crescent.  Remove to a baking sheet and repeat with remaining dough and filling.  Place tray in freezer and freeze for at least two hours before baking.  (These may be frozen unbaked and covered for up to three months).

When ready to bake, preheat oven to 375-degrees.  Place ruggelach 1/2-inch apart on baking sheet lined with parchment.  Bake for 15-20 minutes or until just lightly browned.  Cool completely on baking rack before storing.  Better yet, eat them all immediately.

Yield:  approximately 96 peices

I hadn't made these in years.  Whenever my husband or kids wanted them (which was often), Grandma Ruth would bake up a big batch and ship them down to Atlanta.  I think I made them once, but there was really no need since she was gracious (or crazy) enough to do it for us.

Wow, I had no idea what that really meant.  In the interest of full disclosure, these take a long time to assemble.  It took me almost an hour and a half!  No wonder I left it up to her!  Nonetheless, these things are crunchy, sugary, buttery little bites that will rock your world.  And so worth making.  Just think of it as therapy as you painstakingly roll up each and every one......

Hiking the Cinque Terre...

The Cinque Terre consists of the coastline, five villages, and the surrounding hillsides.
It's noted for its beauty and now we know why! Terraces have been built on the rugged, steep landscape right up to the cliffs that overlook the sea. Paths, trains and boats connect the villages....

Lots of umbrella pictures today. :D The one day it rained on our trip and we had planned to hike all day. We decided to use those umbrellas we lugged all over Europe and go despite the rain. We're glad we did. Even though it was one soggy hike, it was gorgeous!!!

We started out from the hostel in our favorite of the five villages, Manarola...

First we hiked to Corniglia, climbing 380 steps to finally reach the village.


Escargot anyone? :P


Next was Vernazza...By that time we were hungry for more pizza, gelato and pastries! Yum! :D


After hiking for a while and getting soaked we took a boat ride to the next village, which was Monterossso.

Lemons!!!

The beach at Monterosso...The water is incredibly beautiful... the beach just rocks, but they were beautiful too!


Coop is the place to go for groceries. We took the train to Riomaggiore, where we grabbed some olives, cheese and bread for lunch. Then found a relatively dry spot to stand and eat it. By this time I was cold and ready to be in a dry warm place!


Where we stopped to get warm on the way back to Manarola.

The hot chocolate in Italy is the best ever!!! It's so thick that when you blow on the spoon it piles up into a mound. Wow! And it totally hit the spot on this beautiful, wet, cold day...


Okay, here was dinner... I ordered fish soup. I wasn't expecting to get what looked like a scoop of the bottom of the sea... Well, it wasn't the best meal I ate. :)

Fried Noodles (Mie Goreng)

Fried noodles Mie Goreng

Ingredients & spices:

250 g Fine egg noodles
250 g Shrimps, raw or cooked
4 tablespoons cooking oil
1 Onion, finely chopped
3 cloves Garlic, finely chopped
1 Fresh red chili, seeded and sliced
1/2 teaspoon Dried shrimp paste
2 stalks Celery, finely sliced
1 teaspoon Salt
1/2 teaspoon Pepper
1-2 tablespoons Light soy sauce
Small wedge of cabbage, finely shredded

Garnish:
4 Spring onions
Thinly sliced cucumber
Fried onion flakes

How to prepare:

Soak noodles in hot water, while bringing large saucepan of water to the boil.
Drain noodles and drop into the boiling water, allow to return to the boil and boil from 1-3 minutes, depending on the noodles.
Some are cooked in the shorter time, while others take a little longer.
Keep testing one strand every half minute of so, because they must not overcook
As soon as they reach this stage, drain in colander and run cold water through them until cool or they will continue to cook in their own heat. Drain well.
Shell and de-vein shrimps.

Heat peanut oil in a wok or large deep frying pan and fry onion, garlic and chili until onion is soft and starts to turn golden.
Add dried shrimp paste.
Add shrimps and stir fry until cooked through.
Add celery, cabbage, salt and pepper and fry for a further minute or just until tender.
Vegetables should retain their crispness.
Add noodles and keep turning the mixture so that every part of it gets heated through.
Season with soy sauce to taste.
Pile into a serving dish and sprinkle onion flakes over the top.

Chop the spring onions, green leaves and all, and sprinkle over.
Arrange cucumber slices around edge of dish.

Chicken Satay (Sate Ayam)

Chicken Satay Sate Ayam

Ingredients & spices:

2 lbs. boneless, skinless chicken breast or thigh meat
1 clove garlic, crushed
1 tsp. ground ginger
2 tsp. sweetened soy sauce
2 tsp. tamarind juice

How to prepare:

Cut chicken into cubes of approximately 3/4" on a side. Mix together remaining ingredients and marinate chicken for two hours. Soak bamboo skewers in water for approximately 20 minutes.

Thread chicken onto skewers, four or five to a skewer, and grill over glowing coals or under preheated grill four minutes to a side or until chicken is brown on all sides.

Serve satay with satay peanut sauce and a fiery chilly sauce to satisfy your need for heat.

Satay Peanut Sauce

Satay sauce Sambal Kacang

Ingredients & spices:

8 Tb. crunchy peanut butter
1 1/2 cups water
3 tsp. garlic
3 tsp. dark brown sugar
Salt to taste
Tamarind juice to taste
Coconut milk

How to prepare:

Put peanut butter and water in a saucepan and stir over gentle heat until mixed.

Remove from heat and add all other ingredients except coconut milk or additional water.

Use coconut milk or water to make sauce thick yet pouring consistency. Check seasonings and add more salt and tamarind juice if needed.

Pour this sauce into your Chicken Satay