Showing posts with label Vegetables. Show all posts

Saturday, May 28, 2011

Braised Peas with Lettuce and Fresh Onions


I know it may be a pain to some, but to me, there's something so relaxing about shelling peas-- just sitting there in front of my laptop , watching useless youtube videos and mindlessly popping peas from their pods while the sun slowly sets behind me. No, I wasn't putting off schoolwork, I just had to shell them then. Priorities. With fresh peas, you have to use them up as soon as possible, because their flavour deteriorates so quickly (so if you can't get them REALLY fresh i.e. direct from the farmers or better still, from your garden, then go for those that are frozen straight).


As usual, I got a whole load of spring vegetables at the farmers' market. And because my fridge was running out of space, I decided to use up three of these in one dish for dinner right away, in my take on the French classic braised peas. Braising is a really popular technique in Chinese cooking too, but usually with meat, so I was curious to see how it'd work out for vegetables.

Braised Peas with Lettuce and Fresh Onions
Ingredients (serves 2-3 as a side)
about 1 cup of shelled peas (about a brown bag worth of peas in pod)
handful of roughly shredded lollo rosso lettuce leaves (it's usually romaine or little gem lettuce but that was what I got that day. anyway I like the deep purple colour for some contrast)


1 onion (I decided to give fresh onions a try. Sliced it all up, green stalks too)
generous knob of butter (Peas love butter! So do I.) + 1 tsp evoo
about 1/4 cup of homemade chicken stock
sea salt, white pepper
juice of half lemon
a bit of dill (mint is a classic combination, but I had dill at hand and thought the freshness of the dill would work well too)

Method
1. Melt butter with evoo over medium heat in a pan.
2. Add the sliced onions (white part) and cook till soft and translucent, before adding the peas, stir to combine, about 1-2 min.
3. Add the lettuce and sliced onions (green part), stir to combine.
4. Then in with the stock and seasoning, bring to a simmer and then cover and cook for 2-3 min.
5. Uncover, let simmer to reduce for just a while, before removing from the heat and adding the fresh dill and lemon juice.


The peas were just bursting with natural sweetness, really quite different from their frozen brothers and sisters! Oh and the fresh onions I was so intrigued with were great-- really powerful sweetness but with less of a bite (think the best of both regular onions and spring onions). As much as I love peas simply cooked in butter, braising them with onions and lettuce will now be a new favourite (:

This is part of Mangia Monday.

Tuesday, May 24, 2011

Top-to-Toe Radish Stirfry


Green tops and pink bottoms! Such a beautiful combination.
No I don't mean clothes (my fashion-savvy sister will probably axe me). I mean radishes.
I got a bunch of them while working at Pimlico farmers' market on saturday, purely because they looked too pink and pretty to miss. It's not a ditzy girly thing. Just look! They are pretty.


I like radishes raw and sliced thinly to add a little kick to salads, or in tzatziki style dips. But I don't think many people know that radishes are absolutely delicious cooked too! Also, did you know that the radish leaves can be eaten too, much like beetroot? The leaves look a little like pea shoots, but have a slight radish-y sharpness. Here's a super fast stirfry with some sesame oil, garlic and spring onions (also bang in season) to celebrate the whole radish, from top to toe!

Top-to-Toe Radish Stirfry
Ingredients
1 bunch of radishes, washed
2 cloves of garlic, chopped
1 spring onion (white and green parts), chopped
1 tsp fish sauce (or you can use naturally fermented soy sauce)
dash of white pepper
1/2 tsp sesame oil
1/2 tbsp extra virgin olive oil

Method
1. Separate the leaves from the radish roots. Quarter the roots.
2. Heat pan over medium-high heat, and add the evoo. Add the white parts of the spring onion, garlic and sesame oil and toss for 1-2 min.
3. Add the radish roots and stir-fry for 3-4 min till their insides turn from an opaque white

to a glossy translucence.


4. Add the radish leaves and the seasoning, and stir-fry for 1 more min until the radish leaves are wilted. Scatter the chopped green parts of the spring onion over to serve.


I really like my radish cooked for a change. The sharpness of the radish mellows, and it takes on a mild daikon radish/ turnip-like sweetness. The leaves add a nice contrast of texture (a bit like pea shoots), and of course, you can never go wrong with sesame oil and toasted garlic!

Oh and if you're wondering why you only see pink bottoms but no green tops in the plastic bags of radishes from Tesco's, and you feel unfairly shortchanged, it's time to make a trip down to the farmer's market ;)

This is part of Hearth and Soul Blog Hop.

Thursday, May 19, 2011

Sambal Chilli Asparagus and Gruyere Crustless Quiche


Asparagus. The coveted spears of spring. I can't remember where I heard that phrase before but it's been stuck in my head ever since. I love asparagus, and to me, the flavour of fresh British asparagus really can't be beat. The best way to enjoy them is simply steamed, with a knob of butter melted over (try flavoured butters like chilli coriander and lime zest butter).


But asparagus is so terribly expensive though. I actually googled it before - "why is asparagus so expensive". Yes I am that geeky. (What will we do without google??) Anyway. Apart from that fantastic flavour, it's also because asparagus take 2 years to harvest and bring returns and of course, because they only appear for such a short period of time i.e. spring. I figured it would be a shame to let spring slip by without an asparagus dish, so I got some at Pimlico farmer's market and stretched them further in a quiche-- one of my favourite ways to throw in any vegetables and experiment with lots of flavour combinations (even yes, sambal chilli).

Basic Crustless Quiche
I love quiche. It was my staple buy every time we passed a bakery in Paris last summer with my sister. And I will share a proper quiche recipe sometime in the future, I used to be scared of shortcrust pastry but it really isn't that difficult after all! But when you just want an easy lazy Sunday brunch, you can't be bothered with all that mixing and rolling. Without a crust as a base, the ratios are adjusted such that the quiche is less decadently custardy, but it is not a frittata. It's confusing seeing people call their frittatas quiches, because frittatas don't have all that luscious cream (or milk) added; for quiche, think: more cream less eggs.
Ingredients
3 eggs, beaten
1/2 cup cream (preferably grassfed)
1/2 cup whole milk (preferably grassfed)
3/4 cup grated Gruyere cheese (or Emmental or even Cheddar)
a handful of grated Parmiggiano (optional)


Sambal Chilli Asparagus and Gruyere Crustless Quiche
Ingredients
7-8 stalks of asaparagus
1 medium onion, chopped
1 tbsp sambal belachan (replace with chilli paste if not available)
1 tsp chilli flakes (or to taste)
3 eggs, beaten
1/2 cup cream (preferably grassfed)
1/2 cup whole milk (preferably grassfed)
3/4 cup grated Gruyere cheese
pinch of sea salt
1 tbsp extra virgin olive oil

Method
1. Pre-heat oven to 180 degrees celsius.
2. Prepare the asparagus by snapping off the woody bottom part of the stalk. Cut the remaining stalks into halves, leave the top half whole, but further chop up the bottom half into bite sized pieces.
3. Over medium high heat, add the oil to the hot pan, and then add the onions to sweat.
4. Once onions are translucent, add the sambal belachan and the top half of the asparagus, saute for a couple of min, before adding the bite-sized asparagus pieces, and cook for 3 min more till almost tender but not soft.


5. To a inch pie dish greased with some butter or oil, spread the onions and asparagus pieces over the base of the dish.
6. Beat the eggs with the cream and milk, season with the salt and chilli flakes, and pour over. Arrange the asparagus tips on top in a starburst pattern (mine shifted when I moved it into the oven ): )

7. Bake for 30-40 min until set with slightly browned edges but centre looks a little jiggly still, as it will continue to cook out of the oven. Leave to cool before cutting into it.


The chilli adds some kick to a classic quiche, and the belachan (fermented fish paste) in the sambal chilli adds a very special salty savoury depth to the asaparagus, the same way the british use bacon to add an extra something. This quiche is rich with flavour and requires hardly any effort, and I can have it for breakfast, for lunch, as a teatime treat maybe, and then for dinner and then supper after so it's a real time-saver. No I was kidding. Actually, no I wasn't.

This is part of Full Plate Thursday.

Thursday, May 12, 2011

Super Saag! (A Multi-Purpose Indian Spinach Curry)


Spinach is in season and I love it so much, I think I kind of went overboard with the number of bunches I happily put into my grocery bag. To save my bursting little fridge some space, I thought it'd be a good idea to cook them in some sort of pureed soup because spinach cooks down beautifully, but then I suddenly thought of one of my favourite Indian dishes, Palak Paneer!

Saag (or Palak) refers to a pureed spinach curry and it's super handy because you can make proud claims to a list of at least six Indian dishes with just one recipe. Just pour the spinach gravy over ____________(fill in the blank), usually marinated in Indian spices and panfried/roasted a la tandoori, and you get:
1. Paneer --the ever-favourite Palak Paneer.
2. Chicken-- Palak (or Saag) Murgh
3. Mutton-- Saag Gosht
4. Prawns-- Jhinga Saag
5. Chickpeas-- Chana Saag
6. Potatoes-- Saag Aloo

There are two recipes which I've tried and love. One uses tomatoes and cream and tastes just divine, while the other uses yogurt and nothing red and is also delicious (and a brilliant shade of green).

Saag/Palak Recipe No. 1 (adapted from vahchef, I love this enthusiastic Indian chef)
Ingredients
makes about 1 1/2 cup
4 large bunches of spinach leaves
1 onion, finely chopped
1 clove garlic, minced
1/2 tbsp minced ginger
1 tomato, chopped
whole garam masala (1 cinnamon stick, 3 cloves, 3 cardamom pods)
1 tsp ground cumin
1 tsp ground coriander
1 tbsp chilli powder (or to taste)
1 tbsp fenugreek leaves (I don't have this so I left it out)
2 green chillies, chopped
1-2 tbsp cream
sea salt
1 tbsp ghee

Method
1. Blanch spinach in boiling water for 1 min, uncovered (vahchef says the whole process should be uncovered to keep the bright green of the spinach). Drain. Refresh. Puree.
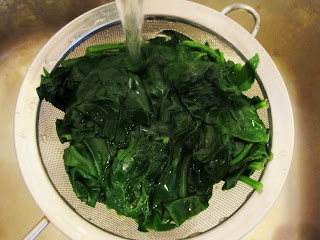
Watch this mountain of spinach that's too huge to fit into the photo,

wilt into 1 cup of cooked spinach (spinach being refreshed under cold running water)

2. Over medium high heat, add the ghee. Toast the whole garam masala for a while.
3. Add the onions, with a pinch of salt (this helps it to 'melt' faster). Saute until translucent.
4. Add the ginger, followed by the garlic, turmeric, and finally the chopped tomatoes. Saute until tomatoes turn to mush.
5. Add the ground spices and green chillies, saute for couple more min.
6. Add the spinach puree, season, and cook till the oil separates. Stir in the cream, plus drizzle more to finish!

Saag/Palak Recipe No. 2 (inspired by sanjeev kapoor)
Ingredients
4 large bunches of spinach
1 handful fresh coriander i.e. cilantro (secret ingredient!)
8 cloves of garlic, minced (he loves garlic and so do I)
1 onion, sliced thinly (I chopped instead)
2 green chillies, chopped
1/2 tsp cumin seeds
1 tbsp coriander
1/2 tsp turmeric
1/2 cup yogurt
sea salt
squeeze of lemon
1 tbsp of ghee

Method
1. Blanch spinach in boiling water for 1 min, uncovered (vahchef says the whole process should be uncovered to keep the bright green of the spinach). Drain. Refresh. Puree with the fresh coriander.

2. Over medium high heat, add the ghee. Toast the cumin seeds.
3. Add the onions (plus pinch of salt), garlic and green chillies, and saute till the onions turn translucent, but aren't browned.
4. Add the ground spices to toast for a while. (He says to add the yogurt before the spices but I tried it and the sauce split after being boiled.)
5. Add the pureed spinach, season bring to boil, before adding the yogurt and simmering gently for 2 more min.

6. Finish off with a squeeze of lemon (His granny says that helps in the digestion of greens, and granny/mummy's always right;) ) and a drizzle of yogurt.

I love both recipes and switch them around depending on the __________ and my mood. This is my favourite way to get spinach into my diet. I'd find it difficult to munch through 4 large bunches of raw spinach, but I can easily finish a bowl of saag. Cooking spinach also reduces the oxalic acids in the fresh greens, making it healthier and more digestible. All that aside, the best thing about saag or palak is, simply, that it's really yum !(:

Thursday, May 5, 2011

Coconut-crusted Coley Fillets with Cucumber Shallot Pickled Salad


I can't believe it took me so long to discover pouting. It's like cod with the price tag torn off. Another great sustainable fish is coley, also known as the "poor man's cod". Its flesh is not as pretty as cod, because it's a little grey, but it's a tasty fish with a light texture too, and is highly praised by British chefs like High Fearnley-Whittingstall.

This is a very light refreshing dish, inspired by classic southeast asian flavours like coconut, rice vinegar, shallots and pickled cucumber.

Coconut-crusted Coley Fillets
serves 2 (as a light lunch/starter)
Ingredients
2 coley fillets
1/2 cup of unsweetened coconut flakes (+pinch of sea salt)
1 tsp grated ginger
2 tsp fish sauce
white pepper
1 tbsp coconut oil

Method
1. Preheat oven to 180 degrees celsius.
2. Pat dry and season the pouting fillets with the fish sauce ginger and pepper.
3. Lay fish on a baking dish greased with coconut oil, and sprinkle the coconut flakes over the top of the fish.


4. Bake uncovered for about 15 minutes (depends on thickness of the fish. You can poke gently with a fork to test for done-ness). Switch to 'broil' for the coconut flakes to toast and brown a little just before the fish is done (or dry toast on a pan and then sprinkle over, if you don't want to risk over-cooking the fish).


Cucumber and Shallot Pickled Salad
serves 2
Ingredients
1/2 cucumber
1 shallot (I used banana shallot, which is milder and sweeter)
1/4 cup rice vinegar
1 tsp unrefined cane sugar
1/2 tsp fish sauce
pinch of chilli powder


Method
1. Halve the cucumber so you can lay it flat, then slice thinly into little semicircles. Same goes for the shallot.
2. Combine all ingredients and toss well, let sit for at least a couple of hours, preferably longer. This only gets better.


Finish with fresh coriander. It might be a good idea to serve the salad beside, not below the fish instead, makes eating easier.. That said, the sharp pickled cucumbers and shallots really bring out the fragrant aroma of toasted coconut and coley. I also had it with sambal tumis (I will share the recipe soon) and I would say the sambal chilli is also a must, but maybe that's just me hehe.
Monday, April 25, 2011

Collard Leaf-Wrapped Herb Rice with Radish Tzatziki, or "Pseudolmades"


Spring greens, aka collard greens, are everywhere now, and both Tesco and Asda are selling huge bags for 50 pence. I found myself with yet another bag of these leafy vegetables because I cannot resist a cheap deal. Keeping a lookout for what's on offer and what's in season is also one of my best ways to stay within my real food student budget. After too many consecutive meals of spring greens thrown into all my soups and broths or into all sorts of stirfries, I wanted something different, and this recipe came to mind.

Dolmades are Greek parcels of rice wrapped with grape leaves or vine leaves, and there are loads of different varieties. I could have done this with some minced meat in the rice mixture too, or extra diced vegetables, but I really wanted it simple for the zesty spring herbs (that I freshly 'harvested' from my windowsill garden) to shine through. I liked them instantly when I first tasted them because they reminded me of dish from home- Chinese lotus-leaf wrapped rice 荷叶饭 loh mai kai- but now with an edible wrapper! It's hard to come across vine leaves, so collard greens, with their huge tough leaves, are a great alternative, i.e. pseudolmades (creative rights go to the real food dudes).

Pseudolmades
makes 8 parcels
8 large collard leaves
1/3 cup brown long-grain rice, soaked (plus 1/2 cup water)
3-4 spring onions, white parts, chopped finely
2 cloves garlic, chopped finely
handful of currants (or sultanas or preferred dried fruit)
handful of pumpkin seeds, soaked and dehydrated or toasted (originally pine nuts, but they're expensive)
handful of chopped coriander and mint leaves
juice and zest of half a lemon
sea salt and pepper, to taste
1 tbsp extra virgin olive oil

Method
1. Saute the onion and garlic in 1 tbsp of evoo, then add the rice, currants and pumpkin seeds to toast for 2 min more. Add the water, season, bring to boil and then let simmer till cooked.
2. Add the chopped herbs and lemon juice and zest to the cooked rice mixture.
3. Steam or blanch the collard leaves in boiling water for 5-10 min so you get cooked, flexible leaves that you can work with easily.
4. De-stem the leaves.

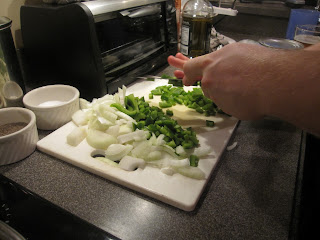
5. A picture speaks a thousand words, so 4 should be more than enough.

(Originally you would stuff the vine leaves with uncooked rice and then let them cook inside the vine leaves, but I think the collard leaves will turn to mush by then.)

5. You can eat them cold as an appetiser or warm, by steaming the parcels.


Ok now for the tzatziki, totally optional but you must do it.

Tzatziki is a great mediterranean dip that's really refreshing and easy to make! It kind of remindsme of Indian raita too, which is also basically yogurt and cucumber. I added radish too as it's in season and it adds a bit of pepperiness, you can cut it out and add more cucumber!


Radish Tzatziki
Ingredients
1 1/2 cup plain yogurt
1/2 cucumber, peeled, deseeded and minced
2-3 radishes, minced
4 cloves garlic, minced
handful of chopped mint (or dill)
juice of half a lemon
extra virgin olive oil

Method
1. To make greek yogurt, just strain the yogurt for a few hours till you get a thick creamy consistency. I use Yeo Valley organic yogurt, which is so creamy it's almost greek-like in consistency already so I skip this step.
2. Mix all the ingredients together, and refrigerate for half an hour or so for the flavours to meld.

This is great with toasted pita bread or as a dip for all sorts of things or even to accompany poached fish!


I served my dolmades with lemon slices and tzatziki spooned over generously. Together, they form a great dish that makes use of all that spring has to offer: collard greens, cucumber, radish, spring onions, lemons and fresh herbs like mint and coriander! How's this for a super springtime meal!

This is part of Hearth and Soul Blog Hop.

Monday, April 11, 2011

When You Just Can’t Justify Mac and Cheese


I’ve maintained this blog for so long, I can’t always remember some of my previous posts. This is partly due to the fact that I suffer from CRS Disease (Can’t Remember Sh_t) and of course I’m too lazy to go back and research some of those earlier entries. So I will just assume that, at some point, I published a rant about how I abhor fast food and chain restaurants.

That said, I have to eat my words about one chain restaurant and that would be Seasons 52. Yes, it’s owned by the Darden Group (which also owns the Red Lobster and Olive Garden chains, places where I would never darken the door, food snob that I am), but it is a fairly small brand (I don’t know if they have even 20 locations) and it is really, really good. In fact, it’s one of my favorite places to go for lunch on Saturdays after an intense workout at the gym. Why? Because it is very civilized dining, I can make a last minute rez on Open Table, racking up an easy 100 points and EVERY MENU ITEM IS 475 CALORIES OR LESS. My kind of place!

http://www.seasons52.com/about_us.asp

We ventured there over the weekend and as usual, ordered one of their flatbreads to start. These are very (VERY) thin rectangular crispy crusts with various toppings. Ours included plum tomatoes, basil and provolone. It was delicious and it satisfied that “pizza craving” we sometimes experience.  Ha, and for less than 250 calories each, we didn’t do that much damage.

Which brings me to the following recipe. While it won’t take the place of mac and cheese (what could?) it is nonetheless satisfying and full of cheesy goodness. I’m betting your kids will like it – even if they hate cauliflower. That’s right, I said “cauliflower.”

This is another one of those recipes that I’m embarrassed to give you because it is ridiculously easy. Ouch, and it even involves a microwave. However, just like my affinity for Seasons 52, don’t let your food snobbery get in the way of a good plate.


EASY, CHEESY CAULIFLOWER

1 large head cauliflower, leaves removed and trimmed so that it sits flat
1/4 cup water
1/2 cup Dijon mustard
2 cups shredded sharp cheddar cheese

Place cauliflower in a glass pie plate or shallow dish.  Pour water into dish and cover tightly with plastic wrap.  Nuke on high for about 10 minutes, or until cauliflower is tender.

Remove from microwave and carefully remove plastic wrap (be careful of escaping steam).  Drain any remaining water in pan.  Spread mustard evenly over the entire head of cauliflower, then place grated cheese in a pile on top.  Nuke again for about 1 minute, or until cheese is just melted.

Slice and serve.  That's it!

Serves 4 - 6


*  Although I am the salt queen, notice that there is none called for in this.  For me to say that - well, then you can trust me.

*  I will also tell you that I have been known to use reduced-fat 2% pre-grated cheddar.  Ouch, again.  But as long as you use sharp cheddar (don't even think about using "American cheese" ) and a good quality dijon mustard, you'll be okay here and you will save a few calories.

*  The genesis of this recipe comes from Glenn Powell and Elise Griffin-Hughes of the original Peasant Restaurants a million years ago here in the ATL.  They concocted a version of it at the long-lamented Country Place.  I think theirs involved mayonnaise, but in the interest of caloric content, I have dispensed with that here.  You'll never miss it.

*  And no, don't worry.  I haven't sworn off posting fat-laden, delicious recipes.  Just thought we all needed a break.  Here's to the Skinny Cook Quest!

Friday, March 18, 2011

The Joys of Parenthood

I'm a pretty happy camper right now since my eldest son (that would be Andy) came home recently.

Home?  Who am I kidding?  He left our house in 2000 and has lived in NYC ever since.  He has a great apartment and a great life  up there, so in all honesty, I guess that's his home, not our house here in Atlanta.  Nonetheless, both he and his brother (Eric) still have their rooms in our house and I have no intention of ever, ever turning them into a gym or a library or any other such thing.  In some way, I hope they always consider this as "home," even if it isn't the house in which they grew up.

Andy's desk

Eric's room (stuffed animals and all)

When they come here, I'm like a little pig in you-know-what as it means I get to cook, bake and feed everyone to my heart's content.  This usually includes their friends, so there is no shortage of people around our dinner table.  The more the merrier, I say!

That's the good part.  Oh, but there is a bad part too, and if you have grown kids who no longer live at home, then you know exactly what I am talking about.  That's the fact that they go out late at night with their friends and don't get home until 3 o'clock in the morning.  Or later.

I know, I know.  They are adults and they manage quite well on their own in their respective cities, without  interference from parental units.  What we parents don't know won't hurt us.  But when they're under our roof?  Ha, that's a whole different story!

It starts when they head out at 11pm.  You go to bed as usual (falling asleep while trying to watch the news) and in a perfect world, you sleep soundly until 8am or so when you awaken to the sun streaming in the bedroom and the car parked in front so you know they made it home safely. 

Oh, but that's not what happens!  You fall asleep during the news alright, but then you wake up to turn off the TV at 2:30am and you can't help yourself.  You get out of bed, pad down the hall and realize that the outside lights are still on and they still aren't home (not that you expected them to be).  Crap.


You then go back to bed and pretend you are going back to sleep, but of course you don't.  You lie there, imagining all sorts of horrible things until you finally hear the key in the lock and the sound of muffled voices.  You breathe a silent sigh of relief, roll over and finally - FINALLY - drift off.  Of course, now it's 3:30am.  This will not serve you well when it's time to get up.  Or for the next two days afterwards.  Sigh.

So I take my joy in the fact that we are sleeping under the same roof (well, sort of, considering that they probably don't hit the bed within 3 hours of my getting up) and spending some good time together.  When Andy shows up, that means good time in the kitchen. 

This past weekend, he introduced me to Matbucha.  He described it as a cooked salad which originated amongst Moroccan Jews.  He calls it peasant food which is common to Israel and consumed at almost every meal.  I looked it up and of course he knew exactly what he was talking about.

http://en.wikipedia.org/wiki/Matbucha

We enjoyed it with dinner that evening and I will confess that I polished off the leftovers at breakfast for several days after he returned to New York.  While you might want to enjoy it for lunch or dinner instead, I highly recommend that you whip up a batch of this stuff.  It's another one of those easy recipes where the whole is greater than the sum of its parts.


ANDY'S MATBUCHA

2 tablespoons extra-virgin olive oil
4 green bell peppers, cut into large dice
1 large yellow onion, sliced
2 jalapenos (or other hot pepper), chopped
4 cloves garlic, minced
2 28-oz. cans diced tomatoes
1 6-oz. can tomato paste
Salt and pepper, to taste
Ground cumin, to taste
Cayenne pepper, to taste
Paprika, to taste
Zhatar seasoning, to taste

Heat olive in a large saute pan over medium heat.  Add green peppers, onion and jalapenos and cook, stirring frequently,  for 12 - 15 minutes until soft and tender, but not caramelized.  Add garlic and cook 1 minute more.

Add diced tomatoes and tomato paste.  Increase heat to medium-high and cook for 15 minutes more or until mixture thickens slightly.  Add salt, pepper, cumin, cayenne, paprika and Zhatar to taste.  Reduce heat to medium and cook for another 5 minutes to let flavors meld.  Taste to adjust seasonings.

Yield:  6 to 8 servings


The better the beer, the better the finished dish, right?


*  I would love to give you more specific amounts, but I was lucky just to get the basics from Andy  (see picture with beer).  He cooks like I do - a little of this, a little of that, oh and maybe more of both.  You can trust me that this recipe is delicious, but you're gonna have to trust your own judgment on the seasonings.

*  You can serve this warm, cold or at room temperature.  You can eat it alone, you can serve it as a side dish or you can serve it as a complement to meat, fish or chicken.  Or, take a leaf from my book and eat it for breakfast which I think is a healthy and spicy way to start your day!

*  One more thing.  Andy learned his basic cooking skills from me, but I think the student has now surpassed the teacher....

Thursday, March 17, 2011

A Naked Broccoli Soup with Garlic Herb Sourdough Croutons


It's St Patrick's day! And after 'bastardising' the classic Irish shepherd's pie, I thought I'd redeem myself with a very green soup!

I'm sure we've all had our own fair share of broccoli and stilton soups, and while I love the savoury richness of cheese with broccoli, I want to really celebrate the flavour of broccoli. This velvety soup has nothing but broccoli in it, no cream, no potato, no stock, no caramelised shallots. It really is just broccoli. But believe me, it's definitely not lacking in flavour or texture. I was doubtful too when I first saw Gordon Ramsay share this recipe, but I tried it, and I love it, and once again, he's a genius.

Naked Broccoli Soup
serves 2-4
Ingredients
1 large head of broccoli, florets only (if you want it really green)
2-3 tsp sea salt
freshly ground black pepper
extra virgin olive oil

Method
1. Bring a pot of water (just enough to cover the broccoli) to the boil, with half the sea salt.
2. Add the broccoli and boil rapidly till cooked i.e. can pierce. Do not overboil unless you want brown soup.
3. Add in the remaining sea salt and black pepper and blend. Test for seasoning after that again. It's the constant seasoning in stages that makes all the difference.
(Ramsay drains the broccoli, but saves the stock- yes, that boiling water chock full of broccoli is all the stock you need- to add to the pureed broccoli. Since I like to minimise the number of dishes to wash, I make sure I start out the right amount of water and use a hand blender, so I've only got that and the pot to wash hehe)
4. Serve with a sprinkle of garlic herb sourdough croutons (see below) and a drizzle of evoo.

Garlic Herb Sourdough Croutons
you can easily double or triple the recipe for some easy salad/soup toppers; it's a great way to use up stale bread.
Ingredients
1 slice of sourdough bread, cut into small cubes
1 clove garlic, chopped finely
1/2 tsp of dried herbs (any you fancy)
1 tbsp extra virgin olive oil

Method
1. Pre-heat the oven to 180 degrees celsius.
2. Over medium heat, add the garlic and dried herbs to the evoo, until the garlic is lightly browned.
3. Pour the garlic and herb-infused oil over the sourdough bread cubes, tossing to coat all of them evenly.
4. Spread the bread cubes out over a baking tray, and bake for about 30 min, stirring halfway through, or till crunchy.


I'm sure you're itching to throw in a rind of parmesan or screaming "some nutmeg!" at the laptop screen, but no, just try to taste the simple clean flavours of broccoli in this creamy (yet light) soup for once, I'm sure you'll be pleasantly surprised.

Thursday, February 24, 2011

Celeriac and Halzelnut Soup


Celeriac. Must be THE ugliest vegetable I've ever seen. Just look at its knobbly and twisted surface; it's no wonder most people avoid it. But peel away (actually more like cut. it's got really thick skin) the outer layers, and you have a beautiful cream-coloured inside,that gives off a sweet nutty smell and flavour, a bit celery-like but much milder and without the fibrous texture.


Anyway, I picked this thing up because I like to get the odd vegetables at the Farmers' Markets. There's not much fun in getting something you can see in the supermarkets anyway, is there? When I don't know what to do with a new root vegetable, there are 2 fail-safe ways I usually turn to: roasting, or turning it into soup.

Celeriac and Hazelnut Soup
serves 2-4
Ingredients
1 medium celeriac, peeled and chopped
1 medium potato, peeled and chopped
1 small onion, peeled and diced
small handful of hazelnuts, soaked overnight and skin-off
2 cups vegetable stock
about 1/3 cup whole milk (raw)
sea salt and black pepper to taste (about 1/2-1 tsp)
1 tbsp evoo + 1 tbsp butter

To serve
fresh parsley
couple of hazelnuts, lightly toasted

Method
1. Over medium heat, sweat the onions in the evoo and butter, till translucent
2. Add the celeriac, potato and hazelnuts, and saute for 5 min more.
3. Add the vegetable stock and seasoning, bring to a boil, and simmer for about 20-30 minutes (depends how big you chopped the vegetables), or till they're all soft.
4. Remove from heat, and blend, adding in the milk till you get a smooth creamy consistency.
5. Meanwhile, lightly toast a couple of hazelnuts (skinless) over medium high heat in a dry pan.
6. Check soup to adjust the seasoning if necessary, before serving with the toasted hazelnuts and parsley for some freshness!

Garnish with the lightly toasted hazelnuts. (to both add crunch and to hint to the person drinking the soup that there's a secret ingredient inside!)

This soup is really velvety and smooth, with that mild, sweet nuttiness coming from both the celeriac and the hazelnuts. I just love that pretty cream colour too. Funny how a while ago I just said it's the ugliest vegetable ever.

By the way, I saw spinach at the Farmers' Market! Could it be...... spring is coming!

This is part of Weekend Herb Blogging.