Showing posts with label Stir-fry. Show all posts

Tuesday, May 24, 2011

Top-to-Toe Radish Stirfry


Green tops and pink bottoms! Such a beautiful combination.
No I don't mean clothes (my fashion-savvy sister will probably axe me). I mean radishes.
I got a bunch of them while working at Pimlico farmers' market on saturday, purely because they looked too pink and pretty to miss. It's not a ditzy girly thing. Just look! They are pretty.


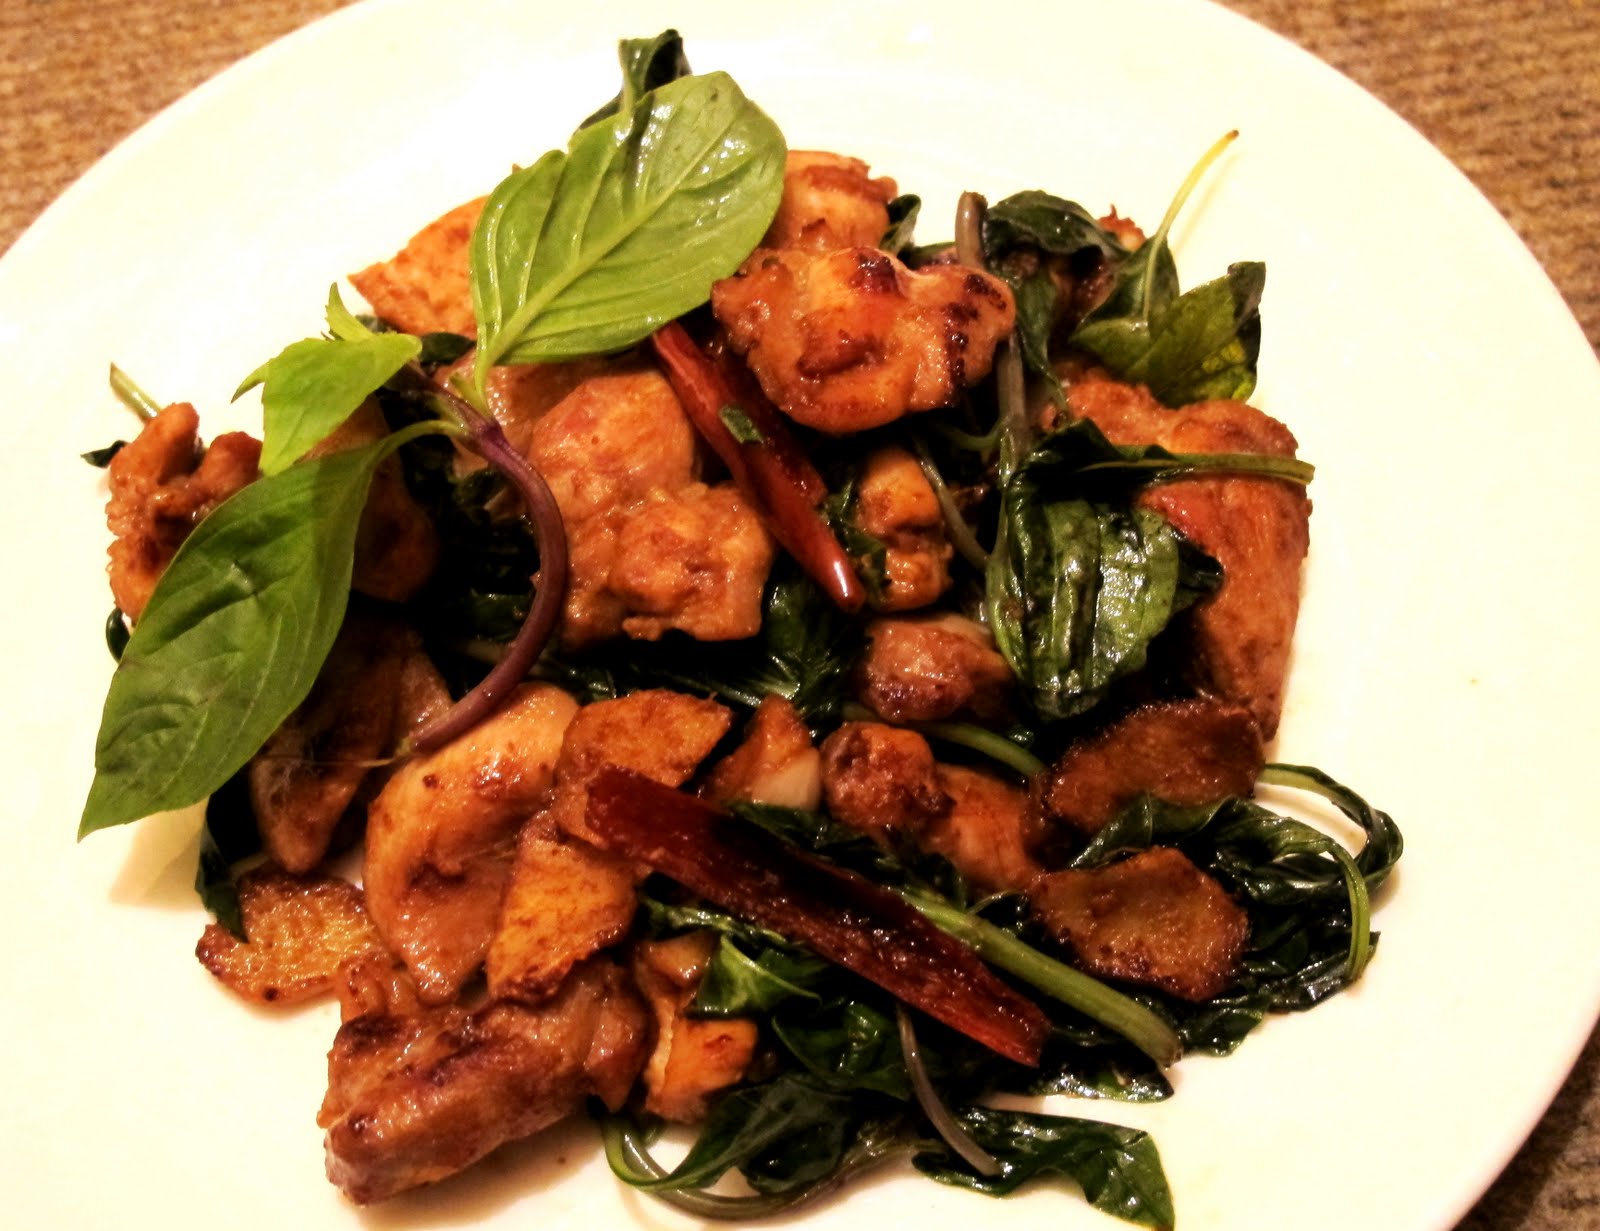
I like radishes raw and sliced thinly to add a little kick to salads, or in tzatziki style dips. But I don't think many people know that radishes are absolutely delicious cooked too! Also, did you know that the radish leaves can be eaten too, much like beetroot? The leaves look a little like pea shoots, but have a slight radish-y sharpness. Here's a super fast stirfry with some sesame oil, garlic and spring onions (also bang in season) to celebrate the whole radish, from top to toe!

Top-to-Toe Radish Stirfry
Ingredients
1 bunch of radishes, washed
2 cloves of garlic, chopped
1 spring onion (white and green parts), chopped
1 tsp fish sauce (or you can use naturally fermented soy sauce)
dash of white pepper
1/2 tsp sesame oil
1/2 tbsp extra virgin olive oil

Method
1. Separate the leaves from the radish roots. Quarter the roots.
2. Heat pan over medium-high heat, and add the evoo. Add the white parts of the spring onion, garlic and sesame oil and toss for 1-2 min.
3. Add the radish roots and stir-fry for 3-4 min till their insides turn from an opaque white

to a glossy translucence.


4. Add the radish leaves and the seasoning, and stir-fry for 1 more min until the radish leaves are wilted. Scatter the chopped green parts of the spring onion over to serve.


I really like my radish cooked for a change. The sharpness of the radish mellows, and it takes on a mild daikon radish/ turnip-like sweetness. The leaves add a nice contrast of texture (a bit like pea shoots), and of course, you can never go wrong with sesame oil and toasted garlic!

Oh and if you're wondering why you only see pink bottoms but no green tops in the plastic bags of radishes from Tesco's, and you feel unfairly shortchanged, it's time to make a trip down to the farmer's market ;)

This is part of Hearth and Soul Blog Hop.

Tuesday, March 29, 2011

Three Cup Chicken 三杯鸡


I know I talked about growing your own herbs, but it's kind of funny because I really only started to learn about herbs after I moved to London.

In Singaporean food, there are a lot of spices involved, but not really herbs. Curry leaves, pandan leaves, banana leaves are used to impart fragrance, but they aren't really herbs are they? In Chinese food, especially, you don't really need anything besides coriander and spring onions. That said, they're used a lot, and go into everything from soups to stir-fries.

But once in a while, you do get the odd herb that's not one of the aforementioned two. Introducing... the Thai Basil!

It has a slight purple-ish tinge to its much tougher stalks.

It's kind of different from the sweet basil that's more commonly used here, because it has a strong anise-like scents that adds a very different dimension to dishes, and also, it holds us a lot better in cooked dishes, unlike sweet basil, which is best eaten raw I feel.

Thai Basil is an important part of Thai dishes (duh) but also in this less known Chinese chicken stirfry reminiscent of the more famous Kung Pow Chicken, called Three Cup Chicken. Three Cup because the original recipe called for 1 cup of each of these 3 Chinese pantry essentials: sesame oil, Chinese rice wine, and soy sauce.

But I guess it's a really small cup, (haha see Chinese tea cups) because you definitely do not need a cup of each. Or maybe because Half Cup Chicken just doesn't have the same ring to it. Nonetheless, what's more important is that you need to keep them in the same ratios, how easy is that to remember!

Three Cup Chicken 三杯鸡
serves 2
2 chicken legs (about 500g), deboned and chopped into small pieces
(it's important to keep them in small pieces, so they all get coated in the sauce, because they aren't marinated in seasonings like other chicken dishes e.g. sesame oil chicken 麻油鸡, and will turn out bland otherwise.)
6 cloves garlic, peeled but left whole
6 thin slices of ginger
2 tbsp sesame oil (traditionally black sesame oil, which has an even stronger aroma)
2 tbsp Chinese rice wine (Shaoxing Hua Diao Jiu, do not replace with cheap cooking wine!)
2 tbsp soy sauce (naturally fermented and aged)
2 tbsp blackstrap molasses (or you can use brown/rock sugar, but I like using molasses when I cook with soy sauce)
handful of Thai basil leaves
3-4 dried red chillies

For velveting the chicken (optional)
1 egg white, beaten but not frothy
1 tbsp cornstarch
1 tbsp Chinese rice wine

Method
1. (optional) 20 min before you are ready to cook, marinate the chicken in the velveting mixture. 20 min later, parboil the chicken in simmering water till they turn white on the surface, but are not yet cooked. Drain and set aside.
(I'm in the midst of my Chinese stir-fry secrets experiments. You can try the baking soda /poaching in oil methods too and let me know! )
2. Heat work/pan on high heat and add the sesame oil.
3. Add the garlic and ginger and stir-fry for 2 minutes till fragrant.

yes they are left whole! If you haven't yet realised, this dish is not shy on flavour!

4. Add the dried chillies and chicken pieces and stir-fry for another few minutes.
Keep stirring or you'll burn your food! This whole dish is cooked on high heat, so the meat is nicely seared and caramelised!
5. Add the other sauce ingredients, and let it simmer, covered for another 4-5 min, till there's sticky and no longer wet.
6. Add the Thai basil leaves and then immediately remove from the heat. They will wilt in the residual heat.

This dish is traditionally cooked in a claypot, so you just serve it in the claypot. I don't have one the right size, so oh well, dish out and garnish with an extra sprig of fresh Thai basil and serve with rice.

This is great humble food, simple yet bursting with flavour. The sweet salty caramelised chicken has a sticky coating of sauce (it's a dry dish, you aren't supposed to be left with a pool of gravy), amped up with the kick from the ginger and whole garlic cloves and chillies, and perfumed with that anise scent from the Thai Basil, and one of my favourite smells in the world--sesame oil! If you can;t find Thai Basil, I guess you can use normal sweet basil, it will still be good, but it will not be Three Cup Chicken.


Wednesday, March 2, 2011

Chilli Belachan Crispy Pork Belly


What to do with leftover roast pork belly? Honestly, it's not much of a problem, who am I kidding, I'll be more than happy eating it as it is. But just to spice things up a little, I stir-fried the leftover pork belly in true Singaporean style, with some chilli and belachan (fermented shrimp paste).

Chilli Belachan Crispy Pork Belly
Ingredients
~100g of leftover roasted pork belly, sliced into small chunks
1 small onion, sliced thinly (or a couple of shallots would be fantastic)
1-2 dried red chillies, deseeded
1 tsp fermented shrimp paste
1 tsp unrefined cane sugar
1 tsp soy sauce (traditionally brewed)
1 tsp Chinese black vinegar
1 tsp evoo (or unrefined coconut oil or palm oil)

Method
1. Over medium-high heat, fry the sliced onions in the oil, till they turn golden brown.
2. Add the dried chillies and fermented shrimp paste and toast till fragrant.
3. Add the pork belly, along with the vinegar, soy sauce and sugar, and stirfry for about 10 min more.
4. Serve over rice with some fresh coriander leaves (which I didn't have).

This dish really hit home with the mix of salty, sweet, sour, savoury and of course, spicy flavours, and the depth from the fermented shrimp paste. Really, you can't go wrong with crispy pork belly, but you can be more than just "right"!

This is part of Full Plate Thursday.

Wednesday, February 2, 2011

Stir-fried Leeks with Beef and Beancurd


It's Chinese New Year! Back home, my family's probably having a feast with lots of abalone and sea cucumber and roast duck ): The Chinese New Year fare is not only about the expensive or rare ingredients though, often it's the simple vegetables that shine. I love leeks, and as my mum happily informed me, that's going to bring me lots of wealth. Leeks are 蒜苗/大蒜 ('suan'), which sounds like “算”i.e. count, so the Chinese believe it means you will have lots of money to count. You could do it minus the beancurd too, or with extra vegetables like carrots, but the golden beancurd represents happiness (white tofu not recommended..white=death?) I can't promise you'll suddenly get a windfall with this, but no harm having some lucky food in you right? ;)

Stir-fried Leeks with Beef and Beancurd
serves 2-3
200g beef rump (it's a cheap cut but check out the Chinese stir-fry tips I learnt on how to make cheap meats tender even if you aren't slow-cooking it!)
1 medium leek, sliced into about 5cm long pieces
100g firm beancurd, chopped into medium pieces
1 red chilli, sliced thinly
2cm ginger, sliced thinly
3 cloves garlic, minced
1 tbsp of olive oil+2 tbsp of coconut oil/palm oil

For marinade and velveting
1/2 tbsp cornstarch
1/2 tbsp Chinese rice wine
1/4 tsp baking soda
1 tsp good (naturally aged) soy sauce
pinch of five-spice powder
few drop sesame oil

For sauce
4 tbsp of homemade stock
1 tbsp good (naturally aged) soy sauce
1 tsp of Chinese rice wine (shaoxing/huadiao)
1 tsp Chinese black vinegar
1/2 tsp of sesame oil
pinch of sugar
1tsp of cornstarch mixed with 1 tsp water (to thicken)

Method
1. Slice the beef thinly against the grain. Mix well with the marinade and then leave it aside for 30 min.
2. Meanwhile, you can prep your ingredients, wash the dirt off the leeks and chop everything up. Also, mix the sauce ingredients except the cornstarch and water so later you can have a relaxing stir fry.
3. Over med-high heat, add half the oil and fry the firm beancurd for about 5 min till light brown and set aside.
4. 30 min should have passed. Over high heat, add the rest of the oil and flash-fry the beef for 1 min, then remove from the pan (sorry no wok) and let drain and set aside.
5. Add the ginger and garlic to the hot oil, fry till fragrant. Add the leeks and chilli and cook till the leeks soften.
6. Add the sauce, which should help deglaze the pan. Let it come to the boil, then reduce the heat.
7. Stir in the cornstarch slurry a little at a time till you get the consistency you want. Note: it will thicken after it cools, so don't go pouring everything at a go!
8. Add the beef and beancurd (finally all the ingredients are happily together!) and stirfry for 2 min or so, making sure everything's coated.
9. Serve over a steaming bowl of rice (:

The beef, prepared this way, is really tender, oozing with juices and flavour-- no need for expensive sirloin steak cuts. Yay for frugal ingredients (:

The Secrets to a Chinese Stir-fry

Whenever people think of Chinese food, they naturally think of stir-fries. It's like the equivalent of Chinese cooking, but I think there's so much more to Chinese food. A lot of effort goes into the food, all the careful steaming to get everything done to perfection, the braising, the slow-cooking for tender and flavoursome food. It's not all quick, easy stir-fries. Chinese restaurants in Singapore (and in China I assume) are so so different from the Chinese restaurants here which serve up MSG-laden sticky and oily deep-fried food.

That said, a good Chinese stir-fry is not that easy. Even with the exact same ingredients and recipe my stir-fry can never match up to that of my favourite tze-char stalls in Singapore. I love cooking and finding out about food, to the extent of a nerd actually. So here are the compilation of tips from surfing a lot of forums, watching a lot of Youtube and master chefs, and Saturday Kitchen on BBC iplayer.

1. High heat!
Sauteeing slowly over low-heat doesn't sear the meat and vegetables the same way, and everything needs to be done fast, which brings me to the next point

2. Fast!
It's not always the more the better, in this case, more time is not better. It always amazes me how much time goes into the prepping of the ingredients but the actual stirfry is over in a matter of minutes.

3. A wok
The heat distribution of a wok is quite different form that of a frying pan. It's where you get that wok hei, that smoky depth to the food at tze char stalls or restaurants. Also, because it curves in at the base, you can "deep-fry" garlic, shallots and ginger without having to use much oil. I don't have this ): I will always be inadequate. Boo.


With meat, I've always wondered how Chinese chefs get the meat so tender and juicy despite the fast cooking on high heat. So anyway, Ken Hom revealed the secret to this on the recent episode of Saturday Kitchen:

4. Velveting
You coat the chicken or whatever meat pieces in egg white, cornflour and some rice wine, before cooking in warm (forums say hot. but the Ken Hom says warm..) water or oil, take it out before it's cooked, because it'll continue cooking on slowly, and that add it back to the dish at the end for a final heatshock. I was so fascinated I trawled the forums and found out some people use baking soda instead too.
So, it goes like this
For about 500g of meat, let it marinade for 20-30 min in:
1/2 tsp baking soda OR 1 eggwhite
1 tbsp cornstarch
1 tbsp Chinese rice wine (shaoxing/huadiao)
1/2 tbsp or so of oil (I'll use sesame oil)
any other flavouring agents like soysauce etc.
2 tbsp of water/stock (for beef esp, apparently because beef will absorb more water when cut)
I like the idea of parboiling in water, so you get a lighter dish than using oil to parcook. I've tried chicken cooked this way before I almost thought it wasn't cooked because it was so tender! But I'm not sure if it'll work with beef?
Future project: Experiment with all the techniques (baking soda/eggwhite, water/oil, warm/hot), using different meats, then do an update someday ;)

5. Slicing
For meats like beef, slice against the grain, and slice thinly.
Tip: Partially freeze it so the meat stiffens up and you can go real thin diagonally easily.

Ah I know I'm weird, but I really enjoy doing research like this.

Sunday, January 16, 2011

Two-Kale Stir-fry


This is less of a recipe writeup, and more of a showcase of these two beautiful vegetables which are in season right now, but unfortunately, you don't get to see in the supermarket:

Tuscan Kale/ Dinosaur Kale/ Black Cabbage/ Cavolo Nero (posh)

Purple Curly Kale

Doesn't it sound like I plucked them from some secret mythical garden?

Two-Kale Stir-fry
serves 4 normal people or 1 veggie-lover
Ingredients
1 large bunch tuscan kale, washed and dried and cut into bite-sized pieces
1 large bunch purple curly kale, washed and dried and cut into bite-sized pieces
3 cloves garlic, finely chopped
1 small onion, finely chopped
1 tsp of extra virgin olive oil (+ 1 more tsp)
1 tsp of butter
sea salt, pepper (to taste)
pinch of nutmeg (opt)
squeeze of half a lemon (opt)

Method
1. Melt butter with the 1 tsp of evoo over medium-high heat, in a large frying pan. (else the kale will not be stir-fried properly)
2. Fry the garlic and onion till golden/translucent, not browned.
3. Add the kale, turn up the heat, then add a splash of water (which quickly turns to steam). When I have some homemade stock at hand, I use stock; it makes all the difference!
4. After the kale has wilted and all the liquid is absorbed, remove from heat, add the extra tsp of evoo, sea salt, nutmeg and lemon juice. Mix well and serve!

This is my simple no-fail method for any greens (or purples or blacks heh)-- spinach, spring greens, chard whatever! So, happy substituting, just note they have different cooking times e.g. spinach takes literally seconds to wilt, while kale's a lot tougher.

Tuesday, June 15, 2010

Phad Thai and Cooking Like a Pro

Professional chefs work differently to home cooks. This is a lesson you learn very early on in a restaurant kitchen.

Working a successful service relies on a number of key practices but chief amongst these is doing one’s meez before the first ticket comes in.

Meez , short for mise en place, a French term for ‘putting in place’, means getting everything ready to go so you aren’t faffing around chopping vegetables when you should really be concentrating on cooking that sea bass for table 14.


It is getting everything how you want it, where you want it so when the time comes all you have to do is cook.

Whilst this is good working practice for a professional environment, it is a lesson I’ve brought home with me as well. I approach cooking differently, first doing any peeling or butchery then moving onto chopping and the like.

Only when everything is ready to go, do I start cooking. This actually cuts down the time spent in the kitchen and means that hands on cooking is as swift and smooth as possible.

More importantly it means there isn’t a mountain of washing up to do after dinner because all the clearing up is done as you go along – another lesson you learn very quickly in professional kitchens.

A chef friend of mine put it rather more succinctly. ‘The six Ps,’ he said when we were talking about cooking for paying customers. I looked at him blankly. ‘Proper preparation prevents poor performance.’

‘That’s only five,’ I replied. ‘Five Ps.’

‘Oh yes,’ he said. ‘I gave you the clean version. Commis chefs get the six P chat. Proper preparation prevents piss-poor performance.’

And he’s right.

One dish that really benefits from this approach is a stir-fry when you have a matter of just a few minutes to actually cook everything and Phad Thai is a real favourite. Last time I visited the family, my sister asked me the best way to cook this. I gave her a little lesson but neglected to write down the recipe so, Ellen – this one’s for you.

Ellen’s Phad Thai
The key flavourings are palm sugar (although you could sub in brown sugar) for sweetness, tamarind and lime for sourness, fish sauce and soy for saltiness and chillies for heat.


The core philosophy of Thai food is ensuring these are balanced so feel free to play with quantities as you see fit: There are no rules – it is a dish from the streets of Bangkok. It is fast, filling and very tasty indeed.

Ingredients are listed in the order they should be cooked

Per person:
Cooking oil (2-3 tablespoons)
½ carrot, sliced into thin strips
½ onion, finely sliced
2 cloves of garlic, finely sliced
Tablespoon of pickled radish or pickled turnip (you should find this in your friendly local Chinese supermarket)
Fresh red chillies, finely sliced
2 spring onions, finely sliced

10-15g palm sugar
2 tablespoons of tamarind
1 tablespoon fish sauce
1 tablespoon soy sauce

100g rice noodles, cooked in boiling water

1 egg, beaten

Tablespoon of peanuts, roasted and roughly ground
Tablespoon of dried shrimp

To finish
Bean sprouts
Finely shredded spring onion
Finely shredded red chillies
Roasted and ground peanuts
Lime wedges

Once the first ingredient goes into the hot oil this dish is about two minutes away from the plate so you have to work quickly. Get all your ingredients ready to go and set up in order – this is your mise en place. Congratulations, you are now a chef.


Heat up a wok so it is good and scorching. Add the oil then tip in the onion, garlic, carrot, chillies and pickled radish (or turnip). Move around the wok then add the flavourings: tamarind, palm sugar, fish sauce and soy stir well then add the cooked noodles. Coat with the sauce then make a well in the centre and add the egg. Let it cook, scramble it and incorporate it into the dish.

Sprinkle in the dried shrimp and peanuts, stir one last time and spoon into bowls. Garnish with bean sprouts, spring onions, chillies and peanuts then feel free to go crazy with the seasonings to pep up the dish to your own personal tastes. Finely chopped bird’s eye chillies in fish sauce is a real favourite that always brings back the memory of Thailand.

Who needs a takeaway?