Showing posts with label Baked. Show all posts

Thursday, May 19, 2011

Sambal Chilli Asparagus and Gruyere Crustless Quiche


Asparagus. The coveted spears of spring. I can't remember where I heard that phrase before but it's been stuck in my head ever since. I love asparagus, and to me, the flavour of fresh British asparagus really can't be beat. The best way to enjoy them is simply steamed, with a knob of butter melted over (try flavoured butters like chilli coriander and lime zest butter).


But asparagus is so terribly expensive though. I actually googled it before - "why is asparagus so expensive". Yes I am that geeky. (What will we do without google??) Anyway. Apart from that fantastic flavour, it's also because asparagus take 2 years to harvest and bring returns and of course, because they only appear for such a short period of time i.e. spring. I figured it would be a shame to let spring slip by without an asparagus dish, so I got some at Pimlico farmer's market and stretched them further in a quiche-- one of my favourite ways to throw in any vegetables and experiment with lots of flavour combinations (even yes, sambal chilli).

Basic Crustless Quiche
I love quiche. It was my staple buy every time we passed a bakery in Paris last summer with my sister. And I will share a proper quiche recipe sometime in the future, I used to be scared of shortcrust pastry but it really isn't that difficult after all! But when you just want an easy lazy Sunday brunch, you can't be bothered with all that mixing and rolling. Without a crust as a base, the ratios are adjusted such that the quiche is less decadently custardy, but it is not a frittata. It's confusing seeing people call their frittatas quiches, because frittatas don't have all that luscious cream (or milk) added; for quiche, think: more cream less eggs.
Ingredients
3 eggs, beaten
1/2 cup cream (preferably grassfed)
1/2 cup whole milk (preferably grassfed)
3/4 cup grated Gruyere cheese (or Emmental or even Cheddar)
a handful of grated Parmiggiano (optional)


Sambal Chilli Asparagus and Gruyere Crustless Quiche
Ingredients
7-8 stalks of asaparagus
1 medium onion, chopped
1 tbsp sambal belachan (replace with chilli paste if not available)
1 tsp chilli flakes (or to taste)
3 eggs, beaten
1/2 cup cream (preferably grassfed)
1/2 cup whole milk (preferably grassfed)
3/4 cup grated Gruyere cheese
pinch of sea salt
1 tbsp extra virgin olive oil

Method
1. Pre-heat oven to 180 degrees celsius.
2. Prepare the asparagus by snapping off the woody bottom part of the stalk. Cut the remaining stalks into halves, leave the top half whole, but further chop up the bottom half into bite sized pieces.
3. Over medium high heat, add the oil to the hot pan, and then add the onions to sweat.
4. Once onions are translucent, add the sambal belachan and the top half of the asparagus, saute for a couple of min, before adding the bite-sized asparagus pieces, and cook for 3 min more till almost tender but not soft.


5. To a inch pie dish greased with some butter or oil, spread the onions and asparagus pieces over the base of the dish.
6. Beat the eggs with the cream and milk, season with the salt and chilli flakes, and pour over. Arrange the asparagus tips on top in a starburst pattern (mine shifted when I moved it into the oven ): )

7. Bake for 30-40 min until set with slightly browned edges but centre looks a little jiggly still, as it will continue to cook out of the oven. Leave to cool before cutting into it.


The chilli adds some kick to a classic quiche, and the belachan (fermented fish paste) in the sambal chilli adds a very special salty savoury depth to the asaparagus, the same way the british use bacon to add an extra something. This quiche is rich with flavour and requires hardly any effort, and I can have it for breakfast, for lunch, as a teatime treat maybe, and then for dinner and then supper after so it's a real time-saver. No I was kidding. Actually, no I wasn't.

This is part of Full Plate Thursday.

Monday, May 2, 2011

Spice-crumbed Pouting Fillets with Cumin Minted Peas


I was watching Jamie's Fish Supper (part of Channel 4's The Big Fish Fight) on youtube, and he was introducing new fishes in the British waters that are less popular and known than our usual salmon and cod. I've always supported getting these 'unwanted' fishes, not just because they are a much more sustainable option that's better for the environment, but because they are a lot cheaper, and also because they do taste fantastic. I've tried mackerel and sardines, but there are some fishes that I've never heard of until this show, one of which is the pouting.

Pouting fillets (skin side down, skin side up)

"Pouting is a totally underrated fish. It's way up there quality-wise and is buttery, flaky juicy and delicious, not to mention a wonderful carrier of flavours. It's from the same family as cod so makes a great alternative to its overfished cousin." Jamie believes that if more people start asking for this at the supermarkets' fish counters, these big supermarket giants will start to see a demand for these 'lesser fishes' and start stocking them, reducing the pressure on the overfished favourites. And I think it's working. Because, guess what I saw when I went to Tesco's? (:

Like Jamie, I breadcrumbed my pouting fillets, but tossed in some chilli and spices too, and also made cumin minted peas and baked spicy sweet potato chips (not pictured, because my timing was off, so they weren't ready by the time the fish was done). This is (sustainable) fish and chips with an Indian twist!

Spice-crumbed Pouting with Cumin Minted Peas
serves 2
Ingredients
For the fish
2 pouting fillets
2-3 tbsp plain flour
1 egg, beaten
about 3/4 cup breadcrumbs (I used stale sourdough bread, dried in the oven, then crushed in a ziplock bag)
1/2 tsp chilli flakes
1/2 tsp cumin powder
1/2 tsp garlic powder
pinch of turmeric
sea salt, white pepper
2-3 tbsp ghee/coconut oil (for frying)

For the peas
1 cup frozen peas (I tried this with fresh peas again. AMAZING.)
2 heaped tbsp butter (yes. that's the key to yummy peas, according to marco pierre white)
1/2 tsp cumin
handful of chopped mint leaves
sea salt, black pepper

For the sweet potato chips

Method
1. Pre-heat oven to 180 degrees celsius.
2. Mix the breadcrumbs with the chilli, cumin, garlic, and turmeric.
3. Prep your fish fillets in this order: season, then coat with flour, then egg, then breadcrumbs.

I originally wanted to bake them

4. Over medium high heat, add the oil, and when it's hot, add the fish fillets. Don't be nosy and poke around! Just leave it there till the bottom gets golden and crisp about 5-6 min, before flipping carefully to cook for another 2 min, lowering the heat. Set aside, tented with foil.
5. Add some water to the pan, and throw in the butter to create an emulsion.

I love watching butter foam.

6. Add the peas with the seasoning, cook for 3-4 min, before adding in the mint. Drain, serve.


Start to finish took only about 15-20 min!

The chips though, take about 45 min... so yes, learn from my mistake ): either start them early, or well, deep fry them (in loads of healthy saturated fat, like coconut oil or ghee or lard).

I had my modified fish and chips with malt vinegar sprinkled over of course, and some Indian mint raita instead of tartare sauce.


Verdict: Moist flaky flesh, definitely comparable to cod! I really liked the texture of the fish, and although not exactly full of flavour, the fish carried the flavours of the spices well. Yum. As for the peas, do try adding the cumin and mint, they really bring out the sweetness of the peas, and of course, you must add the butter, butter makes everything better (:

Friday, April 15, 2011

Salmon Korokke (Croquette) Balls with Wasabi Avocado-naise


Since I posted a recipe which gives canned sardines a makeover following a post on roasted whole sardines, I thought it would be fun to share a recipe giving canned salmon a run for its fresh counterpart following my chilli-soy marinated salmon post. While the canning methods may affect the nutritional profile of salmon slightly, canned salmon is still rich in omega 3 fatty acids, protein, and calcium due to the soft edible bones. What's more, I can get wild Alaskan salmon without breaking the bank, in fact, it's really very cheap when you buy the bulk cans. (Farmed salmon is really not worth your saliva. Did you know that that beautiful orange-pink in farmed salmon comes from chemical dyes, not from the prey they feed on as in wild salmon?)

So here goes!

Salmon Korokke (Croquette) Balls with Wasabi Avocado-naise
makes 10 balls
Ingredients
400g can wild Alaskan salmon, drained
1 stalk spring onion, chopped
1 tbsp garlic powder (you can also use fresh garlic, but I find the garlic powder also helps bind the mixture, kind of like flour)
1/2 tsp sesame oil
1 egg, beaten
1/2 cup breadcrumbs (I put stale sourdough bread into the oven with some olive/sesame oil to lightly toast/dry out, then crushed them in a ziplock bag. You can also use a food processor. For a more Japanese korokke, you can use panko breadcrumbs, but I don't agree with the ingredients in these.)

Method
1. Preheat oven to 200 degrees celsius.
2. Combine the salmon, garlic powder, spring onions and beaten egg. Form little balls with your hands.


3. Roll them about in the breadcrumbs so they all get an even layer of crumb coating. Refrigerate for about 1h or so if you have time.


4. Grease a baking sheet and arrange the croquette balls, spacing them out so they aren't touching. If your breadcrumbs aren't already infused with oil, spray a mix of olive oil and sesame oil over the croquettes so they will crisp up nicely. Bake in the oven for about 20 min, or till crispy and golden.


for the wasabi Avocado-naise
Ingredients
1 ripe avocado
2 tbsp rice vinegar
1 tsp wasabi (Japanese horseradish) powder + 1 tsp water, combined to make a paste

Method
1. Combine all the ingredients together and blend. If you can't take spicy, leave the wasabi out, if you can but don't have wasabi, just sub with mustard/ horseradish. (Note: Avocado will oxidise and discolour on exposure to air, so don't do this too ahead of time!)


I'm sure we've all had our fair share of fishcakes served with tartare or dill sauce, so if you're looking for something slightly different, I think you'll enjoy this with Asian (Japanese) twist! You can flatten them into patties if you like, but I chose to make them into croquette balls because 1.it was easier to roll them about in the breadcrumbs 2. they looked cuter like that 3. so I can indulgently pop hot crispy balls into my mouth whole and get bursts of flavours and texture, yum, no fork or knife or dainty smile ;)


Thursday, March 24, 2011

Baked Egg in Jacket Sweet Potato, with Chilli Lime and Coriander Butter


Besides making the garlic and herb butter, I also made a flavoured butter, this time infused with the spice of chilli and the freshness of lime zest and coriander. I had them in the fridge anyway because of the type of food I usually cook, and I really wanted to give my own special twist to the usual herb butter.

These few nights have been a mad rush for deadlines, and I haven't had much time to spend fiddling with complicated recipes or those that need me to be hands on. There's been a lot of "throw vegetables and meat and herbs into the slow cooker", and of course, "throw things into the oven". But while I may compromise on effort, I don't compromise on taste or nutrition. A baked sweet potato is simple, yet oozing with sweetness (and vitamins), and topped with an egg, and of course, that yummy butter, I've got a hearty delicious supper ready.

Baked Egg in Jacket Sweet Potato, with Chilli Lime and Coriander Butter
serves 1
Ingredients
1 sweet potato, washed and scrubbed, but skin-on
1 egg
2 coins of chilli lime and coriander butter (see below)
a bit more butter (plain)
coarse sea salt

Method
1. Pre-heat oven to 200 degrees celsius.
2. Pat the sweet potato dry and prick all over with a fork. This allows the steam to escape and prevents it from exploding. Rub melted plain butter over the skin and season with coarse sea salt to get crispier skin.

3. Bake for about 30-45 min (depends how big your sweet potato is!), till tender. Remove, and lower the heat to about 170.
4. Cut the baked sweet potato, but not all the way. Drop one thin coin of chilli butter in so it melts into the soft sweet flesh, then crack an egg over.

Might be a good idea to transfer to an (oven-safe) dish you plan to eat from (if not already), because the egg will probably ooze all over. It's messy, but I don't really mind, I like it when the liquids (egg white, sticky sweet potato juices and spicy zesty butter) all intermingle and caramelise around the sweet potato. Alternatively, you can slice a bit off the top of the sweet potato, scoop out a bit of the flesh, then crack the egg into the hole. That'd be a lot classier, but a pretty dish wasn't really my top priority then.
5. Return to oven for about 10 min more till the egg is set. Serve with another coin of chilli butter and some lightly dressed greens.


Chilli Lime and Coriander Butter
makes 1 little log
Ingredients
1/4 block of butter
2 tbsp chopped coriander leaves (i.e cilantro)
grated zest of 1/2 a lime
1 tsp chilli flakes (to taste)
sea salt (to taste)

Method


I love this butter melted on fish (again, see previous post), but particularly on roasted root vegetables or tubers, because the spicy salty nutty melted butter just complements the concentrated sweetness of the root vegetables, and the lime zest and coriander helps to bring some freshness to counteract that stodginess.

Tuesday, March 15, 2011

Masala Kheema Shepherd's Pie


It'll be St Patrick's day in a couple of days, and I thought it fitting to share a shepherd's pie on this Irish festival. That raised an all-important question though: Is the shepherd's pie British or Irish? I always thought of shepherd's pie as a classic British thing, but others (the Irish?) claim it's Irish. Oh well. I'm doing it Indian-style anyway. Yes, indian. I want the kick of spice in my pie.

I adapted a Gordon Ramsay video recipe for the classic shepherd's pie--the man's brilliant, I love how no-nonsense he is. But I also incorporated the spices in kheema matar (spicy minced meat with peas i.e. matar. I didn't use peas, so it's just a masala mince)-- this man is brilliant too-- for an extra special touch of spicy goodness.

Masala Kheema Shepherd's Pie
serves 4
Ingredients
for the filling
500g lean minced lamb (if it's beef, it'll be cottage pie)
2 large onions, grated
1 large carrot, grated
handful of mushrooms, finely chopped
2 tbsp tomato puree
2 cloves garlic, grated
1 tsp ginger, grated (or 1 tbsp ginger-garlic paste)
1 cinnamon stick
2-3 cardommom pods, crushed
1 tsp cumin seeds
1 tsp chilli powder
1 tsp turmeric
1/2 tsp garam masla
2 green chillies, finely chopped
1/4 cup whole plain yogurt
sea salt, black pepper
1 tbsp flour

for the mash
3-4 large potatoes, peeled and chopped
1 egg yolk, beaten
2 tsp butter
1 tbsp parmesan + extra to top (optional but it's a secret ingredient that'll lift the dish)
sea salt, black pepper

Method
1. Boil potatoes.
2. Add oil to a hot pan, and the whole spices to toast.
3. Add the minced meat, breaking it up and searing the meat to get the caramelised brown. Season.
4. Grate in the onions, carrots, garlic and ginger. This helps them to disintegrate into the sauce better, a Ramsay tip, which is why I didn't add the onions before the mince like what vahchef did. Also add in the flour to cook out, this will help thicken the gravy later.
5. Add the mushrooms, ground spices and tomato puree, cook for 3 min more, then add the yogurt and let simmer for 10-15 min.
6. Meanwhile, your potatoes should be cooked. Drain, mash and season. Add the egg yolk, butter and parmesan to the mashed potato.

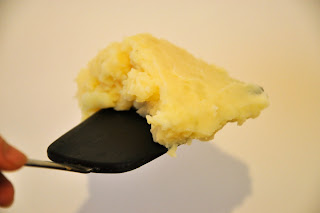
"mash that deserves to sit on my mince"

7. Add the green chillies and garam masala powder to the mince and continue to cook uncovered till you get a dry gravy. You don't want a soggy shepherd's pie. Also a good idea to pick out the cinnamon stick (and the cardamom pods) now.
8. Tip the filling into a baking dish, then top with the mashed potato and another sprinkling of parmesan. Fork through (important, to get the crispy edges!), and dot with butter.
9. Bake at 180 degrees celsius for 20-25 min, or till golden.


Serve with a light salad, hopefully more indian style with thinly sliced red onions and cilantro.


How can you not love a good shepherd's pie? You can't go wrong with buttery parmesan-mashed potatoes and minced meat that's coated with rich savoury gravy , but add to that the piquant flavour and aroma of spices, and it's definitely a winner for the singaporean in me!

Friday, January 28, 2011

Baked Apples with Cinnamon Nuts and Raisins


I don't often do desserts because it's hard to avoid all the sugar. When I do make desserts though, I try to make sure the sweetness comes naturally from fruits. This is a very very easy pudding, and one that satisfies both your sweet tooth and conscience!

Baked Apples with Cinnamon Nuts and Raisins
serves 2
Ingredients
2 Bramley apples (both a good eating and cooking apple and will end up sweet, light and fluffy inside)
a handful of chopped almonds, walnuts and pumpkin seeds (soaked and dried please! use any you fancy. pecans would be nice.)
1 tsp of raisins (if you want to jazz it up a bit, soak your raisins in rum or brandy for a couple of hours before)
1-2 tsp of brown sugar (I used raw cane sugar Rapadura)
a generous pinch of cinnamon
few dabs of butter

To serve
Plain Greek yogurt (or some raw cream or homemade custard)

Method
1. Pre-heat the oven to 200 degrees celsius.
2. Remove the core of the apples. I did it by cutting a square around the core of the apples, but stabbing my knife in at an angle, but if you have a fancy apple corer use that!
3. Mix the nuts, raisins, sugar and cinnamon together, before stuffing the mixture into the apple holes, and adding a happy dab of butter over.
4. Place the stuffed apples into an ovenproof dish, and pour some water around the apples so they don't dry out.
5. Bake for about 45 min until the apples are soft and oozing, but not collapsing. Serve with a dollop of yogurt and the apple juices spooned over.

6. Dig your spoon into it and have all the warm sweet apple juices flow out, mixed with that buttery toffee-ishness, and the crunch of the toasted caramelised nuts, and then on top of that, you have your creamy tangy yogurt. And then on top of all that, you have the reassuring knowledge that it's not loaded with the things that make a dessert sinful (:

Sunday, January 16, 2011

Baked Purple Kale Chips


Crispy, smoky, lightly salted, with the flavour of extra virgin olive oil-- you wouldn't believe these chips are guilt-free. If you have children this is a good way to get them to swap those cancer-causing Pringles for some antioxidant-filled kale! I have purple curly kale from the farmers' market, but you can definitely just use normal kale.

Baked Kale Chips
Ingredients
1 large bunch of curly kale, stems removed and cut into bite-sized pieces
generous pinch of sea salt (or to taste)
glug of extra virgin olive oil

Method
1. Wash and DRY the kale pieces.
2. Toss with the sea salt, and evoo, and spread on a baking tray in an even layer (try not to overlap!)
3. Bake at 160 degrees celsius, for 10-15 min, till they become crispy, with slightly browned edges.


You can experiment with different flavours. Try throwing in a sprig of rosemary, or some ground spices. I only thought of this after baking, but decided to toss them with some toasted garlic and chilli flakes anyway.

That's it! So easy, the only difficult part is stopping yourself from finishing all the chips. Oh wait, there's no reason to stop ;)

Tuesday, January 4, 2011

German-inspired Roasted Pork Trotters


About 2 weeks ago, my friend and I went to Berlin for the authentic German Christmas market experience. It was a crazy idea seriously, considering we were already freezing in London (we traveled smack in the middle of the cold spell). My toes turned black from the cold on the first day, not kidding, and by the last day, I was wearing all the clothes I brought so my carry-on was conveniently light. But it was great fun! One sip of a mug of hot Bailey's and one (ok much more than one) bite of sizzling bratwurst are all we needed to make us forget about the cold. And then that massive German pork knuckle at Augustiner. We ate so much pork there I was convinced I had enough pork to last me the rest of the year.

But it's 2011! (yes I knew that when I said "rest of the year") So I started to think about the pork knuckle again. It's that power combination of crispy outside and soft and gelatinous inside, the fat/collagen (I don't know which I was eating after a while) and tender meat underneath that crack!-ling. So I googled recipes and decided to try this very basic Shweinshaxe recipe out.

Then at the butcher's, I stupidly got pork trotters instead. Ahhh :( Knuckles are above the trotters, which are the actual feet?hooves? of the pig, so there's a lot more meat. Trotter= Knuckle - meat= Skin+gelatin+fat. BUT who says I must give up all hope? I went for it anyway, not knowing how it'll turn out! I slow-cooked the pieces of trotter with soup vegetables first, then once I got them soft and tender, I chucked them into the oven at a very very high temperature for 40 minutes to crisp up the skin.

UPDATE: Doesn't turn out crackling this way... ):

German-inspired Roasted Pork Trotters
Ingredients
1 pork knuckle, chopped into large chunks
1 large onion
1 carrot
1 celery stick
1 leek
salt, black peppercorns
pinch of cumin
beer/stock/water
1 tbsp of oil, preferably lard
1 tbsp of butter
pinch of cumin (or if you have caraway seeds, a tsp of that would be better!)
pinch of sugar

Method
1. Boil the pork knuckle in rapidly boiling water for 10 min or so first to clean it. You'll see alot of disgusting scum floating to the top of the water. Drain and discard the water.

Pork trotter, after the boiling/cleaning process. Piece the puzzle? ;)
2. Chop vegetables and combine with pork totters, salt and black peppercorns in a large pot filled with just enough beer/water (I used water/stock, but I wished I had beer)to cover. Bring to boil and simmer gently for 3h or so until tender.
3. Preheat oven to 220 degrees celsius. (HOT.)
4. Oil the base of a roasting tray, then arrange the pork trotter pieces on the tray, skin side up. Try to make sure there's no overlapping so all the skin will get exposed to the heat! Arrange the vegetables around the trotter pieces. Moisten everything with a ladle or so of the cooking liquid. I dotted the trotters and vegetable with a bit of butter, and sprinkled a pinch of salt, black pepper, cumin and sugar (just in case;) too.
5. Bake for 30-40 min, moistening frequently with more cooking liquid.
6. Traditionally served with sauerkraut, red cabbage, potato dumplings and a huge dollop of mustard. I served mine with Mustard-mashed Potatoes, and Braised Red Cabbage with Apples.

Verdict: You know when you eat a pork knuckle and you get bits (ok chunks) where you have to abandon your knife and just bite and puuulllll to rip the skin? That's what you get all the time while eating it! It made it a lot of fun to eat. I ended up eating twice the amount in the photo, but eh, it's mostly bones ;) and since it's an uncommon and unpopular cut, it was so cheap too! But it's NOT crackling. I've learnt that crackling has to be made with skin that's very dry, hence you don't slow cook a pork belly then chuck into the oven. This was more like pork-gnawing not pork-crackling, mouth-action/sound effect wise.

Here's some food porn:
I humbly admit it doesn't match up to that impressive pork knuckle we had in Berlin. I still want my pork knuckle! I promise I will revisit this, stay tuned.

Thursday, December 30, 2010

Olive, Tomato and Basil Sourdough Crispbread (or Crackers)


When you've got nice dips and cheese, you want something to scoop them from their containers and into your mouth. There is a fantastic recipe by Katie for sourdough crackers, but I wanted them there and then (or at least soon) and I hadn't added flour to starter 7 hours ago. You can't just pour your starter into the baking tray, because it's too liquid. Or can you? I like sourdough pancakes or crepes, because I don't have to plan in advance, I just mix up some starter with an egg and then pour the batter into a frying pan. Burst of inspiration and primary school-style curiosity. So I made my batter as usual but minus the sweet additions, then once I cooked my pancake, I cut it up and placed it on the baking tray to crisp up. It worked perfectly!

So if you need a shortcut, or shorter-cut at least...

Anyway, I topped mine with some slow-dried cherry tomatoes, black olives, plain yogurt, and fresh basil leaves. THEN as I bit through all those flavours, I thought why not flavour the crispbread/crackers with this combination?

So I chopped up the tomatoes and black olives, grated some parmesan, and added some dried basil to...THREE types of batter. One with egg white, one with egg yolk, one with both. Might as well make it a proper experiment since I already got myself into it.

Olive, Tomato and Basil Sourdough Crispbread/Cracker
Ingredients
1/4 cup starter
1 egg white OR 1 egg yolk OR 1/2 egg (check below for verdict. I recommend the 1/2 egg.)
small amount of grated parmesan
1 tbsp finely chopped slow-dried cherry tomatoes
1 tbsp finely chopped black olives
pinch of salt, pepper, dried basil
1 tbsp unrefined palm oil (or you can use coconut oil. or olive oil even. but I think palm oil helped it to crisp up?)

Method
1. Pre-heat oven to 180 degrees celsius.
1. Mix all the ingredients together except the oil to make a batter.
2. Over medium heat, melt palm oil in the pan, swirl about, then pour the batter in.
3. Cook for about 2 min till set, then flip and cook for another 1 min.
4. Cut into desired shapes. Arrange on a baking tray without overlapping. Put into oven for 20 min till crisp.

My experimental crispbreads.

Verdict:
(from left to right) Results of egg white batter, egg batter, egg yolk batter

The one with both yolk and white gives an in between result. It's more like a crispbread. Bit more depth to the flavour than no yolk.
The one with the yolk gives an almost biscuit-y texture, because the batter's quite dense, you get a very thick "pancake". After baking, when you bite into it, you get a "crunch" instead of a "crack".. do I make sense?
The whipped egg white one gives you a cracker, because the batter's more runny, you get a thinner "pancake/crepe", and crispier result after baking. But (I find) less flavourful?
This is how a "crack" looks:


Lastly, if you don't put them into the oven at all, you get a yummy gently tangy flatbread that actually works great for dips too! For that I recommend the egg white one because it feels lighter and has less..egginess? so the flavours are less confused.

Ok that's all. My old science teacher would be proud.

UPDATE: The crispbreads/crackers don't stay crispy till the next day, so you'll have to pop them back in the oven. I guess that's why you shouldn't do last minute work, but still, if you didn't prep your dough the day before, and will munch them up at a go anyway ..why not hehe.