Showing posts with label Bacon. Show all posts

Saturday, December 25, 2010

Moroccan Quinoa Stuffed Chicken Breast wrapped in Bacon


'Tis the jolly season, but for me, it's when I start missing home and my family. We don't traditionally celebrate Christmas anyway (but wait till Chinese New Year. that's when we go all out with the festive goodies!), but my sister's born on the 25th December, lucky her, so we still have some kind of a family celebration in the form of food. What else is miserable about Christmas is I haven't got a whole party of people at your house, so I don't have an excuse to buy a whole turkey to stuff and roast. Then again, I'm a secret introvert, so I was perfectly contented stuffing a chicken breast instead.

Although I say Moroccan, I've got cured pork, roast bird, cinnamon, ginger, nuts and sweet dried fruit... Merry Christmas!

Moroccan Quinoa Stuffed Chicken Breast wrapped in Bacon
Ingredients
serves 2
2 chicken breasts, skinless
4 slices of bacon (or if you've got deeper pockets, try parma ham or pancetta)
pinch of salt, black pepper
extra virgin olive oil

For the stuffing
2/3 cup cooked quinoa
1 tbsp raisins
1 tbsp chopped dates
1 tbsp chopped toasted almonds
pinch each of cinnamon, cumin, turmeric, ginger
zest of 1/2 a lemon
1 egg yolk

For the dressing
Equal amounts of
extra virgin olive oil
balsamic vinegar
(a white sauce would be nice usually, but not with the Moroccan-style stuffing; balsamic vinegar adds a bit of sharpness to the dish. plus sweetness. plus it's easier haha)

Method
1. Preheat the oven to 180 degrees celsius.
2. Mix the stuffing ingredients together and set aside.
3. Lay the chicken breasts flat on the chopping board, and then cut a slit across the chicken breast through the centre, but don't cut through fully, so you can open it up (i.e. butterfly).
4. Place clingfilm over and pound so you get them flatter and.. wider. It looks like an open book now.
5. Flip over, so now the chicken breasts are on top of the clingfilm. Season both sides with salt and pepper.
6. Place half the stuffing on one side of the "book" for each chicken breast. Roll the other half of the "book" over so you kind of get a..swiss roll/ wrap?

7. (opt) Chill in the fridge for half hour or even longer to firm up.
8. Remove clingfilm, and wrap 2 slices of bacon around each chicken breast. The bacon helps to hold it in place also.

9. Put into the oven and bake for about 40 min, or till juices run clear.
10. Leave to rest for a while, before cutting up into pretty circles or you can also leave it as it is. Drizzle some evoo and balsamic vinegar over, and garnish with parsley.


The bacon is a must! It helps the lean chicken breast meat stay juicy, and flavour-wise, it adds all the right contrasts. Salty bacon v.s. sweet raisins and spiced quinoa. Crispy bacon and cunchy almonds v.s. tender chicken. Ho ho ho!


Wednesday, June 16, 2010

The Brits Cook Sausages and Bacon

Italian Sausages with Lentils


For the lentils:
1-2 tablespoons olive oil
1 onion, finely chopped
Sprinkling of salt
2 cups dried Puy lentils (green or black or a mixture)
1 bay leaf
6 sprigs of fresh thyme
½ cup red wine
3 cups stock or water to cover the lentils
Salt and pepper to taste

For the sausages:
1-2 tablespoons olive oil
2 large garlic cloves, peeled and smashed
6 fresh uncooked sweet Italian sausages
½ cup red wine
¼ cup water or stock
Flat-leaf parsley for garnish

1. To cook the lentils, put 2-3 tablespoons of oil into a good-sized pan or a Bram pot over low heat. When it’s warm, add the chopped onion and sprinkle with salt. Cook over a low heat until the onions are soft but not browned, about 10 to 15 minutes. Add the lentils, bay leaf, and thyme sprigs, stir well, and cover generously with the red wine and the stock or water. Bring to a boil, cover, and simmer gently for 30-50 minutes or until the lentils are cooked and most of the liquid’s absorbed, stirring occasionally. Add salt and pepper to taste. You can make this ahead. Reheat when you’re ready to proceed.
2. To cook the sausages, add 1-2 tablespoons olive oil and the smashed garlic cloves to a heavy frying pan, and fry for a few minutes. Add the sausages and brown on all sides. Add the wine and stock, bring to a boil, and then turn down the heat, cover the pan and simmer the sausages for about 15 minutes, turning mid-way. When the sausages are done, cut in half on the diagonal, add them to the lentils. Mash the garlic into the remaining liquid and add it to the lentil pot. Taste for seasoning and adjust with salt, pepper, or more liquid until it is to your liking.
3. Before serving, reheat the lentil and sausage mixture over low heat. Sprinkle with parsley.

4-6 servings
Adapted from Nigella Lawson’s Nigella Bites

Warm Potato Salad with Garlic Sausage


6 ounces small potatoes or about 12 small potatoes
½ cup white wine
1 cup chicken stock
6 Garlic, Italian or Sicilian fresh sausages, cooked and cut in thick slices
3 ounces Swiss cheese, cut in small cubes
1 tablespoon chopped chervil (if you can find it)
1 tablespoon chopped tarragon
¼ cup chopped chives

Mustard and White Wine Vinaigrette:
1 tablespoon Dijon mustard
1/3 cup white wine vinegar
½ cup olive oil
Salt and pepper to taste

1. Cook the potatoes in boiling water until just soft. (Or steam as in the French Potato Salad on my March 13, 2010 blog). Drain and cut into thick slices. If the potatoes are small, halve or quarter them.
2. Bring the wine and stock to a boil and reduce by two-thirds. Remove from the heat and toss the potatoes into the mix and leave for 10 minutes to infuse.
3. Warm the cooked sausages in a 350ºF oven for 6 minutes in a Bram pot or an ovenproof skillet. Combine the sausages and the potatoes in the pot or skillet.
4. Whisk together the mustard and vinegar. Slowly add the oil and season with salt and pepper to taste. Pour this over the potato mixture; you may not need all of it. Add the cheese and herbs and toss together. Serve the salad in the Bram pot or, if you used a skillet, transfer to a serving bowl. Serve warm.

4-6 servings
Adapted from Simon Rimmer’s Rebel Cook: Bending the Rules for Brilliant Food

Brussels Sprouts and Bacon


1 pound Brussels sprouts
1 tablespoon butter or bacon fat
½ cup thinly sliced bacon or pancetta
Salt and pepper to taste
3-4 tablespoons water, as needed
2 tablespoons fresh lemon or lime juice

1. Shred/slice the Brussels sprouts either by hand or with a food processor. The processor doesn’t do as nice a job as by hand, but it is so fast.
2. Heat the butter in a large, shallow pan. When it is warm, add the sliced bacon and stir until it is soft and cooked through.
3. Add the shredded sprouts and ½ teaspoon salt and pepper. Fry until the sprouts begin to soften. Add the tablespoons of water as needed to help with the cooking and to loosen and incorporate any brown places on the bottom of the pan.
4. The sprouts are ready when they are soft and coated with the bacon juices. Most of the water will have evaporated. Adjust the seasonings. Add the lemon or lime juice just before serving.

4 servings
Adapted from Nigel Slater’s Real Fast Food

Friday, February 26, 2010

Jane's Bacon and Lentil Soup


¾ cup small red lentils
1 bay leaf
4 cups stock or water
10-12 slices thick smoked bacon (10-12 ounces uncooked), cut crosswise into ½-inch pieces
1 small onion, finely diced
1 small carrot, peeled and finely diced
You can add some fennel and some red and yellow pepper, chopped, if you have them on hand
1 garlic clove, minced or pressed
1 can (14 ounces) diced tomatoes
OR
1 large beefsteak tomato or comparable smaller ones, peeled, cored, seeded, saving the juice and adding it to the soup. See instructions below.
½ teaspoon dried oregano
½ teaspoon cumin
2 tablespoons coarsely chopped fresh mint, plus more for garnish
Salt and pepper to taste
1 green onion, both white and green parts, thinly sliced
Sour cream or crème fraiche, optional

1. In a medium saucepan, stir together the lentils, bay leaf, and stock or water. Bring to a boil, reduce the heat and simmer until the lentils are soft, about 20 minutes. They will change from an orange color to a muddy yellow—do not be alarmed.
2. In a soup pot, cook the bacon pieces over low to medium heat, turn as needed to brown but not crisp. Remove from the pan, leaving the bacon fat. If there is a large amount of bacon fat, you might want to pour some of it into a container to save for another use. Leave 1-2 tablespoons in the pot.
3. Add the onions to the soup pot and sauté over medium heat until tender and starting to brown, about 8-10 minutes.
4. Add the tomatoes, the cooked lentil mixture, ¾ of the bacon (save some for a garnish), the oregano, cumin, and mint and stir until mixed. Season with salt and pepper to taste. Simmer for 10 minutes. Remove the bay leaf. Adjust seasonings to suit you.
5. Ladle into bowls. Garnish each serving with the sliced green onion, bacon and sour cream, if desired.

Great served with lemon cornbread, on October 16, 2009 blog.

To peel a tomato: Drop the tomato into boiling water for 10-15 seconds depending on how ripe it is. Remove, slit the skin and peel it off. Remove the core. Slice in half around the equator. Place a small sieve over a bowl or pitcher. With your finger, remove as many of the seeds as you can into the sieve, allowing the liquid which comes out with them to drain into the bowl. It is, to my mind, precious tomato juice.

4-5 servings
Adapted from Sara Perry’s Everything Tastes Better with Bacon

Monday, January 18, 2010

Papaya Heaven Recipes

Papaya Salsa 

Serve as an accompaniment to enchiladas, tacos, molés, seared ahi tuna, or with chips.


1 medium ripe papaya, peeled, seeded, and diced
1 clove garlic, minced or pressed
¼ small red onion, finely diced
3 tablespoons fresh lime juice or more to taste
¼ cup finely chopped fresh cilantro
¼ teaspoon salt or more to taste
½ red or green jalapeno pepper, minced

1. Combine the papaya, garlic, onion, lime juice, cilantro, salt and jalapeno in a non-reactive bowl, stirring well to mix.
2. Cover and refrigerate at least 1 hour.
3. Taste for salt and lime juice. Add more as necessary.

4 servings
Adapted from The Junior League of Honolulu, Inc.’s Aloha Days, Hula Nights

First Night Dinner Salad


2 heads butter lettuce, washed, dried, and torn into pieces
1 pink grapefruit, sectioned
1 small papaya, seeded, peeled, and sliced
½ cup macadamia nuts, coarsely chopped
4-5 slices of bacon, cut crosswise into ½-inch strips
2 tablespoons finely chopped red onion or green onion
Coarse-grain Hawaiian salt, if available (white or pink), optional 

Red wine and paprika vinaigrette:
2 tablespoons red wine vinegar
6 tablespoons olive oil
¼ teaspoon paprika, smoky or regular
Salt and pepper to taste

1. Place the sectioned grapefruit and sliced papaya in separate bowls.
2. Fry the bacon until it is slightly brown and a little crispy. (I like limp bacon but I may be alone in my preference.)
3. Make the vinaigrette by combining all the ingredients in a small bowl and stirring with a fork to mix well. Taste and adjust seasoning. You can add a touch of sugar if your vinegar is quite sour.
4. Mix the greens with the onions in a salad bowl. Add about half of the dressing and toss carefully.
5. Arrange the greens on four dinner plates. Distribute the papaya slices, grapefruit sections, bacon, and macadamia nuts over the greens. Spoon the remaining dressing over each plate to moisten the fruit and nuts. Sprinkle with the optional coarse salt.

You can also add avocado slices if you desire.

4 servings for a light dinner or 6 for a side salad
My own devising

Papaya Quesadillas with Spicy Tomato Relish


2 tablespoons olive oil
1 fresh jalapeno pepper, red or green, seeded and finely diced
1 large yellow onion, thinly sliced
1 ripe large papaya, seeded, peeled, and diced
Salt and black pepper to taste
5 ounces Asiago cheese or other mild white cheese, shredded
10 10-inch flour tortillas
4 tablespoons butter, softened (or bacon fat if you have some)
Sour cream, for serving

1. Make the Spicy Tomato Relish before you begin the quesadillas. See recipe below.
2. Heat the oil in a skillet (metal or pottery) over medium heat. Add the jalapeno and onion. Sauté 5 to 10 minutes until wilted and slightly golden brown. Stir in the papaya. Season with salt and pepper to taste. Sauté briefly to warm the papaya. Set the pan aside.
3. Butter one side of each tortilla (or use the bacon fat if you’d like). Lay buttered side down in a hot skillet. Cover with one-fifth of the onion/papaya mixture. Sprinkle with about ¼ cup shredded cheese. Top with the second tortilla, buttered side up.
4. When browned on the bottom, carefully turn the quesadilla over to brown the other side using as wide a spatula as you have. If any of the filling falls out in the process, tuck it back inside. Remove from the pan and keep warm in a 250ºF oven on a rimmed baking pan.
5. Repeat with the remaining tortillas and filling, moving them to the oven as they are done.
6. When done, cut each of the quesadillas in half. Scissors work well. Serve warm with Spicy Tomato Relish and sour cream.

6 servings (if everyone eats about 1½ quesadilla halves)
You may have a little left over for lunch the next day. The cookbook suggests serving this as an appetizer, cutting the quesadillas into wedges, like a pie.
Adapted from The Junior League of Honolulu, Inc.’s Aloha Days Hula Nights

Spicy Tomato Relish


6 ripe tomatoes or 8 Roma tomatoes, seeded and chopped
OR
1 14-ounce can diced tomatoes
2 teaspoons minced fresh ginger root
4 garlic cloves, minced
1 teaspoon curry powder
1½ teaspoon cumin seed
¼ teaspoon fenugreek seed, optional
¼ teaspoon mustard seed
1 small dried hot red chile
Salt to taste

1. Put the chopped or canned tomatoes, ginger, garlic and curry powder in a saucepan, stirring to mix.
2. In a small skillet over medium heat, toast the cumin, fenugreek, mustard seed and chile pepper until the mustard starts to pop, about 30 seconds to a minute. Add to the tomato mixture.
3. Cook the tomato sauce on medium heat for 20 to 25 minutes, stirring often, until thickened. Season with salt to taste.
4. Remove from the heat. Scrape into a bowl and let cool. Serve warm or at room temperature.

If you have any leftover, you can use as a filling for an omelet.

 Adapted from The Junior League of Honolulu, Inc.’s Aloha Days Hula Nights

Tuesday, November 24, 2009

The Tastes of Autumn: Squash, Chestnut & Bacon Risotto

When it comes to food, Autumn is the most exciting season. By the time the end of November rolls around, one hankers for rich, big, warming flavours and hearty platefuls to ease the depression of driving home in the dark and fighting through increasingly bad weather.


Large jumpers can hide expanding waistlines and the only way to achieve a healthy glow is by supping an extra glass of wine. It truly is the season for gourmands.

Those earthy flavours so reminiscent of Autumn are a delight to cook with. Their versatility offers infinite combinations, each one guaranteed to be tasty. Pick three of the following and you’re almost certain to achieve deliciousness in perfect harmony:

Pheasant. Bacon. Mushrooms. Pears. Truffles. Pumpkins. Squashes. Rabbit. Potatoes. Pigeon. Chestnuts. Garlic. Thyme. Apples.


In fact, you could probably put all of the above together and create something lip-smackingly good.

I didn’t quite go that far with this risotto but came pretty close.

First step was to roast off a small squash – sliced and cooked until tender in a hot oven, squash develops a rich sweetness that demands to be matched with something salty. In this case bacon, although some melted blue cheese with it would make a good meal on its own.

Once the bacon had been crisped up nicely in a hot pan, the fat rendered out into a tasty sizzling liquid, it was put to one side and a finely chopped red onion softened in a tablespoon of the reserved bacon fat – using the same pan to make the most of the flavours in there (and minimise washing up)

A handful of chestnuts were roasted in the oven until the insides were sweet and the skins had split open. Half were then chopped finely, the others merely split in two to act as a textural contrast.

The risotto was made in the usual way – toast rice, add onions and spoon stock in until rice is tender but still in possession of some integrity. Right at the end, along with the requisite Parmesan and butter, the bacon, roasted squash and chestnuts were stirred in.


The whole thing was topped off with thinly sliced pheasant breast that had been fried off in a little butter, chestnut halves and a little of the reserved bacon. Finally, it was seasoned with a small pinch of ground coffee to add the merest hint of bitterness.

A big, steaming, delicious bowl of Autumn.

Tuesday, September 1, 2009

Recipes from the Garden

Summer Squash Gratin
You can serve this as a side dish. With the addition of some salami or bacon, you could also serve it as a main dish with a nice green salad.


1¼ pounds yellow squash, cut into ½-inch squares
1 tablespoon butter or olive oil
1 small onion, finely diced
½ cup salami, prosciutto, bacon, or pancetta, coarsely chopped, optional
1 cup diced Monterey Jack or Swiss cheese (actually any melting cheese would work)
2 tablespoons grated Parmesan cheese
1/3 cup crème fraiche or sour cream
1 tablespoon white vermouth or dry white wine
1 teaspoon ground coriander
Generous pinch of ground nutmeg
Salt and ground pepper to taste
1½ cups fresh breadcrumbs
2 tablespoons melted butter

1. Lightly butter a 10-inch gratin dish or casserole.
2. Steam the squash until tender, about 6-8 minutes. Remove to a medium bowl.
3. Heat the butter or oil in a small skillet and add the onion and the optional meat. Cook until soft but not browned. Add to the squash along with the cheeses, the crème fraiche or sour cream, the wine, coriander, nutmeg, salt and pepper.
4. Pour into the prepared dish. Combine the breadcrumbs and melted butter; sprinkle over the top of the squash.
5. Bake at 350ºF. until bubbling and nicely browned, about 35 minutes.

4-5 servings
Adapted from Irma S. Rombauer, Marion Rombauer Becker and Ethan Becker’s The All New All Purpose Joy of Cooking (from 1997). Earlier versions of this cookbook called this recipe Summer Squash Casserole.

Moroccan Two Reds Salad
This salad has an astonishingly psychedelic color and a unexpectedly great flavor. Almost makes you want to say "Cool, man."


1 pound beets (3 medium), washed, stems cut off
1 pound (4 medium) tomatoes, seeded, cut into ½-inch cubes
½ medium red onion, finely chopped
1 clove garlic, minced
¼ cup chopped flat-leafed parsley
¼ cup chopped fresh cilantro, mint, or oregano or a mix
2 tablespoon olive oil
2 tablespoons red wine vinegar
3 tablespoons fresh lemon juice
1 teaspoon salt or to taste
Freshly ground black pepper to taste

1. Place the beets in a glass or metal 8 x 8 pan or something comparable. Pour about ½-inch water into the bottom of the dish and cover the dish tightly with aluminum foil. Place in a 400ºF. oven and roast until the beets are soft, about 1 hour. You may need longer if the beets are larger. Let them cool slightly and then peel. The skins and stems should slip off easily, leaving your hands nicely pink. Cut off the beet tails.
2. Cut the beets into ½-inch cubes and place in a medium-sized bowl along with the tomatoes, onion, garlic, parsley, cilantro or other herbs.
3. Add the olive oil, vinegar, lemon juice, salt and pepper to taste and mix well.
4. Serve at once or chill in the fridge for up to an hour. I prefer the salad at room temperature.

Serves 6-8
Adapted from Jeffrey Alford and Naomi Duguid’s Flatbreads & Flavors

Oven-Roasted Tomato Variation


I tried something slightly different with a current batch of tomatoes I purchased from The Patch.
I did the usual washing, cutting in half around the equator, taking out as many of the seeds as I can with my finger, placing them close together in a glass dish and seasoning with salt and pepper. You can also use a rimmed baking sheet. I didn’t sprinkle any olive oil over them.

I roasted at 400ºF. for about 15 minutes and then lowered the temp to 300ºF. until they were much reduced in volume but still nice and squishy, about 2 or 2½ hours. Maybe more. (If you need to roast some beets--or anything else for that matter, you can do them at the same time. They’ll just take longer than at their usual temp.)

I let them cool, placed them on a serving plate and drizzled them with Maple Smoked Olive Oil and then placed a small mound of Délice de la Vallée, a combination of cows’ milk and cream and goats’ milk on top. Both products are made in Sonoma County. You can substitute any good olive oil or soft cheese.

Thursday, August 13, 2009

Three Summer Salads

Grilled Pancetta-Wrapped Figs and Arugula with Lavender Dressing
If you're interested in a light dinner in the midst of fig season, this is just wonderful. Plenty of flavor, a delicious dressing, and the little purple flowers which are in nearly every yard during the summer.


Mustard Lavender Vinaigrette, start the day before if you have time (see recipe below)
About 6 cups arugula or other fresh greens
½ cup pine nuts, lightly toasted (Watch! They burn easily.)
8-12 large fresh black figs
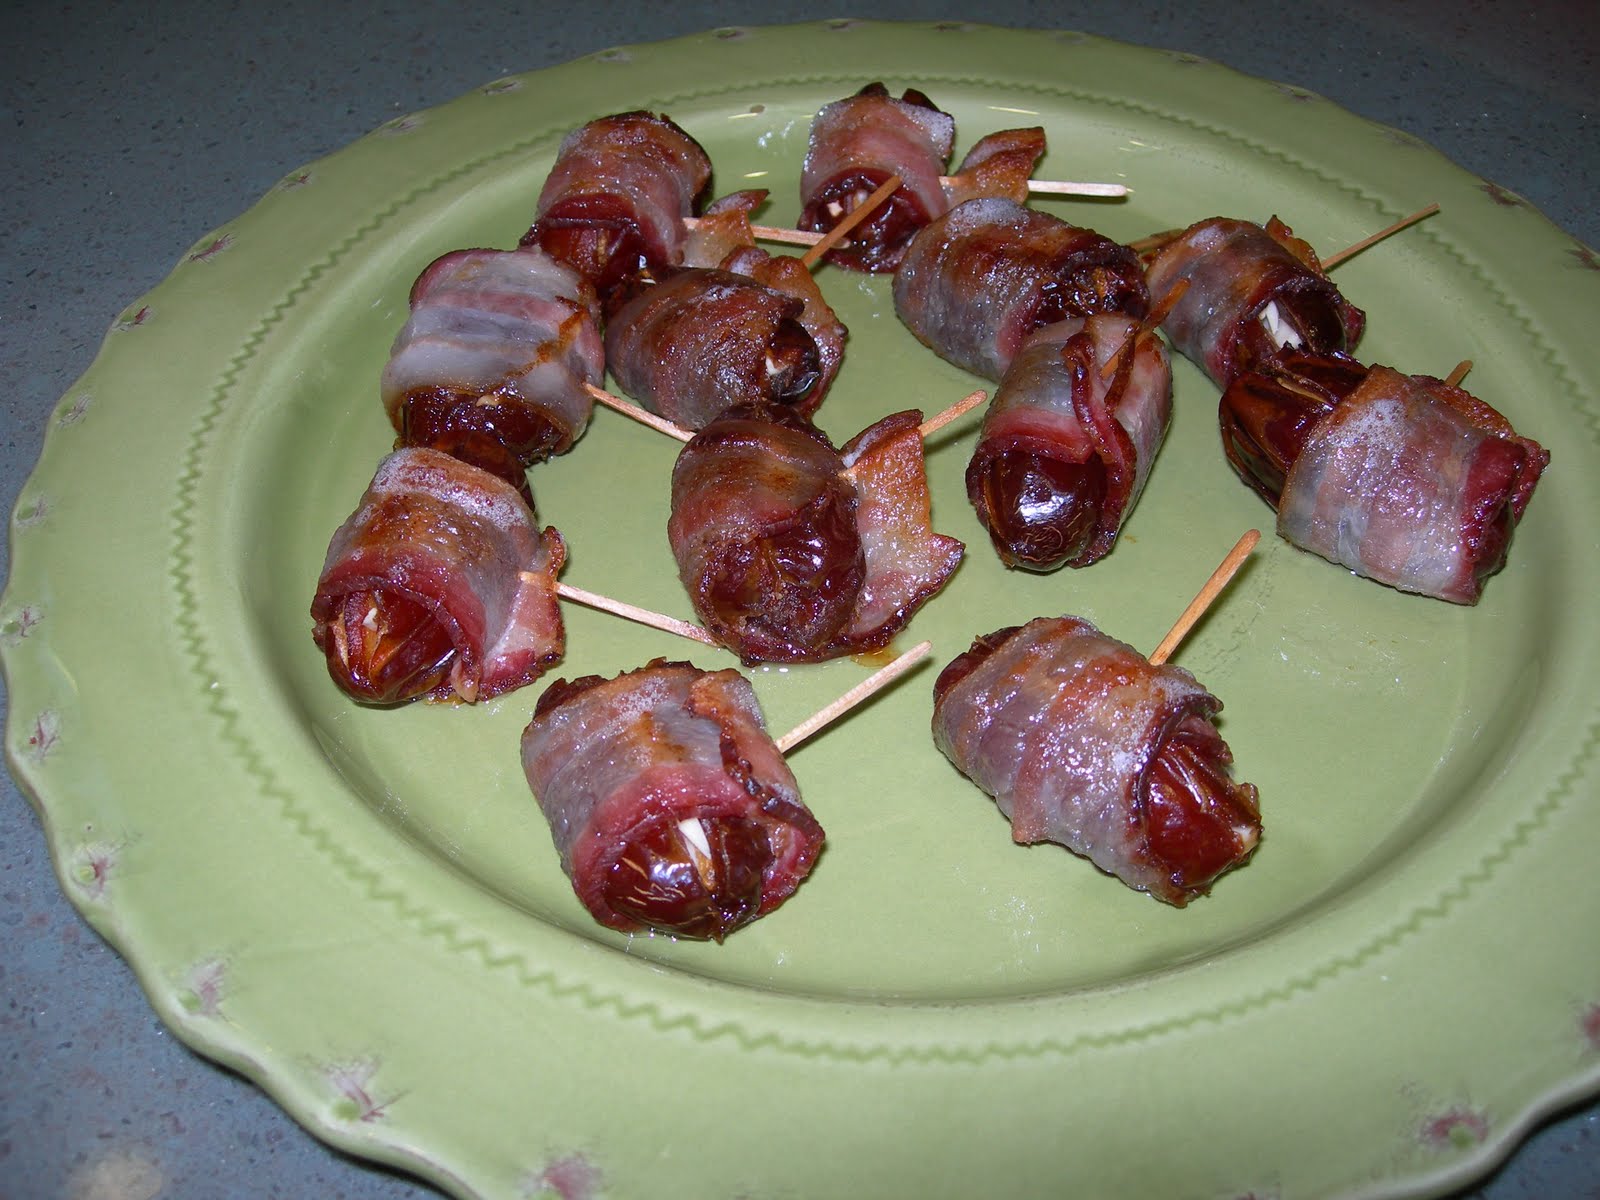
8-12 thin slices pancetta, smoked pepper bacon, or regular bacon
Vegetable oil for brushing the grill
Fresh lavender or society garlic flowers for garnish

1. Wash, dry, and chill the greens.
2. Prepare your grill or broiler.
3. Wrap each fig with a piece of bacon or pancetta and secure with a toothpick or small metal skewer. Brush the grill or broiler rack with vegetable oil. Place figs on the rack and grill or broil, turning frequently, until the bacon is browned, about 5 minutes or a little longer.
4. Drizzle the arugula or other greens with the Mustard Lavender Vinaigrette. Divide the greens among 4-6 individual plates. Arrange 2 or 3 figs on each plate and drizzle with more vinaigrette if desired.
5. Sprinkle with pine nuts and garnish with the fresh flowers.

4-6 servings as a salad course, depending on the size of the figs and how many figs you serve/person
Adapted from James McNair’s Salads

Mustard Lavender Vinaigrette

½ cup fruity extra virgin olive oil
1 tablespoon chopped fresh lavender flowers
OR
1½ teaspoons crumbled dried lavender flowers
¼ cup balsamic vinegar
1 tablespoon Dijon-style mustard or 1 teaspoon dried mustard
1 teaspoon minced or pressed garlic
1 teaspoon salt
1 teaspoon sugar

1. In a bowl or jar, combine the olive oil and chopped or crumbled lavender, cover, and let stand at room temperature for at least 24 hours or for up to several weeks. Strain before using.
2. Combine everything except the lavender oil in a bowl or jar. Shake or stir until combined. Add the oil and shake or stir again. Use immediately or store in the fridge. Return to room temperature before serving.

Makes ¾ - 1 cup
Adapted from James McNair’s Salads

Chicken Salad with Walnuts and Grapes
You may think I have a "thing" for roasted fruits and veggies. I must confess that I do--primarily because of the intense flavor. But also because I sometimes buy too many grapes, strawberries, or cherry tomatoes and they may be on the verge of going squishy. Roasting comes in so handy.


¾ cup mayonnaise (You can use some thick yogurt in place of some of the mayonnaise.)
Zest of 1 lemon
Juice from ½ lemon
½ teaspoon salt or to taste
1/8 teaspoon pepper or to taste
1 tablespoon finely chopped chives
1 tablespoon finely chopped flat-leaf parsley
1 tablespoon finely chopped fresh tarragon
4 individual chicken breasts, poached or microwaved and roughly chopped or shredded
OR
4 cups leftover roasted chicken, bones and skin removed, roughly chopped or shredded
1/3 cup finely chopped red onion
½ cup finely chopped celery (about 1 stalk)
1 cup halved red seedless grapes or ½ cup Roasted Grapes, see recipe below
¾ cup roughly chopped walnuts, lightly toasted
Greens, if desired

1. In a small bowl, whisk together the mayonnaise, lemon zest and juice, salt, and pepper. Add the chives, parsley and tarragon; mix gently.
2. In a large bowl, combine the chicken, onion, celery, and grapes. Add the mayonnaise mixture and fold together to combine. Add more mayonnaise if the mixture is too dry. Season to taste. Chill until ready to serve.
3. Just before serving, stir in the toasted walnuts. If desired, serve over or surrounded by greens.

4-6 servings
Adapted from the New York Times Sunday Magazine

Oven-Roasted Grapes


2 pounds red grapes, without seeds
A slight sprinkling of sugar

1. Remove the grapes from their stems. Cut in half if large. Line a cookie sheets with a silicone mat or parchment paper and place the grapes on top in a single layer.
2. Turn the oven to 250ºF and place the pan in the oven. You can use the convection setting in your oven on either Bake or Roast and speed up the process a bit.
3. After about an hour, check to see how they are doing; move them around a bit and sprinkle with a small amount of sugar if they taste a little tart to you. Roast for an additional hour or until the grapes have lost some of their juice and shrunk some. Sort of like raisins but with more moisture.

You can use these as an accompaniment to cheese, in salads, on your Steel-Cut Oats for breakfast and in Italian Sausage with Red Grapes or Chicken Salad with Walnuts and Grapes.

Makes about 3 cups
Adapted from John Ash’s Cooking One on One

Quinoa Salad with Pistachios and Cranberries
Quinoa is a grain originally from Peru that has a very high protein content. It is also delicious. This red one is from the Rancho Gordo folks in Napa, California who produce so many outstanding dried beans.


1/3 cup pistachios or slivered almonds
1 cup quinoa (red from Rancho Gordo or regular)
1½ cups water, heated in the microwave
1 teaspoon salt
2 stalks celery, cut in half lengthwise and sliced
3 scallions, sliced, including some of the green part
¼ cup dried cranberries, chop coarsely if they are big, use more if you'd like
Sherry Vinaigrette, see recipe below

1. Arrange the pistachios or almonds in a single layer in a small pan and toast at 350 F. until lightly browned, about 5 minutes or less. Let them cool to room temperature and chop coarsely.
2. Toast the quinoa in a medium skillet or pottery skillet over low heat, shaking the pan occasionally until it lightly browns, about 5 minutes or longer. It will take a little longer in the pottery skillet, keeping it on low heat. Add the water and salt, cover and bring to a simmer. Cook until the quinoa is soft but still has a little bite, about 15 minutes. The water should be gone.
3. Let it cool. Add the nuts, celery, scallions, and cranberries and toss.
4. Dress with Sherry Vinaigrette. Check for salt, adding more if required.
5. Serve immediately or refrigerate. Bring to room temperature before serving.

4 servings
Adapted from Fran Gage’s The New American Olive Oil

Sherry Vinaigrette

1 tablespoon sherry vinegar
¼ teaspoon salt
Pepper to taste
3 tablespoons olive oil

Mix the vinegar, salt, and pepper in a small bowl. Slowly pour in the olive oil, whisking with a fork to mix. Taste for seasoning and adjust.

If you are using this for a regular salad, you can add 2 teaspoons minced shallots or green onions. The Quinoa Salad already has green onions in it so these are shallots are not necessary.

Adapted from Fran Gage’s The New American Olive Oil

Sunday, June 21, 2009

Using Them Up--So Good

Over the past several days, I've done a good job of cleaning out some of the fruits and vegetables I found lurking in the fridge. It was fun to watch the shelves clear out. Some breathing room for all that remained. And we had some great meals with very little additional shopping.

Jicama Slaw


1 medium-sized jicama, peeled
½ cucumber, peeled, seeded, and chopped in ¼-inch pieces
1 minced jalapeno or Serrano chile, seeds and membranes removed
½ sweet red bell pepper, diced
¼ cup chopped red onion
½ cup finely chopped fresh cilantro
Juice from ½ lemon
1 tablespoon sour cream
½ cup mayonnaise or less if you use more sour cream
1 garlic clove, pressed
Salt and pepper to taste

1. Grate the jicama using a food processor or a box grater. Combine all the vegetables in a large bowl. Add the lemon juice. If you have time, refrigerate the vegetables for 20 minutes to let the flavors mingle.
2. Mix together the sour cream, mayonnaise and the pressed garlic. Stir into the vegetables along with salt and pepper. Taste for seasonings and adjust.
3. Some liquid will gather at the bottom of the bowl so serve with a slotted spoon to avoid a big puddle on the salad plates. I served for lunch with corn chips and a slice of leftover pesto arugula pizza from the night before.

4 servings
Adapted from Barbara Passino’s Chocolate for Breakfast

Grilled Patty Pan Squash with Smoked Bacon and Olive-Caper Vinaigrette


Squash:
1 pound patty pan squash (5 or 6), cut in half horizontally
2 tablespoons olive oil
Salt and pepper

Smoked Bacon and Olive-Caper Vinaigrette:
¼ pound smoked bacon, diced
2 cloves garlic, chopped
1 shallot, chopped
2 tablespoon capers
¼ cup chopped olives (green or black)
2 tablespoons champagne vinegar
2 tablespoons caper vinegar (from the jar)
3 tablespoons olive oil
1 Roma tomato, peeled, seeded, and chopped
You can also use cherry tomatoes, cut in half

To prepare the squash (and peel the tomato):
1. Bring a large pot of salted water to a boil. Drop in the tomato for 10-15 seconds. Remove and peel. Drop in the squash and cook for approximately 3-5 minutes or until barely tender. Remove and place immediately in an ice bath or run under cold water. When cool, lay them out on a clean kitchen towel to dry.
2. Coat the squash lightly with olive oil, salt and pepper. Set aside.

To prepare the vinaigrette:
1. In a skillet, cook the bacon until it is nicely browned.
2. Reduce the heat to low and add the garlic, shallots, capers and olives. Sauté until the garlic is slightly golden brown.
3. Remove from the heat and add the vinegars and olive oil. Set aside.

To finish the dish:
1. Place the squash on the hot grill or a hot grill pan on top of the stove. Turn them until they are warmed through and have nice grill marks. Reheat the vinaigrette.
2. Place the flat bottoms of the squash on a serving platter. Spoon some of the warm vinaigrette over them. Top with the round part of the squash and pour the remaining vinaigrette over all. Garnish with the diced tomatoes.
3. Serve warm or at room temperature.

4-6 servings depending on the number of squashes and your hunger.
Originated with the Grilled Asparagus recipe in Bradley Ogden’s Breakfast Lunch and Dinner

Fruit Salad
We had this for dinner with the Frittata which follows.


You can use most any fruit that you happen to have in your fridge. I used blueberries, one mango, one pink grapefruit, and one orange. I could have added an apple and a giant papaya but thought they didn't quite fit the mood. I served the salad on a couple of small romaine leaves with French Fruit Salad Dressing (see recipe below) on the side.

3 servings or as many as you have fruit
my own devising

French Fruit Salad Dressing

¼ teaspoon salt
½ teaspoon paprika
6 tablespoons olive oil
3 tablespoon lemon juice or juices from the bottom of the fruit bowl
¼ teaspoon dried mustard
1 teaspoon sugar

1. Combine all the ingredients in a small bowl or a small glass jar. Stir them with a small whisk or a fork until they are smooth. Or shake them in the jar with the top on. Taste for seasonings. Add more salt if necessary.
2. Shake or stir before using. I put it in a bowl on the table so that we could serve ourselves.

Makes ½ cup
Adapted from Irma S. Rombauer and Marion Rombauer Becker’s 1953 Joy of Cooking

Spicy Corn Frittata with Tomatoes and Scallions


This was a perfectly nice frittata from Fresh Food Fast but not worthy of being a “keeper.” What was truly worthy was the new pan I used for cooking it. Bram, a new store on the Sonoma plaza, specializes in pottery made in Egypt that can be used both on top of the stove with a heat diffuser and in the oven. I had seasoned it earlier in the day so it was set to go.

I sautéed the tomatoes, corn, peppers, green onions, and garlic on the top of the stove on lowish heat. I then mixed the vegetables with 8 eggs and returned it to the burner to cook gently until the eggs started to set on the bottom. And finally I popped it in the oven for 20 minutes to firm up. I used bacon fat to cook the vegetables and to coat the pan before returning the eggs. Not a bit of the frittata stuck to the dish. Just amazing. And it looked really pretty. Prettier than cast iron which is what I would have used in the past. Let me know if you want to see the whole recipe.

Sunday, June 14, 2009

Menu 4: One Plate Meals

My sweetheart, Katherine, is a great fan of one-dish meals. Or rather one-plate meals. I could attribute her liking of these simple meals to the fact that she is the dishwasher in the household and hence her job is made considerably easier with the one plate dinner. Some pots and pans, of course, but not as many, and two plates which can be tucked into the dishwasher without much fuss. More importantly, though, I think that her spirit is nourished by a meal that is less complicated, by one dish with abundant flavor, such as the Bacon-Tomato-Corn Ragout that follows, on a bed of something soothing and comforting, in this case Creamy Polenta. It is straightforward and delicious. And that’s it.

Bacon-Tomato-Corn Ragout with Creamy Polenta


10 thick bacon slices, cut crosswise into ½-inch pieces
Note: Buy the best you can like Niman Ranch or a good local producer
2 tablespoons olive oil or bacon fat
2 medium onions, sliced
Pinch of red pepper flakes or smoky hot paprika
2 cups fresh corn kernels (about 3 ears) or frozen corn if you are desperate
7 Roma tomatoes, peeled if you want, seeded, cored and coarsely chopped
Note: I tried heirloom tomatoes. They were too juicy for this dish. If you want to use them, drain them really well before adding to the ragout.
½ cup chopped fresh basil
½ cup shredded basil for garnish
Fleur de sel or other large grain finishing salt
One recipe of Creamy Polenta (see recipe below)

1. In a medium skillet, cook the bacon pieces over low to medium-low heat, turning to achieve uniform crispness. Transfer to a paper towel to drain.
2. In a large skillet, heat the olive oil or some bacon fat over medium heat. Add the onions and red pepper flakes or paprika, reduce the heat to medium-low and sauté until they are soft and amber, at least 20 minutes.
3. Add the corn, increase the heat to medium, and cook for 5 minutes. Stir in the tomatoes and three-fourths of the bacon pieces and continue to cook, stirring frequently for 5 minutes. Add a little more bacon fat if you think the dish needs it for heightened flavor. Stir in the chopped basil.
4. Reheat the Creamy Polenta and make soft flat mounds in the middle of 4 warm plates. Spoon the ragout over the top. Sprinkle with the shredded basil, the remaining bacon pieces, and a sprinkling of fleur de sel or other salt.

4-5 Servings
Adapted from Sara Perry’s Everything Tastes Better with Bacon

Creamy Polenta


3 cups milk
Note: You can substitute other liquids if you desire.
1 tablespoon butter
1 teaspoon sugar
1 teaspoon salt
1 cup stone-ground yellow cornmeal

1. Combine the milk, butter, sugar, and salt in a heavy saucepan and heat to a simmer.
2. Slowly add the cornmeal, whisking constantly. Lower the heat and continue stirring with a wooden spoon until the mixture has thickened and leaves the sides of the pan, about 10 minutes.

Note: If you make this ahead, leave it in the saucepan or place in a microwavable bowl. You will need to add more milk or other liquid to loosen it up before serving. Warm it on low heat on the stove or in the microwave. Keep adding liquid and stirring until it is the consistency of mashed potatoes and nice and warm. You may need to add a bit more salt.

6 servings
Adapted from Julee Rosso and Sheila Lukins’ The New Basics

Thursday, June 11, 2009

BLT From Scratch

Michael Ruhlman (yes, that Michael Ruhlman,) has issued a challenge over on his blog: to make a BLT sandwich from scratch.

Bacon. Lettuce. Tomato. Mayo. All wedged between two doorstop sized slices of bread.

Count me in.

Fancy taking part? You have until August 28th. Plenty of time to grow the necessary items, cure the bacon and nail that bread recipe.

For more information, see Michael’s (rather excellent) blog.

Sunday, June 7, 2009

Appetizers

So far I’ve given you three menus consisting of a main dish, a starch, and vegetable side dishes. If you were cooking one of the menus for a dinner party, you might want to add an appetizer and a dessert which you can purchase or make yourself. If you decide that you are up to making an appetizer, I’m going to give you three: two are truly easy and one is a little more complicated—maybe more the sort you would take to someone’s house if you were assigned the “pre-eating” course with drinks. Except that it is so good that you might want to eat it for dinner.

Apricot Thrones


25 pecan halves
2 ounces cream cheese at room temperature
2 ounces blue cheese
25 dried apricots

1. Preheat the oven or toaster oven to 325ºF. Place the pecans on a baking sheet and toast in the oven until golden brown. Watch carefully. Let them cool.
2. Combine the cheeses and stir until evenly mixed. If the mixture doesn’t get smooth, microwave for 10 seconds to soften slightly and stir again.
3. Scoop up small amount of the cheese mixture and place on top of each apricot. Start with a small amount. You can always add more later. Note: You can use a pastry bag if you are doing a large number of these.
4. Top with a toasted pecan, rounded side up, if you are fussy about it. Transfer the apricots to a serving plate, cover with plastic wrap, and refrigerate.
Note: The recipe can be completed to this point up to 8 hours before serving.
5. Serve at room temperature.

6-10 servings
Adapted from Hugh Carpenter and Teri Sandison’s Fast Appetizers

Dates Stuffed with Almonds


24 blanched whole almonds, toasted or untoasted
24 medium dates, pitted
12 thin slices bacon, cut in halves

1. Preheat the oven to 350ºF.
2. Stuff an almond inside each date. Wrap each date with bacon and secure with a toothpick crosswise.
3. Bake in the 350ºF oven on a baking sheet for 20-30 minutes or until the bacon is crisp.
If the bacon isn’t browned enough for you, place the dates under a hot broiler for a minute or two, watching them closely.
Note: Can make the day ahead and bake for 20 minutes. Reheat at 350ºF before serving.

8 servings (about 3 per person)
Adapted from Marimar Torres’ The Catalan Country Kitchen

Mushroom Pâté


½ ounce dried porcini mushrooms
1 cup boiling water
¼ cup butter (½ stick)
1 pound fresh cremini mushrooms, thinly sliced, tough stems discarded
1 garlic clove, coarsely chopped
2 tablespoons oyster sauce
½ teaspoon hot sauce
½ teaspoon sugar
6 ounces cream cheese
Salt and pepper
¼ cup chopped fresh chives, parsley or cilantro or a mixture
Edible flowers, like society garlic flowers, optional
Crackers, thinly sliced French bread, or crostini

1. Place the dried mushrooms in a small bowl and cover with 1 cup boiling water. Let sit for 30 minutes. Remove the mushrooms from the soaking liquid. Pour the liquid through a coffee filter or a double layer of paper towels in a sieve (to catch the dirt from the dried mushrooms). Reserve both the mushrooms and the water.
2. Heat a 12-inch sauté pan over high heat. Add the butter and when it begins to brown, add the softened dried mushrooms, the fresh mushrooms, and garlic. Sauté until the mushrooms begin to wilt and squeak, about 5 minutes.
3. Add the reserved mushroom water, oyster sauce, hot sauce, and sugar. Cook over high heat until all the moisture disappears. Remove from the heat and let cool to room temperature.
4. Transfer the mixture to a food processor and process until smooth. Cut the cream cheese into bits and add it to the mushroom mixture along with 2-3 tablespoons of the herbs. Process until very smooth, adding salt and pepper to taste.
5. Line the bottom of a 6½ or 7-inch springform pan with parchment paper and butter the sides.
6. Transfer the pâté to the prepared pan, and press a layer of plastic wrap over the surface. Refrigerate.
Note: You can also put the pâté in a pretty bowl.
7. To serve, run a knife around the edge of the pan, remove the sides and bottom of the springform pan. Peel off the parchment paper by flipping the pâté on to your hand, paper side up. Then flip the pâté right side up onto a flat serving plate. Decorate with the reserved herbs and the flowers. Serve chilled or at room temperature with crackers, baguette slices, or crostini.

Serves 6-12
Adapted from Hugh Carpenter and Teri Sandison’s Fast Appetizers