Showing posts with label Blog Hops. Show all posts

Tuesday, June 21, 2011

Recipe of the Week - Grilled Veggies

This week I am sharing a recipe I found from Lynn's Kitchen Adventurers. She always has lots of good recipe ideas and so I decided to try an idea that she posted. I have made grilled veggies before but never with balsamic vinegar. I have recently been using and liking balsamic on fruit and so when I saw Lynn's idea for grilled veggies using it I knew I had to try it. 

Grilled Vegetables with Balsamic Vinegar
Original recipe: Lynn's Kitchen Adventures Adapted by: Heather G. @ Golden Reflections


1 zucchini
1 head of broccoli
1 yellow pepper, red pepper and/or orange pepper
1 pkg. of portabella mushrooms
salt and pepper to taste
olive oil
balsamic vinegar

Cut all of the vegetables into bite size pieces and place on tin foil. Sprinkle with salt and pepper to taste. Drizzle with olive oil and balsamic vinegar, enough to coat each piece of vegetable. Mix together and let it marinade for 1 hour. Place on a grill until vegetables are cooked through.

You can also use any other vegetables of your choice like onions or yellow squash. This is a great side dish when grilling out with the family and a great way to get your vegetables! Enjoy!

PRINTABLE VERSION

Be sure to link up your recipes below! Please link back to Recipe of the Week blog hop in your post or grab the blog hop button on the right side of this blog! Looking forward to seeing everyone's recipes this week!

This post is linked to the following blog hops: Tuesdays at the Table, Tempt My Tummy Tuesday, Tasty Tuesdays, Made From Scratch Tuesday,

Monday, June 13, 2011

Recipe of the Week - Mexican Pizza

This week I am sharing a recipe I tried from a fellow blogger, Kristi over at Veggie Converter. It is a twist on a home made pizza, making it mexican style! I really enjoyed it! My hubby didn't really care for it though. But he is not a big mexican style food person and he thought it was little spicy because of the salsa I used. Oh well, can't please all the time I suppose! :) I brought the left overs over to my in-laws the next day and my mother in-law really liked it! So that is 2-1. :)

Mexican Pizza 

All of my ingredients ready to go! This is vegetarian, but if you eat meat you could use beef instead of the Vegetarian griller crumbles. I am also using my Pampered Chef Large Stoneware Bar Pan. I love using the stoneware, especially for pizza. Once you oil the surface a few times before using it, it becomes naturally stick free. It also makes the crust nice and crispy by evening distributing the heat. 

I used a pre-made pizza dough, but you could definitely make a home made crust. I didn't put any oil on my stoneware since I have used it a few times and so it is naturally stick free already. 

I baked it in the oven per the directions on the pizza dough container. I believe it was 400 for about 15 minutes. While it was in the oven, I chopped my green onions. 

I used my trusty 5" Utility Knife  and the Flexible Cutting Mats. The Pampered Chef cutting mats are a lot sturdier than ones I have found in the store but are still flexible enough to transfer items and pour them into your pots or pans. 

I also starting browning the veggie griller crumbles. I am using my 10" TPC Saute Pan and a Bamboo Spatula. The saute pan is nonstick, you don't have to even put oil or butter in it! The bamboo is great because it doesn't stain or take on the flavors of whatever you are using it in! 

The original recipe didn't call for this, but I decided to add some taco seasoning to the griller crumbles. 
I used my 2 cup prep bowl, which also comes with a lid so you can store small amount of items if you need to. I also used our stainless whisk to make sure it was nice and smooth. 

After the crust come out of the oven I started layering! 


I used  a generic brand of white corn and black bean salsa as the "tomato sauce." 

Then I added the griller crumbles and green onion. You could also add olives or any other type of mexican style veggies that you want. 

And of course, cheese on the top! I used a Mexican style 3-cheese blend. 

Bake it at 400 for another 15 minutes. 

And the results..... 

Yum!! Doesn't that look delicious?! I used TPC's Pizza Cutter to cut it up! 

Mexican Style Pizza 

1 pizza crust (either home-made or store bought) 
1 cup salsa 
1 cup of ground beef or griller crumbles (I use Morningstar, found in the breakfast freezer section). 
1 pkg. of taco seasoning (not in original recipe) 
2 cups of Mexican cheese 
1 bunch of green onions (not in original recipe)
Optional: Black Bean Salsa, refried beans, black olives. 

Partially bake your crust. Since I used a store bought crust I baked it at 400 for 15 minutes. Top with a layer of salsa, ground beef or griller crumbles, green onions and/or black olives, and cheese. Bake at 400 degrees for 15 minutes. 


Also, if you are interested in any of The Pampered Chef products that I mentioned, send me an e-mail and let me know! 

Be sure to link up your recipes below! Please link back to Recipe of the Week in your post to spread the word about this recipe blog hop! You can also grab the button on the right side of my blog to add to your blog list if you like! 


Monday, June 6, 2011

Recipe of the Week Blog Hop - The Mighty Mac Patties + Gravy

Today I am going to share a recipe that my mom made a lot while I was growing up. I grew up vegetarian and mostly vegan, and this recipe is completely that. I am also using this recipe to show case some of the items I sell through The Pampered Chef. I started being an independent consultant last fall. I love all of their products. They make cooking enjoyable and fast! If you would like to know more and possibly purchase one or more of our wonderful products, please send me an e-mail.

Now on to the recipe for this week!

The Mighty Mac Patties 

All my ingredients out and ready to go: walnuts, onion, oats, chick peas, soy sauce, salt, and broth packets. 

First drain the chick peas and then measure 1 cup worth. 1 can is just a little over 1 cup worth, so I went ahead and added the whole can. I used The Pampered Chef medium size mesh colander and the 2 cup Easy Ready Measuring Cups. I love the measuring cups because it shows the measurements on the inside of the container so you don't have to guess and look at the sides to see how much you are adding (as you can see by the picture above). 


Add the chick peas and 1 1/2 cup of water to a blender and blend until smooth. Add to a bowl and set aside. 

Add 2 cups of rolled oats to the chick pea mixture. You can see my trusty Small Mix and Scraper. It acts like a spoon and spatula all in one. I love it! 


Next, I used my 5" Utility Knife to quarter a medium onion and then used my food chopper to mince the onion! The food chopper comes completely apart when you are done and is dishwasher safe! With only 5-10 quick pushes on the top, the onions and walnuts were minced nicely! Only a food chopper can get items chopped that thinly and nice!! I love it! I am also using The Pampered Chef Cutting Board


Next I added about 1/4 cup of oat flour since it was little too moist. Then I added the salt, The Pampered Chef Italian Seasoning mix and soy sauce. I used my Adjustable Measuring spoons. I absolutely love these! The small size goes from 1/8 tsp to 1 tsp and the large goes from 1 tsp. to 1 Tb. size. They take up less space in your storage area which makes to a neater and cleaner drawer! 

I used a scoop to put 6 balls of the patties into a greased glass dish. Then I just flattened the tops of the burgers with the bottom of the scoop. This recipe will make 9 large patties. I put them in a 400 degree oven and cooked for 15 minutes before adding the gravy so that the tops get crispy. I also flipped them after 15 minutes before adding the broth. 
Next I made the broth using George Washington Rich Brown Seasoning and Broth. You can find this at specialty stores or any health food store. Or you can use any broth gravy mixture you like. 
I used the Measure-All cup to measure 12 oz. of water for 2 packets of broth/seasoning. I also added 2 tsp. of corn starch to make the broth a little thicker while it baked. 
I used the Mini Whisk to mix everything together so it was nice and smooth. 

After the patties baked for 15 minutes, I added the broth and cooked them for another 1/2 hour at 400 degrees. 

And the result.... 


These were definitely delicious! I served them with grilled veggies, a recipe I will share next week! :) 

To make recipes even easier for you to get off my site, I am now offering a free printable of this recipe. Just click here to get it! 

The Might Mac 
Recipe from: Hartland Heartsavers Adapted by Heather G. @ Golden Reflections 
1 cup chick peas (either soaked garbanzo beans or 1 can of chick peas). 
1 1/2 cups water 
2 cups rolled oats 
1/4 cup walnuts, chopped 
1 medium onion, minced 
1 tsp. salt 
1 tsp Italian Seasoning (original recipe calls for sage). 
2 Tb. soy sauce 

Whiz first two ingredients in blender. Remove and add to a bowl. Add remaining ingredients and mix with a spoon. Drop from 1/3 cup measurer to form patties on a greased cookie sheet. Bake at 400 degrees for 25-30 minutes. You can serve as a burger as use as a casserole with gravy. 

If making a casserole, place all patties into a greased glass dish. Bake at 400 for 15 minutes. Then add gravy recipe below and bake for another 30 minutes. 

Gravy Option 

2 packets of George Washington Brown Broth/Seasoning 
12 oz. of water 
2 tsp. corn starch 

Wisk all ingredients together. 


Be sure to link your recipe below! Please link back to Recipe of the Week or grab my blog hop button on the right side of the page!


Tuesday, May 31, 2011

Recipe of the Week Blog Hop - Breakfast Smoothie

I have been wanting to try "green smoothies" since I started hearing about them. My friend Sarah over at Sarah's Heart's Home posted one of her blog and so I decided it was time to try it! If you want to see her recipe, you can visit her blog here.

So here is my rendition of a "green" breakfast smoothie.

Breakfast Smoothie
1 banana
3/4 to 1 cup of mixed berries (I used thawed strawberries, blueberries, raspberries and black berries).
1 cup of spinach
1/2 cup of apple juice 

Add banana and berries into a blender and begin to blend. Add spinach while blending and then add apple juice. Blend until smooth.


It didn't really turn out green since it had the berries in it, but it still has the same nutrition! I can't taste the spinach at all. Tastes very delish and healthy for breakfast! I ever got my husband to try it! He doesn't know what is in it yet though, haha! :)

Now it's your turn to share those yummy recipes you have! Link up below! Be sure to grab the button or link back to this blog hop! The blog hop closes Friday at 11:59pm.

Need recipe ideas? Check out my recipe section on this blog to see all previous recipes that I have shared.


Tuesday, May 24, 2011

Recipe of the Week Blog Hop - BBQ Baked Beans

This is a recipe that my mother in-law makes and now me! I have made it for grill outs, church pot-lucks and bon fire parties. Always a good hit. And it's super super easy!

BBQ Baked Beans 

Ingredients
2 cans of Busch's Baked Bean or any other brand you like

BBQ Sauce Ingredients


1 cup Ketchup
2 T. Worceshire Sauce
3 T. brown sugar
½ t. Cinnamon
1/8 t. red pepper
¼ t. nutmeg
¼ t. cloves
¼ t. ginger
½ t. garlic salt
Chopped Onion (optional). 

Directions


Pre-heat oven to 350 degrees. Add baked beans into 9x12 glass baking dish. Add all BBQ sauce ingredients and mix together. Bake for 30-45 minutes.


Please link up your recipes below! Don't forget to link back and grab the blog hop button!


Tuesday, May 17, 2011

Recipe of the Week Blog Hop - Strawberry Amaretto Pastries

This is a recipe that I make during Pampered Chef parties. It is extremely easy and tastes great!!

Strawberry Amaretto Pastries 

1/2 pkg (17.3 oz) frozen puff pastry sheets
(1 sheet), thawed
1/2 cup sliced almonds, divided
1 tbsp granulated sugar
1 container (8 oz) sour cream
1/2 cup powdered sugar
1/4 tsp almond extract
1 1/2 cups thawed frozen whipped topping
12 large strawberries, sliced
1 orange

 1. Preheat oven to 400°F. Unfold pastry dough onto large cookie sheet or baking stone . Finely chop half of the almonds using a food chopper. Combine chopped almonds and granulated sugar in a bowl; sprinkle evenly over surface of dough. Lightly press almond mixture into dough.

2. Using a pizza cutter , cut dough lengthwise into three strips; cut strips crosswise into four squares for a total of 12 squares. Using a spatula , separate squares evenly over surface of bar pan. Bake 16-18 minutes or until puffed and golden brown. Remove from bar pan to cooling rack ; cool completely.

3. Meanwhile, place remaining almonds in sauté pan . Cook over medium-high heat 2-3 minutes or until lightly toasted, stirring occasionally; remove from heat and cool completely. Coarsely chop using food chopper and set aside.

4. Whisk sour cream, powdered sugar and almond extract in a bowl using. Fold in
whipped topping. Slice strawberries. Split open each pastry square; arrange half of the strawberries into bottom of each shell. Top each with about 2 heaping tablespoons of the filling and sprinkle with chopped almonds. Top with remaining sliced strawberries. Zest orange over strawberries. Place tops of pastry shells over filling. Serve immediately.


Now it's your turn to share a recipe! Please be sure to link back to Recipe of the Week and get the word out about this recipe blog hop! The linky will be open until Friday evening at 11:59pm! 

Tuesday, May 10, 2011

Recipe of the Week Blog Hop - Pasta Salad

This week I am sharing an original Heather creation recipe! It's the easiest pasta salad in the world to make, extremely healthy for you and tastes great! 

Heather's Easy Pasta Salad 

1 yellow bell pepper
1 cucumber 
2 medium size carrots 
1 pkg. sun dried tomatoes
1 lb. rainbow color pasta 
1 container of Italian Dressing 

First bring a pot of salted water to boil and cook the noodles as directed on the box. While the noodles cook, cut up your vegetables. I used my handy dandy Pampered Chef julienne peeler for the carrots. 


Photo Credit: The Pampered Chef

Place all the vegetables in a bowl. 

Drain the noodles and let them cool slightly. Add the noodles and Italian Dressing to your vegetable mixture. Chill and serve!


Be sure to link back when you submit your recipe below! The link up will be open until Friday night at 11:59pm. Please spread the word so we can get more entries going! 


Wednesday, May 4, 2011

Recipe of the Week Blog Hop

Just wanted to let you all know that my Recipe of the Week blog hop will be returning next week. I am on a cleaning spree this week, so I have not had a chance to try any new recipes or time to post much this week. Looking forward to seeing you all back here next Tuesday for the blog hop!

Thanks for understanding!


Wednesday, April 13, 2011

Recipe of the Week Blog Hop - Mini Carrot Cake Cups

It's time to share your recipes for the week! Sorry this is a day late. I have been super busy and barely home all week so far, so I had no time to type this up yesterday. Be sure to grab the button on the right and link to the linky with your recipe post!
Today I am sharing a really yummy Pampered Chef recipe that I actually made for a party this past weekend. It is a dessert and is super easy to make and very delicious!

Mini Carrot Cakes Cups
1 pkg of yellow cake mix
1 and 1/2 tsp. allspice
1 egg
2 TBS vegetable oil
2 medium size carrots
Filling & Garnish 
1 pkg of cream cheese
3/4 cup powdered sugar
1/2 cup thawed whipping cream
chopped walnuts (optional)

Directions
Preheat oven to 350ºF (180ºC). Spray each well Mini-Muffin Pan with nonstick cooking spray. For cups, combine cake mix, allspice, egg and oil in bowl; stir until ingredients are moistened. (Mixture will be very thick.) Grate carrot. Stir 3/4 cup of the carrots into batter; set aside remaining carrots for garnish. Divide batter evenly among wells, filling wells about two-thirds full; bake 11-13 minutes or until cups feel firm to the touch. 

Meanwhile, whisk together cream cheese and sugar until smooth; fold in whipped topping. Spoon cream cheese mixture into resealable plastic bag; secure bag and set aside.

Remove pan from oven to cool. Press tops of cups with lightly floured Mini-Tart Shaper to make slight indentations. Cool in pan 3 minutes. Carefully remove cups from pan; cool 5 minutes. Trim corner of cream cheese-filled bag; pipe filling evenly into cups. Garnish cups with chopped walnuts and reserved grated carrots, if desired. 


Happy Cooking!


Post is linked to: Tuesday at the Table


Monday, April 4, 2011

Recipe of the Week Blog Hop - Zesty Skillet Ravioli


It's time for my weekly recipe blog hop! The blog hop will be open from Tuesday to Friday night. Share your recipes in the link up below and be sure to include a link back to the blog hop! Thanks to everyone who linked up last week! Please get the word out so that more people will link up! You can tweet about it using the tweet button at the bottom of the post too! 

This week I am sharing a recipe that I tried this past Friday in my menu planning. It is from The Pampered Chef and since I am a Pampered Chef consultant, I am a little partial! :) They have a vegetarian cookbook called Quick Vegetarian Main Dishes. This dish was so easy to make and was very very good! Enjoy! 

Zesty Ravioli Skillet 
4 cups loosely packed fresh baby spinach (I left this out since hubby does not like spinach)
6 oz. provolone cheese, grated 
1 TBS olive oil 
1 small jalapeno pepper, seeded (I just used half of one, since again hubby does not like spicy foods)
3 garlic cloves, pressed 
2 cans of diced tomatoes with onions, undrained 
1/2 tsp. salt 
1/2 tsp. coarsely ground black pepper 
1 pkg. small frozen cheese ravioli 
1/3 cup heavy whipping cream (you can also use half and half)

Directions
1. Wash spinach and drain. Grate cheese and set aside. 
2. Add oil to skillet and heat over medium-high heat, 1-3 minutes or until shimmering. Finely chop jalapeno (I used my food chopper). Add jalapeno to skillet; cook and stir 1 minute or until crisp-tender. Press garlic into skillet with a garlic press. Cook and stir 15-20 seconds or until fragrant. 
3. Add tomatoes, salt, and black pepper to skillet. Cook and stir 1-2 minutes or until simmering. Add ravioli; stir to coat. Cook, uncovered 4-5 minutes or until tender. Stir cream into skillet. Cook, uncovered 1-2 minutes or until simmering. Sprinkle spinach over ravioli; cook covered 1 minute or until spinach starts to wilt. 
4. Remove skillet from heat. Top with cheese; cover skillet and let stand 1-2 minutes or until cheese is melted. 

I also added some fresh basil to the top since I didn't have spinach in mine. 

Photo Credit: The Pampered Chef


Monday, March 28, 2011

Recipe of the Week Blog Hop - Black Bean Gluten Steaks

This week I am sharing a recipe that I tried last week in my menu planning. I would change a couple things next time I try them, but overall they were good! 

Black Bean Gluten Steaks 
Recipe Source: Cooking Entrees with the Micheff Sisters - A Vegan Vegetarian Cookbook 

2 cups cooked black beans 
1 medium onion, chopped 
1/2 cup quick oats 
1/2 cup nutritional yeast flakes 
1 tsp. garlic powder 
1 tsp. onion powder 
1 tsp. McKay's Vegan Beef Style Seasoning 
1 tsp. salt 
1 1/2 cups cold water
1/4 cup olive oil 
1/2 cup whole-wheat flour 
2 cups gluten flour 

Optional Broth: 
1 1/2 cups diced tomatoes 
1 medium onion, diced 
3/4 cup Bragg Liquid Aminos or soy sauce 
2 tablespoons McKay's Vegan Beef Style Seasoning 
12 cups water 

Directions: 
Place the black beans, chopped onions, oats, nutritional yeast flakes, seasonings, cold water, and olive oil in a blender. Blend until smooth. Pour into a large bowl or heavy duty mixer. Add the whole-wheat flour and gluten flour. Knead by hand or in the mixer until soft and smooth in texture. Form mixture into a long roll about 2 1/2 inches in diameter. Slice into 1/2 inch thick pieces. Pat gluten pieces into circles and drop into a large kettle or crock pot with boiling broth. Boil gently for 30 to 35 minutes. Reduce heat and continue cooking for 45 to 50 minutes. Let cool. Place in containers with a little of the broth and store in the refrigerator or freezer until ready to use. 


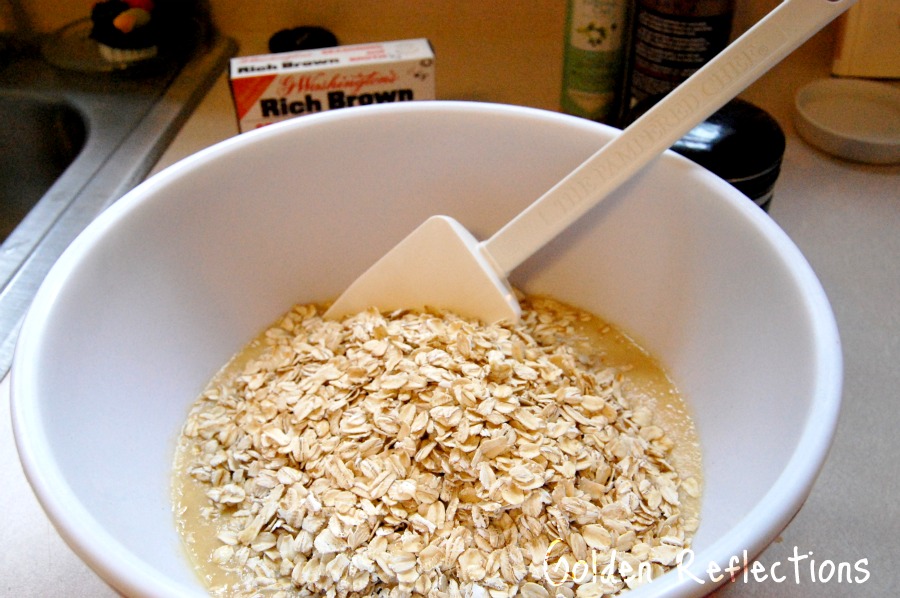
Place the black beans, chopped onion, oats, nutritional yeast flakes, seasonings, cold water, and olive oil in a blender. Blend until smooth. 

The picture on the left is what the nutritional yeast flakes look like. I can usually find them at a health food store or world market. 

Here is the gluten flour all ready to go. 

Add whole wheat flour and gluten flour to the black bean mixture in a bowl. Kneed by hand or in a mixer until soft and smooth. 


Form mixture into a long roll about 2 1/2 inches in diameter. Slice into 1/2 inch thick pieces. 


The recipe says you can boil them in a broth, which I did not do. I decided to brown them on the stove and then bake them. I rolled them in some plain bread crumbs before placing them in the frying pan. 

By this time, the dogs decided that the kitchen smelled pretty good and wanted to get into the action. Cooking in a small kitchen with two large dogs in the middle of the room can make things a lot more interesting, haha. This is Caspian (my blog mascot) and Cody. Our 3rd dog, Denali was being good in the living room.


Here is the finished product. I baked them at 350 for about 30 minutes. They were a little tough, so next time I would probably bake at 325 for around 15 to 20 minutes. I made some gravy and served them with lima beans.


It's time to do some recipe blog hopping! Please link up your recipes below! The linky will be open until Friday night. Be sure to grab the button and add it to your recipe. Please only link up posts that are recipes. 


This post is also linked to: Tuesdays at the Table, Tasty Tuesday, Tasty Tuesday at 33 Shades of Green, Tempt my Tummy Tuesday, and Made from Scratch Tuesday, The Handmade Hog.